


18
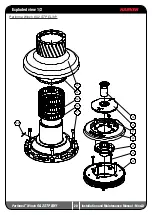
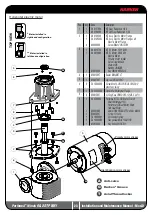
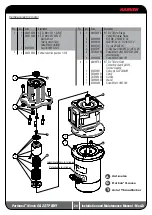
Performa
™
Winch
60.2 STP E/HY
Installation and Maintenance Manual - Mod.D
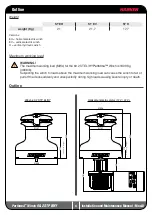
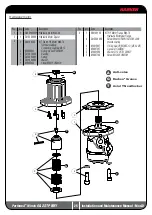
Winch assembly
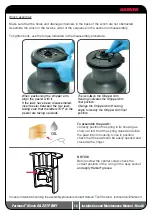
Make sure that the holes and drainage channels in the base of the winch are not obstructed
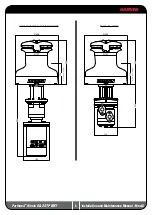
Assemble the winch in the reverse order of the sequence in the section on disassembly.
To tighten bolts, use the torque indicated in the disassembly procedure.
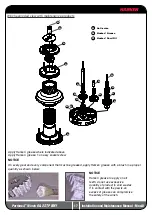
To assemble the pawls:
correctly position the spring in its housing as
shown at left. Hold the spring closed and slide
the pawl into its housing. Once in position,
check that the pawls can be easily opened and
closed with a finger.
NOTICE
Before screw the central screw, check the
correct position of the o-ring in the assy socket
and apply Harken
®
grease
.
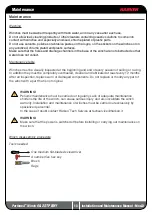
In case of doubt concerning the assembly procedure contact Harken
®
Tech Service: [email protected]
OIL
When positioning the stripper arm,
align the peeler with it.
If the jaws have been disassembled,
insert peeler between the two jaws,
taking care that the letters TOP on the
peeler are facing upwards.
The icon on the Stripper Arm
Housing indicates the Stripper Arm
final position.
Change the Stripper Arm Housing
angle to modify the Stripper Arm final
position.


