background image

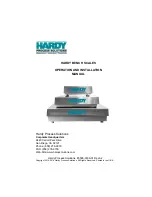
HI 1769-WS & HI 1769-2WS

WEIGH SCALE MODULE 

OPERATION AND INSTALLATION

MANUAL

Corporate Headquarters


9440 Carroll Park Drive         
San Diego, CA 92121


Phone: (858) 278-2900
FAX: (858) 278-6700
Web-Site: http://www.hardysolutions.com

Hardy Process Solutions Document Number: 0596-0282-01 Rev T

Copyright 2011-2013 Hardy Process Solutions, All Rights Reserved. Printed in the U.S.A. (941028)

Содержание HI 1769-WS

Страница 1: ...te Headquarters 9440 Carroll Park Drive San Diego CA 92121 Phone 858 278 2900 FAX 858 278 6700 Web Site http www hardysolutions com Hardy Process Solutions Document Number 0596 0282 01 Rev T Copyright...

Страница 2: ...audits and performance measurement Emergency troubleshooting and repair To request Emergency Service and Troubleshooting Start up Installation Calibration Verification or to discuss a Maintenance Agr...

Страница 3: ...al 1 4 Rate of Change 1 4 Return to Zero Test Optional 1 4 Weighing System Tests Optional 1 4 Auto Zero Tracking 1 5 CHAPTER 2 SPECIFICATIONS 2 1 A Brief Description of Chapter 2 2 1 Specifications fo...

Страница 4: ...STALLATION 3 1 A Brief Description of Chapter 3 3 1 Unpacking 3 1 Installing the HI 1769 WS or HI 1769 2WS to an Allen Bradley Compact or Micro Logix 1500 Processor 3 2 Installing the HI 1769 WS or HI...

Страница 5: ...ic Parameter 4 24 Setting the Motion Tolerance Value 4 24 Setting The Zero Tolerance Value 4 25 Setting the Auto Zero Tolerance Value 4 25 Setting the Number of Readings Averages 4 25 Setting the Span...

Страница 6: ...HI 1769 WS HI 1769 2WS WEIGH SCALE MODULE iv Electrical 6 6 Mechanical Stability and Configuration Settings 6 7 INDEX...

Страница 7: ...SED POSITION3 9 INDUSTRY STANDARD LOAD CELLS WIRING DIAGRAM3 10 HARDY LOAD SENSOR C2 WIRING DIAGRAM3 11 REMOTE TERMINAL ASSEMBLY3 12 RTA DIN RAIL MOUNT3 12 RTA CABLE ASSEMBLY HI 1769 WS3 13 RTA CABLE...

Страница 8: ...IES DIALOG BOX CONFIGURATION SIZE 48 WORD S4 9 CONTROLLER TAGS SLOT 14 15 CHAPTER 5 CALIBRATION5 1 PROPERLY INSTALLED LOAD CELL W NO BINDING5 2 MILLIVOLTS WEIGHT SCALE5 4 CHAPTER 6 TROUBLESHOOTING6 1...

Страница 9: ...ble bus connector To get the maximum service life from this product users should operate this module in accordance with recommended practices either implied or expressed in this manual Before using th...

Страница 10: ...and optional equipment and the Remote Termi nation Assembly RTA Chapter 4 Provides complete hardware Con figuration instructions for setting dip switches and jumpers Chapter 5 Provides all Calibratio...

Страница 11: ...769 WS HI 1769 2WS is fitted with WAVERSAVER technology which eliminates the effects of vibratory forces present in all industrial weight control and measurement applications By eliminating the factor...

Страница 12: ...load cells on the system Rate of Change The ROC option measures and displays the rate at which a material enters or is dispensed from the scale over a period of time ROC data uses a 100 entry reg ist...

Страница 13: ...sensor to see if the load sensor might be causing the problem The ability to read the weight seen by each individual load sensor allows use of this test to make cornering leveling and load sharing ad...

Страница 14: ...HI 1769 WS HI 1769 2WS WEIGH SCALE MODULE 1 6...

Страница 15: ...of this instrument Specifications for a Standard HI 1769 WS Weigh Scale Module Maximum Installed Modules 8 modules per power supply in a single bank Mod ule s must be installed within 4 slots on eith...

Страница 16: ...sensors with IT Junction box Load Cell Excitation 5 VDC C2 Calibration Output Isolation from digital section 1000 VDC minimum Environmental Requirements Temperature Coefficient Less than 0 005 of ful...

Страница 17: ...channel module to the RTA Hardy Part D8 HI 1769 XX DC6 Cable Length 6 Ft 1 525 meters from 2 single or one dual module to the RTA HI 215IT Series Junction Box NEMA rated waterproof enclosure which su...

Страница 18: ...ies Up to 500 MHz Cable Types Multi strand Single Conductor Physical Dimensions Width 705 inches 17 9 mm Height 724 inches 18 39 mm Length 1 272 inches 32 3 mm ZeroTrackEnable False 0 ZeroTolerance 10...

Страница 19: ...or assistance Unpacking Step 1 Before signing the packing slip inspect the packing for damage of any kind Step 2 Report any damage to the carrier company immediately Step 3 Check to see that everythin...

Страница 20: ...electrostatic discharged prior to handling the module Handle the module from the bezel in front away from the connector Never NEVER touch the connector pins Wiring must be in accordance with Class I D...

Страница 21: ...Chapter 3 Installation 3 3 FIG 3 1 POSITIONING THE MODULE FOR INSTALLATION Step 2 Pull Lever B back to the unlock position FIG 3 2 CONNECTOR UNLOCK POSITION Lever A Lever B Module A Module B...

Страница 22: ...dule A See Fig 3 3 FIG 3 3 CONNECTOR IN LOCKED POSITION Step 5 The installation is comple Installing the Module I O Connector About the Module I O Connector The I O Connector at the front of the modul...

Страница 23: ...crews that fasten the connector to the module See Fig 3 5 Step 3 Gently pull the connector off of the board in the module Single Channel Pin 1 Shield1 Pin 3 C2 1 Pin 5 C2 1 Pin 7 Exc 1 Pin 9 Sen 1 Pin...

Страница 24: ...HI 1769 WS HI 1769 2WS WEIGH SCALE MODULE 3 6 Step 4 To install the connector reverse steps 2 3 FIG 3 4 MODULE CONNECTOR INSTALLED...

Страница 25: ...wires are securely connected before operating the module NOTE Most of the problems with modules are due to loose connections Be sure to check the I O connection first in the event you have a problem r...

Страница 26: ...ule on the DIN rail Step 3 While holding the module in place press the two rail fasteners towards the center of the module until they both snap into place See Fig 3 7 Step 4 The module is now securely...

Страница 27: ...Chapter 3 Installation 3 9 FIG 3 7 RAIL FASTENERS IN THE CLOSED POSITION...

Страница 28: ...HI 1769 WS HI 1769 2WS WEIGH SCALE MODULE 3 10 Load Cell Wiring Diagrams Industry Standard Load Cells FIG 3 8 INDUSTRY STANDARD LOAD CELLS WIRING DIAGRAM...

Страница 29: ...VANTAGE OR ADVANTAGE LITE LOAD SENSOR CABLE BECAUSE YOUR C2 ACCURACY WILL BE AFFECTED AND THE WARRANTY VOIDED HI 1769 Remote Terminal Assembly HI 1769 XX RT Provides connection points between the cabl...

Страница 30: ...1769 2WS WEIGH SCALE MODULE 3 12 FIG 3 10 REMOTE TERMINAL ASSEMBLY FIG 3 11 RTA DIN RAIL MOUNT RTA Cable Assembly Six 6 foot cable and schematic that connects to the HI 1769 WS module See Figs 3 12 3...

Страница 31: ...pter 3 Installation 3 13 FIG 3 12 RTA CABLE ASSEMBLY HI 1769 WS FIG 3 13 RTA CABLE SCHEMATIC HI 1769 WS Six 6 foot cable that connects to the HI 1769 2WS See Figs 3 14 3 15 FIG 3 14 RTA CABLE HI 1769...

Страница 32: ...res for the dual channel model Step 1 There should be enough of the individual strands of wire exposed to install the sup pression core If there is not enough room remove enough of the cable cover unt...

Страница 33: ...ESSION CORE Step 4 Open the core until it is wide enough to enclose all the strands of wire See Fig 3 17 FIG 3 17 SUPPRESSION CORE OPEN Step 5 Place all the wire strands in the core and gently close t...

Страница 34: ...Hardy HI 215IT Junction Box FIG 3 19 HARDY HI 215IT JUNCTION BOX WIRING DIAGRAM NOTE When connecting the Hardy HI 215IT Junction Box you must remove the two factory installed jumpers 17 15 and 7 9 on...

Страница 35: ...he user and service personnel be familiar with the procedures contained in this chapter before going through the setup procedures The Setup procedures require Allen Bradley s RS Logix 5000 CompactLogi...

Страница 36: ...nning Normal Slow Flashing Green Error No Calibration Steady Red Error ERRORADFAILURE hardware induced status bit is set Flashing Red Read AD Convert Error LED is Off Channel is not Enabled OK Module...

Страница 37: ...or REV A the setting is 0 For all other REVs the set ting is 48 To set up communication between the MicroLogix 1500 Processor and the Weigh Scale Module you will need to do the following in RSLogix 50...

Страница 38: ...the I O information and enters them into the con figuration text fields See Fig 4 4 FIG 4 4 READ I O CONFIGURATION FROM ONLINE PROCESSOR DIALOG BOX Step 5 The HI 1769 WS I O is configured and ready to...

Страница 39: ...gix 500 for MicroLogix 1500 To set up communication between the MicroLogix 1500 Processor and the Weigh Scale Module you will need to do the following in RSLogix 500 Step 1 Under Project click on the...

Страница 40: ...tep 3 From the I O Configuration dialog box under the column heading click on 1 or the next open slot number available See Fig 4 8 Step 4 In the Current Cards Available double click on Other Requires...

Страница 41: ...REV A or 48 for later Firmware REVs Step 6 Click on the Apply button Step 7 OTHER appears under the Part col umn heading See Fig 4 8 FIG 4 8 I O CONFIGURATION DIALOG BOX Step 8 The HI 1769 WS I O is...

Страница 42: ...4 8 FIG 4 9 SELECTING COMPACTBUS LOCAL Step 2 Right click on CompactBus Local A dia log box appears Step 3 Click on New Module The Select Module Type dialog box appears See Fig 4 10 FIG 4 10 SELECT M...

Страница 43: ...on the 1769 Generic Module Step 6 Click on the OK button The Module Prop erties dialog box appears See Figs 4 11 12 FIG 4 11 MODULE PROPERTIES DIALOG BOX CONFIGURATION SIZE 0 WORDS FIG 4 12 MODULE PRO...

Страница 44: ...down arrows to select 32 words Step 14 Under Connection Parameters Configura tion use the up or down arrows to select For Firmware REV A 0 words For other Firmware REVs 48 words Step 15 Click on the...

Страница 45: ...bit integer set to 1 if the channel is active 0 if not active 1 Metric 16 bit integer which determines the format of weight values Metric is the sum of 3 fields 1 If bit 7 is set 0x80 weight is displa...

Страница 46: ...meter 10 0 lbs ZeroTolerance 32 bit weight value format determined by value of Metric Parameter 10 0 lbs Motion Tolerance 32 bit weight value format determined by value of Metric Parameter 5 lbs tarew...

Страница 47: ...Parameters labeled REAL or DINT will be inter preted as floating point or integer according to the value of the METRIC parameter of the channel If bit 6 0x40 of METRIC is set the parameter is float in...

Страница 48: ...2 22 INT Ch0Spare3 23 INT Ch1CopyConfig 24 INT Ch1ChanActive 25 INT Ch1Metric 26 INT Ch1Waversaver 27 INT Ch1NumAverages 28 INT Ch1ZeroTrackEnable 29 INT Ch1AutoZeroTolerance 30 REAL or INT Ch1MotionT...

Страница 49: ...ved for Channel 0 The second 16 words are reserved for Channel 1 The first word in the 16 words of a channel s output table is called the COMMAND word See the COMMAND table for a list of commands The...

Страница 50: ...eeds other data with it the other words in the output table should be filled in first then the command number Example WRITEPARAM0 should have PARAMETER0 Data placed into the output table before the co...

Страница 51: ...eter I 9 Calibration Type Hard Calibration 0 C2 Calibration 1 No Calibration 0xFFFF I 10 ADC Counts LSW I 11 ADC Counts MSW I 12 ROC units min I 13 ROC units min I 14 Serial Number I 15 ADC Conversion...

Страница 52: ...ting RELOADNONVOLATILE 0X10 Reread the non volatile memory O 0 0x10 O 1 O 15 unused I 0 0x10 I 1 0 I 2 I 15 See NOCMD continuously updating CALLOWCMD 0x64 Do the low step of a Hard Calibration Results...

Страница 53: ...ive O 3 Metric O 4 WAVERSAVER O 5 NumAverages O 6 ZeroTrackEnable O 7 ROCtimebase 1 1800 sec O 8 AutoZeroTolerance LSW O 9 AutoZeroTolerance MSW O 10 MotionTolerance LSW O 11 Motion Tolerance MSW O 12...

Страница 54: ...ock contains some non user settable calibration parameters zerocount A D counts at the last ZEROCMD calzerocount A D counts at zero weight as obtained at the last calibration CalLowCount A D counts at...

Страница 55: ...to switch in O onboard reference signal 1 4 load cell signals on IT JBOX 5 reference signal from IT JBOX I 0 0x6B I 1 COMMAND STATUS NOTE The COMMAND STATUS INDEXOUTOFRANGE 4 is returned if a signal...

Страница 56: ...decimal places Load Cell resistance has zero decimal places Sense Volts has 2 decimal places I 2 millivolts volt combined LSW I 3 millivolts volt combined MSW I 4 millivolts volt load sensor 1 LSW I 5...

Страница 57: ...MSW I 8 gross weight on load sensor 3 LSW I 9 gross weight on load sensor 3 MSW I 10 gross weight on load sensor 4 LSW I 11 gross weight on load sensor 4 MSW I 12 Internal reference weight LSW I 13 In...

Страница 58: ...rance Value The motion tolerance is the tolerance value used to determine if the scale is in motion READC2SERIALNUM 0x70 Read data from a C2 sensor The C2SEARCH command must be performed before this c...

Страница 59: ...rages The Number of Averages sets the number of weight readings which will be used to compute the displayed weight The average is a sliding average so that a new average reading is available for displ...

Страница 60: ...HI 1769 WS HI 1769 2WS WEIGH SCALE MODULE 4 26...

Страница 61: ...nnel be familiar with the procedures con tained in this chapter before installing or operating the Weigh Module NOTE Do not perform a calibration while the application is in operation Pre Calibration...

Страница 62: ...draped across the scale vessel or the load cell such as a hose electrical cord tubes or other objects c Check to see that nothing is coming in contact with the scale vessel other than service wires a...

Страница 63: ...of the system which includes the weight of the vessel and the weight of the product as measured by the load cell point d If the load cell point weight capacity is rated at 1000 pounds the load cell p...

Страница 64: ...te 0 mVDC or absolute 0 weight NOTE Load cell point measurements are checked with a dig ital volt meter at the J1 connector on the front of the module or by using INTEGRATED TECHNICIAN with the HI 215...

Страница 65: ...res C2 load sensors If you do not have C2 load sensors you must perform a traditional calibration with test weights which we call a Hard Calibration The Weigh Module reads the perfor mance characteris...

Страница 66: ...a ladder logic model only Your application may vary and the example may or may not meet your requirements Step 3 The Hard Calibration Ladder Logic Exam ple is located at the Hardy Web Site If you have...

Страница 67: ...leshooting and resolution of operating problems that may occur All maintenance personnel and users should be familiar with Chapter 6 before attempting to repair the HI 1769 WS Scale LED is Flashing Re...

Страница 68: ...es should be avoided 3 Do not use flexures to correct for misaligned piping 4 Do not use hose flexures to make right angle bends 5 Non flexed piping should have an unsupported horizontal run using a r...

Страница 69: ...E On balancing load cells the overall objective is to insure each load cell sees a positive millivolt reading When weight is evenly applied all load cells signals should increase the same amount NOTE...

Страница 70: ...to motors and piping should not exceed 2 mV c If there isn t any motors valves or piping to explain the mV difference adjust the corners and balance the mV readings d Use shims or if equipped adjusti...

Страница 71: ...rating Systems See Figure 6 3 FIG 6 3 GUIDELINES FOR INSTABILITIES ON FORMERLY OPERAT ING SYSTEMS Check for Electrical Stability OK Check for Mechanical Stability OK Check for Mechanical Stability OK...

Страница 72: ...Ground straps must be installed to provide a direct discharge path to ground around the load points B1 4 Cable Routing Separate high voltage sources and cables from low voltage signal cables Stay a mi...

Страница 73: ...lty load cells Piping and motors will effect effect the individual load cell readings Allow for a higher reading on load cells that support motors and piping Insure pneumatic lines are not applying pr...

Страница 74: ...HI 1769 WS HI 1769 2WS MANUAL 6 8...

Страница 75: ...Description of Chapter 1 1 1 A Brief Description of Chapter 2 2 1 A Brief Description of Chapter 3 3 1 A Brief Description of Chapter 4 4 1 A Brief Description of Chapter 5 5 1 A Brief Description of...

Страница 76: ...3 1 Binding 5 1 C C2 Calibration 5 5 C2 Calibration Input 2 2 C2 Calibration Output 2 2 C2 Calibration Using Ladder Logic 5 5 C2 load sensors 5 5 C2 Calibration 1 3 cable 3 7 cable cover 3 14 Cable l...

Страница 77: ...nput 4 10 Connection Parameters Output 4 10 ControlLogix I O 1 2 Conversion Rate 2 1 Customer Support Department 1 1 D damaged load sensors 1 4 Data INT 4 10 Dead Load 5 3 Default Parameters 2 3 Descr...

Страница 78: ...x 3 16 Hardy Instruments C2 certified load sensors 1 3 Hardy Load Sensor with C2 3 11 HI 1756 Remote Terminal Assembly 3 11 HI 1769 WS Compact and Micro Logix I O Weigh Scale Modules 1 1 HI 1769 XX RT...

Страница 79: ...ing Diagrams 3 10 Load Cell Point Input Output Measurements 5 2 Load Check 5 4 Load Sharing and Load Sensor Checkout 6 3 loose connections 3 7 M Maximum Installed Modules 2 1 Mechanical Inspection 6 1...

Страница 80: ...iew 1 2 P Parameters for the HI 1756 WS 2WS Module 4 15 Possible COMMAND STATUS Values 4 16 Pre Calibration Procedures 5 1 R Read IO Config button 4 4 Read IO Configuration from Online Processor dialo...

Страница 81: ...alue 4 25 Setting The Zero Tolerance Value 4 25 Setting Up Communications Between the MicroLogix 1500 Processor and the HI 1769 WS Weigh Scale Module 4 3 single module 1 2 Specifications 1 2 Specifica...

Страница 82: ...HI 1769 WS HI 1769 2WS MANUAL Weighing System Tests 1 4 wrist strap grounding device 3 2...

Отзывы: