


11. Check for damaged parts. Before using any product, any part that appears damaged should be
carefully checked to determine that it will operate properly and perform its intended function. Check for
alignment and binding of moving parts; any broken parts or mounting fixtures; and any other condition
that may affect proper operation. Any part that is damaged should be properly repaired or replaced.
12. Guard against electric shock. Prevent body contact with grounded surfaces such as pipes, radia-
tors, ranges, and refrigerator enclosures.
13. Do not work if under the influence of alcohol or drugs. Read warning labels on prescriptions to
determine if your judgment or reflexes are impaired while taking drugs. If there is any doubt, do not
work with tools and equipment.
Warning: The warnings, cautions, and instructions discussed in this instruction manual cannot cover
all possible conditions and situations that may occur. It must be understood by the operator that
common sense and caution are factors which cannot be built into this product, but must be supplied
by the operator.
Specific Product Warnings and Precautions
1. The Tidy-Up must be securely attached to a mounting plate (not included), which is securely attached to
2 or more wall studs (not included). Follow all mounting instructions discussed on page 4.
2. For Indoor/Outdoor Use. Avoid placement in areas exposed to direct sunlight.
3. Maximum load on large hooks is 4 lbs. “A” Reference - page 4.
4. Maximum load on small hooks is 1 lbs. “B” Reference - page 4.
5. Maximum load on bonus hooks is 4 lbs.
5. Total weight limit on Tidy-Up is 28 lbs. (evenly distributed).
6. Do not hang axes, crowbars, sledge hammers or any other heavy tools.
7. Load heaviest tools near the wall and lighter tools at the front end.
8. Use common sense when hanging and removing items.
9. Do not attempt to hang too many tools; overloading the organizer can result in tool damage and personal
injury from falling tools.
SKU 02453
Page 3
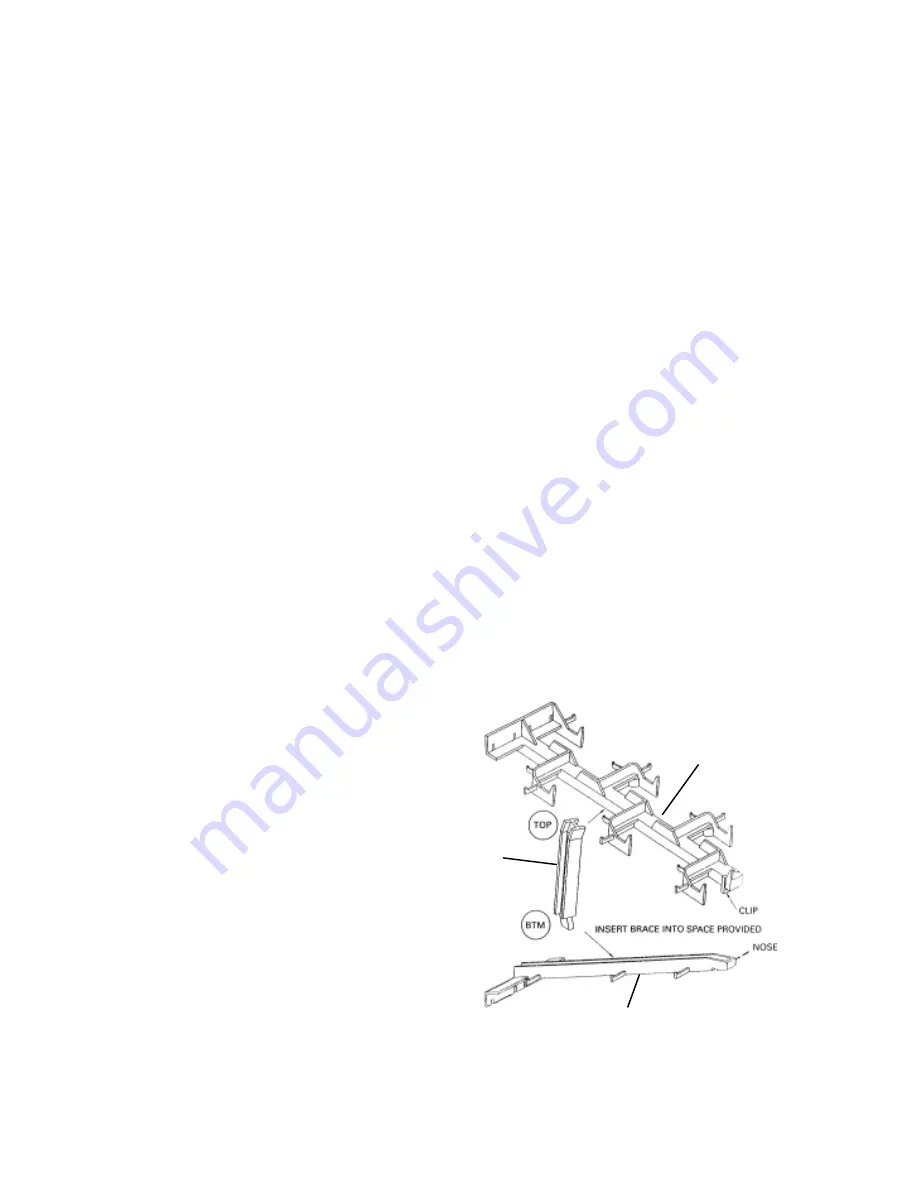
1. Snap Clip onto the top Front Piece as
shown in Figure 1.
2. Insert Middle Brace into top or bottom
section.
3. Insert nose of Bottom Piece into
nose clip.
4. Press top and bottom sections
together to seat middle brace.
Unpacking
When unpacking, check to make sure the following parts are included.
If any parts are missing or broken, please call Harbor Freight Tools at the number on the cover of this
manual.
Assembly Instructions
Figure 1
Bottom
Piece
Middle
Brace
Top Front
Piece
Brought To You By Augusta Flint


