background image

SKU 96167 

for technical questions, please call 1-800-444-3353.

         Page 6

operAtion

For additional information regarding the parts listed in the following pages, refer to 

the 

Assembly diagram


at the end of this manual

.

note:  before first use, wash the bread pan, kneading blade, and measuring cup in 

hot, soapy water, taking care to rinse completely.  dry with a soft cloth.  wipe 
the motor/heating element housing with a soft clean cloth or sponge.  neVer 
immerse motor, HeAting element, cord, or plug in wAter or Any 
otHer liquid.

Place the Bread Maker on a flat, smooth surface near an electrical outlet.

Place the Bread Pan (8) into the Bread Maker and push it down firmly to secure it 
in place.

Fix the Kneading Blade (13) onto the Peg (39) on the bottom of the Bread Pan.  

Mix bread ingredients in a mixing bowl (not included) thoroughly, before adding the 
dough to the Bread Pan.  Close the Cover (51) of the Bread Maker.

The Bread Maker will now complete the kneading, rising and baking cycles auto-
matically, depending on what setting is chosen.  

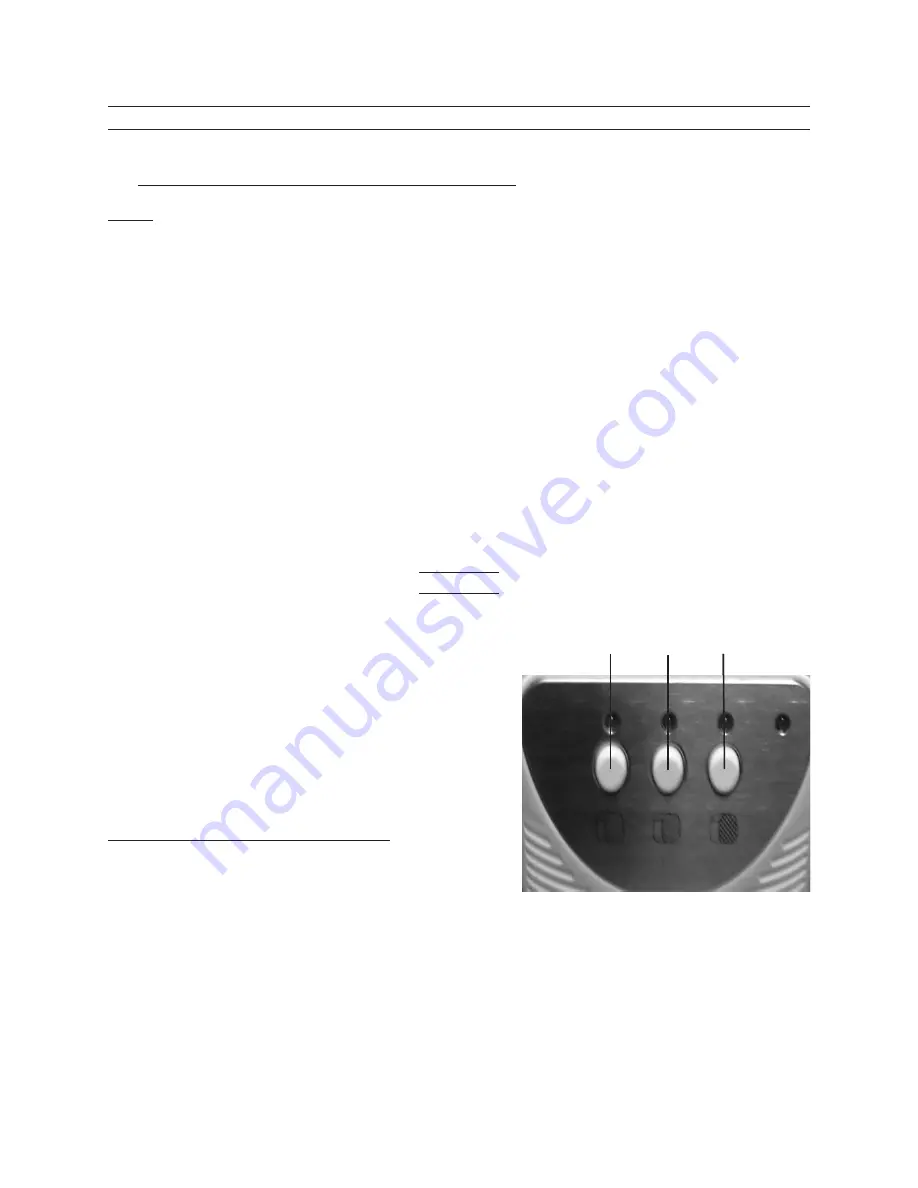
buttons

Push Button 1 to bake White Bread mixes.
Push Button 2 to bake Yellow Bread mix-
es.
Push Button 3 to bake Dark Bread mixes.
Push Button 1 and 2 together for the knead 
only function.
Push Button 2 and 3 together for the bake 
only function.

bread kneading & baking times:

First knead: 3 minutes. 
Second knead: 22 minutes. 
Rising: 105 minutes, 10 seconds. 
Bake times: 

White/light bread: 30 minutes. 

Yellow bread: 40 minutes. 

Dark bread: 50 minutes. 

1.

2.

3.

4.

5.


button 1

button 3

button 2

button 1

button 3

button 2

Содержание 96167

Страница 1: ...our website at http www harborfreight com To prevent serious injury read and understand all warnings and instructions before use Copyright 2007 by Harbor Freight Tools All rights reserved No portion...

Страница 2: ...225 F cycle Not adjustable Overall Dimensions 10 13 16 L x 9 5 8 W x 11 7 16 H Weight 8 8 Pounds HOUSEHOLD USE ONLY SAVE THIS MANUAL You will need this manual for the safety warnings and precautions...

Страница 3: ...hot cookware Maintain a safe working environment Keep the work area well lit and uncluttered Make sure there is adequate surrounding workspace Do not use metal utensils or metal scouring pads on the...

Страница 4: ...d to a properly grounded outlet If the tool should electrically malfunction or break down grounding provides a low resistance path to carry electricity away from the user reducing the risk of electric...

Страница 5: ...the required minimum cord size See Table A Make sure your extension cord is properly wired and in good electrical condition Always replace a damaged extension cord or have it repaired by a qualified...

Страница 6: ...ecure it in place Fix the Kneading Blade 13 onto the Peg 39 on the bottom of the Bread Pan Mix bread ingredients in a mixing bowl not included thoroughly before adding the dough to the Bread Pan Close...

Страница 7: ...may affect its safe operation If abnormal noise or vibration occurs have the problem corrected before further use Do not use damaged equipment After each use wash the non electrical parts of the appl...

Страница 8: ...25 Power Cord 1 26 Screw PA3 10 14 Part Description Qty 27 Control Plate 1 28 Buttons 3 29 Control Box 1 30 Lampshade 1 31 PCB 1 32 Screw PA4 14 1 33 Capacitor 1 34 Spring Washer 4 1 35 Motor 1 36 Sil...

Страница 9: ...SKU 96167 For technical questions please call 1 800 444 3353 Page...

Отзывы: