background image

Page 4

SKU 90750

Assembly

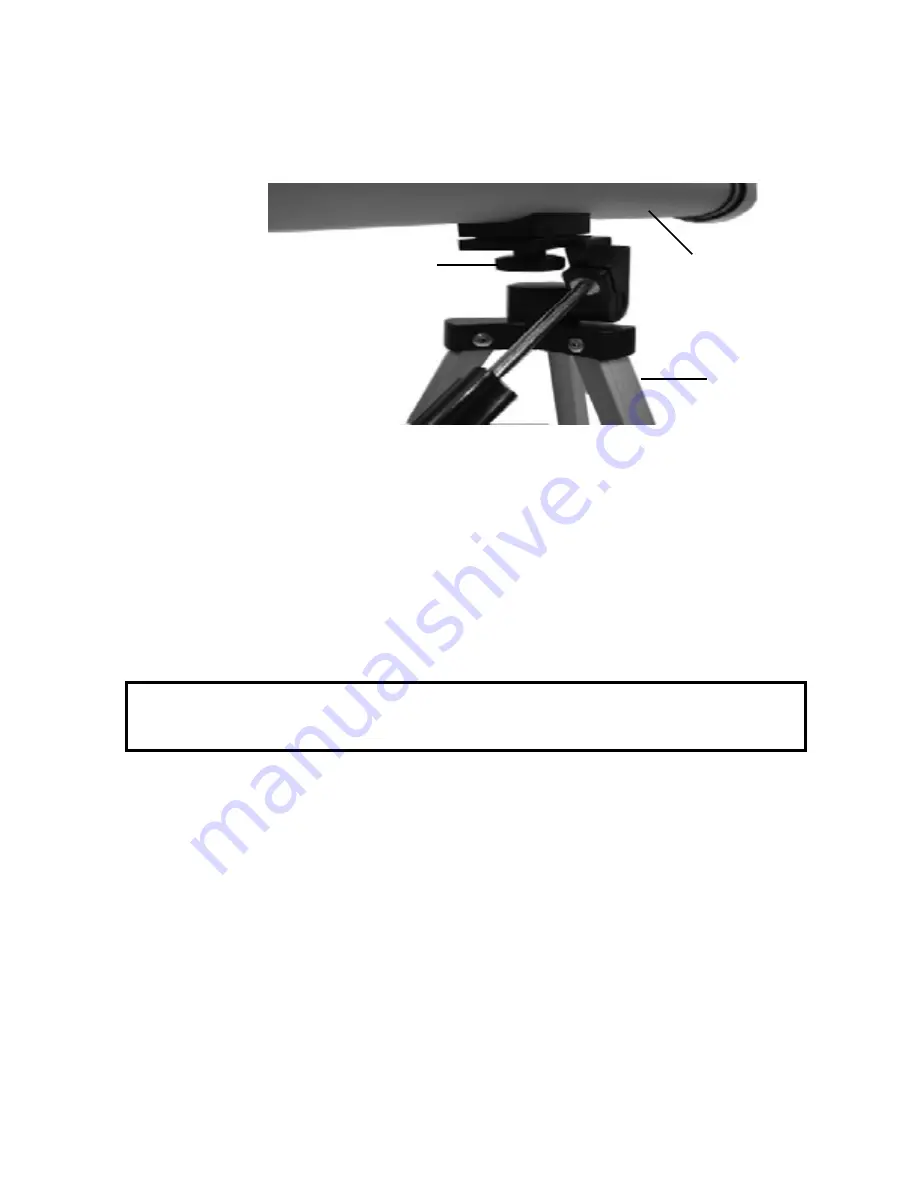
FIGURE 1

1.  Thread the Body (1) to the Tripod (6) using the Body Connecting Screw (10).
See FIGURE 1.

Body Connecting Screw (10)

2.  Attach the Spotting Scope Bracket (13) to the Body (1) with the two Chrome Nuts.  Make
sure the longer end of the Spotting Scope (2) is pointed toward the front of the Telescope.
Refer to the Assembly Drawing on page 5.

3.  Attach the Diagonal Eyepiece Holder (3) to the Focus Tube (11) by inserting and tightening
the Diagonal Screw (14) to securely hold it in place.  Refer to the Assembly Drawing on page
5.

4.  Place  either one of the Eyepieces (7) (50X or 100X) into the Diagonal Eyepiece Holder (3),
and tighten the Eyepiece Screw (12).

Operation

1.  Place the Telescope on a stable platform or on flat, level ground.

2.  Remove the Objective Cover (9)  and Spotting Scope Covers and set aside.

3.  Turn the Angle/Bearing Adjusting Lever (5) counterclockwise to loosen it and allow the
Telescope to be angled to the desired location. Look through the Spotting Scope (2) to find
the general area you wish to view.  Tighten the Angle/Bearing Adjusting Lever (5) when you
determine you are in the correct viewing area.

4.  Look through the Eyepiece (7) and turn the Focus Knob (4) very slowly and gently to focus
in an object.  Be very patient while attempting to focus in objects in the night sky.
Note:  This Telescope will not view an object clearly unless it is a minimum of 150 feet away.

5.  Replace the Objective Cover (9) and Spotting Scope Covers when finished.

     WARNING!  NEVER LOOK DIRECTLY INTO THE SUN WITH THE TELESCOPE.

     LOOKING AT THE SUN CAN CAUSE PERMANENT EYE DAMAGE.

Body (1)

Tripod (6)

Содержание 90750

Страница 1: ...site at http www harborfreight com Copyright 2003 by Harbor Freight Tools All rights reserved No portion of this manual or any artwork contained herein may be reproduced in any shape or form without the express written consent of Harbor Freight Tools For technical questions and replacement parts please call 1 800 444 3353 90750 ...

Страница 2: ...eep out of reach of children 5 Use the right product for the job Do not attempt to force a small product to do the work of a larger industrial product There are certain applications for which this product was designed Do not modify this product and do not use this product for a purpose for which it was not intended 6 Do not overreach Keep proper footing and balance at all times 7 Maintain products...

Страница 3: ...ur safety service and maintenance should be performed regularly by a qualified technician 13 Observe viewing conditions Never look directly at the sun with the Telescope Looking at the sun may cause permanent eye damage Warning The warnings cautions and instructions discussedin this instructionmanual cannot cover all possible conditions and situations that may occur It must be under stood by the o...

Страница 4: ...e on a stable platform or on flat level ground 2 Remove the Objective Cover 9 and Spotting Scope Covers and set aside 3 Turn the Angle Bearing Adjusting Lever 5 counterclockwise to loosen it and allow the Telescope to be angled to the desired location Look through the Spotting Scope 2 to find the general area you wish to view Tighten the Angle Bearing Adjusting Lever 5 when you determine you are i...

Страница 5: ...RER AND OR DISTRIBUTOR EXPRESSLYSTATESTHATALLREPAIRSAND PARTS REPLACEMENTS SHOULD BE UNDERTAKEN BYCERTIFIED AND LICENSED TECHNICIANS AND NOT BYTHE BUYER THE BUYER ASSUMES ALL RISK AND LIABILITY ARISING OUT OF HIS OR HER REPAIRS TO THE ORIGINAL PRODUCT OR REPLACEMENT PARTS THERETO OR ARISING OUT OF HIS OR HER INSTALLATION OF REPLACEMENT PARTS THERETO Parts List Assembly Drawing Part No Description ...

Отзывы: