


11
Lowes.com/harborbreeze
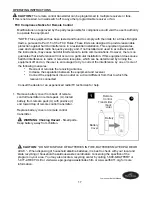
Temporarily hang fan on the tab on the mounting
bracket (C) using one of the non-slotted holes in
the canopy (B).
4.
C
4
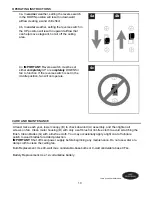
WARNING:
To reduce the risk of fire, electrical shock or personal injury, each wire connector
provided with this
fan is designed to accept only one 12-gauge house wire and one lead wire from
the fan. If your house wire is larger than 12-gauge or there is more than one house wire to
connect to the corresponding fixture lead wires, consult an electrician.
CAUTION:
Be sure outlet box is properly grounded and that a ground (green or bare) wire is present.
WARNING:
The wires from the outlet box must be connected to a corresponding color of the
fan's wires. Be sure wire colors match before making connections. If house wires are different
colors than referred to in the following steps, stop immediately. A professional electrician is
recommended to determine wiring.
WIRING
WARNING
: Using a full range dimmer switch (not included) to control fan speed will cause
a loud humming noise from fan. To reduce the risk of fire or electrical shock, do NOT use a full
range dimmer switch to control fan speed.
CLOSEMOUNT-STYLE FAN MOUNTING
Tab
Hole
B