


9 - 19
Hanskamp AgroTech B.V. (the Netherlands)
www.hanskampagrotech.nl/en
PipeFeeder HighSpeed
EN
t.b.v carrousel
24VAC & 12-24VDC
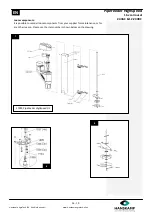
Installation:
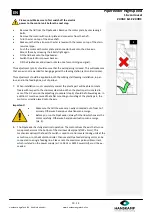
1. The PipeFeeder is designed to be mounted on a wall. First of all ascertain where the
PipeFeeder needs to hang and at what height. To do this, use the mounting holes in
the assembly brackets provided for this purpose (item no. 1902).
2. Grease, before assembly, the bolts and nuts with sufficient copper grease.
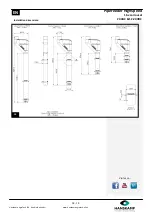
3. If the distance between the feeder and the dosing unit is too great we advise you to
use a fall pipe fitted directly underneath the dosing unit. The PipeFeeder is designed
to hang directly above the feed trough so that the fall height remains low so noise
and dust are reduced. Also the PipeFeeder HighSpeed can be mounted, above a hop-
per
.
Sample installations can be found at www.hanskampagrotech.nl/en
Please note! No mounting material is supplied to mount the PipeFeeder to the
wall.
Please note! Always allow ±10 till 15cm of space under the PipeFeeder.
This way air can run underneath the PipeFeeder.
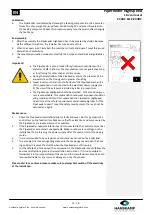
4. Use a well-shielded electricity cable to connect the dosing unit.
See the annex on page 15 for the connection diagram for the motor (24VDC,
120 rpm). The motor turns counterclockwise as standard.
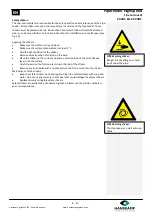
Please note! When assembling
always first switch off the
electricity to the control unit.
Please note! Make sure that there is always a plug or lockable switch
placed between the Pipe Feeder and the energy supply
so that power can be disconnected.
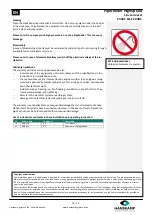
5. Using the supplied membrane grommet (item no. 1947), fit the cable through the lid
of the PipeFeeder. To do this, drill a hole (Ø 16 mm) at the desired position in the lid.
Then connect the other end of the cable to the desired output of the control unit.
6. Make a solid and closed connection with the supply auger. The top connection of the
PipeFeeder is Ø125mm. This fits a slide coupling socket of PVC or PP exactly across.
Make sure to not allow water, moist or dirt in the stock of the PipeFeeder.
Please note! An insufficient seal with the supply auger can cause problems when
operating the PipeFeeder.
2
afdekkap
16


