background image

Start-up

Page EN-31

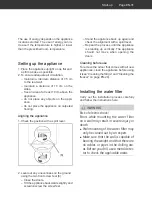
The use of energy depends on the appliance 
location selected. The use of energy can in-
crease if the temperature is higher or lower 
than the prescribed room temperature.

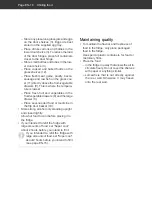
 Setting up the appliance

1. Place the appliance upright on as flat and 

as firm a base as possible. 

2. To ensure adequate air circulation, 

– maintain a minimum distance of 7.5 cm 

to the rear wall.

– maintain a distance of 10 cm on the 

sides.

– free an area of at least 10 cm above the 

appliance.

– do not place any objects on the appli-

ance.

– do not place the appliance on carpeted 

flooring.

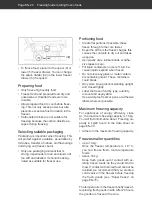
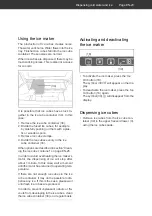
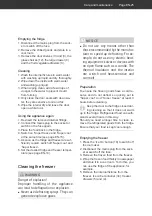
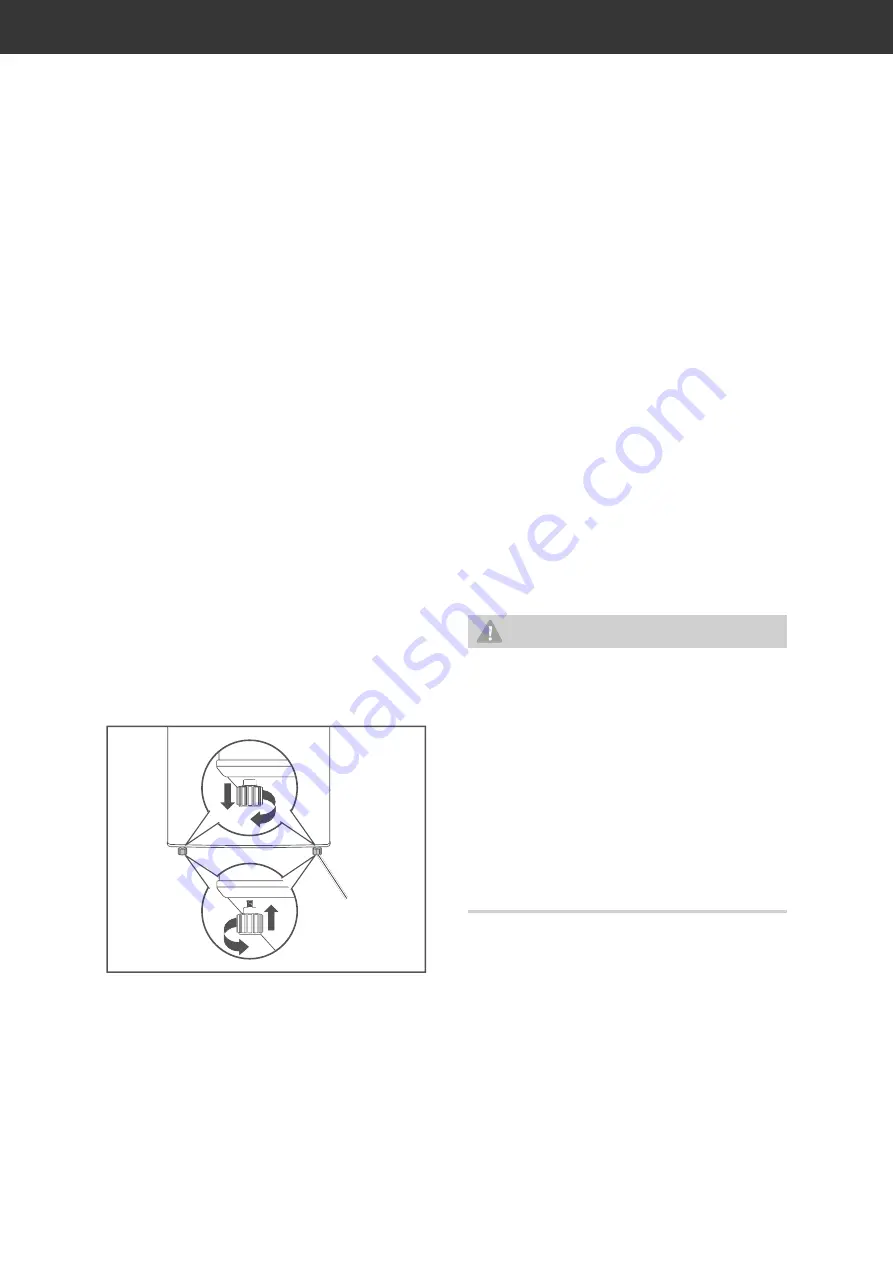
Aligning the appliance

1. Check the position with a spirit level. 

(6)

2. Level out any unevenness on the ground 

using the two front screw feet (6).
– Close the doors.
– Tilt the appliance backwards slightly and 

screw/unscrew the screw feet.

– Stand the appliance back up again and 

check the alignment with a spirit level.

– Repeat the process until the appliance 

is standing up vertically. The appliance 
should not move when opening the 
doors.

Cleaning before use

To remove the odour that comes with all new 
appliances, clean the appliance before using 
it (see “Cleaning the fridge“ and “Cleaning the 
freezer“ on page EN-24).

 Installing the water filter

Carry out the installation process carefully 
and follow the instructions here.

 WARNING

Risk of electric shock!
Errors while mounting the water filter 
on a wall may result in severe injury or 
death.

Wall mounting of the water filter may 
only be carried out by an expert.

Make sure that the wall is capable of 
bearing the weight and that there are 
no cables or pipes in the drilling are-
as. Before you drill, use a metal detec-
tor to check the applicable areas.

Содержание HFD18560A1WDI

Страница 1: ...Kühl Gefrier Kombination mit Wasserspender und Eisbereiter Gebrauchsanleitung Anleitung Version 197180 DE 20190726 Bestell Nr 6756 4766 Nachdruck auch auszugswei se nicht gestattet HFD18560A1WDI ...

Страница 2: ...frierbereich reinigen DE 25 Eiswürfelbehälter reinigen DE 26 Wasserfilter austauschen DE 27 Beleuchtung DE 28 Inbetriebnahme DE 29 Bevor Sie das Gerät in Betrieb nehmen DE 29 Transportieren auspacken und aufstellen DE 29 Gerät aufstellen DE 31 Wasserfilter montieren DE 31 Gerät an die Wasserversorgung anschließen DE 33 Gerät ohne Wasserfilter betreiben DE 35 Gerät an die Stromversorgung anschließe...

Страница 3: ...erungen 2 Schrauben 1 Rückschlagventil Zoll 1 Schlauchkupplung 4 Sicherheitsclip rot 2 Sicherheitsclip blau 1 Gebrauchsanleitung Lieferung kontrollieren 1 Transportieren Sie das Gerät an einen ge eigneten Standort und packen Sie es aus siehe Inbetriebnahme auf Seite DE 29 2 Prüfen Sie ob die Lieferung vollständig ist 3 Kontrollieren Sie ob das Gerät Transport schäden aufweist 4 Sollte die Lieferun...

Страница 4: ...e mit Raumteiler 6 verstellbare Schraubfüße 7 vordere Rollen 8 Breite Schublade niedrigste Temperatur im Kühlbereich 9 Gemüseschubladen 10 Klapptürkorb für getrennt zu lagerndes Kühlgut sowie Medikamente 11 Glasabdeckung über den Obst Gemüseschubladen 12 Glasablagen 13 Dichtschiene 14 Innenraumbeleuchtung 15 linke Kühlbereichstür Gerätetüren geöffnet 1 2 3 3 3 3 4 5 6 7 8 9 10 11 12 13 14 15 ...

Страница 5: ...ur im Gefrierbereich 21 Anzeige Super Leuchtet wenn Schnelles Einfrieren gewählt ist 22 Temperaturanzeige Gefrierbereich 23 Temperaturanzeige Kühlbereich 24 Anzeige Super Leuchtet wenn Schnelles Kühlen gewählt ist 25 Taster Fridge zur Regulierung der Temperatur im Kühlbereich 26 Taster Super zum Ein und Ausschalten des schnellen Kühlens 27 Taster Holiday zum Ein und Aus schalten des Urlaubsmodus 2...

Страница 6: ...eichs vorgese hen Sie ist nicht zur Beleuchtung eines Raumes geeignet Begriffserklärung Folgende Signalbegriffe finden Sie in dieser Gebrauchsanleitung WARNUNG Dieser Signalbegriff bezeichnet eine Gefährdung mit einem mittleren Risi kograd die wenn sie nicht vermieden wird den Tod oder eine schwere Verlet zung zur Folge haben kann VORSICHT Dieser Signalbegriff bezeichnet eine Gefährdung mit einem ...

Страница 7: ...anliegt Nähere Informationen hierzu finden Sie auf dem Typschild Der Anschluss an eine Zeitschaltuhr oder ein separates Fernwirksystem zur Fernüberwachung und steuerung ist unzulässig Die vollständige Trennung vom Stromnetz erfolgt bei diesem Gerät nur durch Ziehen des Netzsteckers aus der Steckdose Gerät daher nur an eine gut zugängliche Steckdo se anschließen damit es im Störfall schnell vom Str...

Страница 8: ...chalten heraus drehen Keine Gegenstände in oder durch die Gehäuseöffnungen stecken und si cherstellen dass auch Kinder keine Gegenstände einstecken können Gerät regelmäßig auf Schäden prü fen Risiken für Kinder Erstickungsgefahr Kinder können sich in der Verpackungs folie verfangen oder Kleinteile verschlu cken und ersticken Kinder nicht mit der Verpackungsfolie spielen lassen Kinder daran hindern...

Страница 9: ...n die Wand stel len Halten Sie die Mindestabstände ein siehe Gerät aufstellen auf Sei te DE 31 Gefahren durch Kältemittel Im Kältemittelkreislauf Ihres Geräts be findet sich das umweltfreundliche aber brennbare Kältemittel R600a Isobu tan Mechanische Eingriffe in das Käl tesystem sind nur autorisierten Fach kräften erlaubt Den Kältemittelkreislauf nicht be schädigen z B durch Aufstechen der Kältem...

Страница 10: ...lsche Handhabung unzurei chende Kühlung oder Überlagerung können die eingelagerten Lebensmittel verderben Bei Verzehr besteht die Ge fahr einer Lebensmittelvergiftung Insbesondere rohes Fleisch und Fisch ausreichend verpacken damit da nebenliegende Lebensmittel nicht durch Salmonellen o Ä kontaminiert werden Die von den Lebensmittelherstellern empfohlenen Lagerzeiten einhalten Beachten dass sich d...

Страница 11: ...us dem Gefrierbereich in den Mund nehmen HINWEIS Beschädigungsgefahren Wenn das Kühlgerät liegend transpor tiert wurde kann Schmiermittel aus dem Kompressor in den Kühlkreislauf gelangt sein Das Kühlgerät möglichst nur vertikal transportieren Vor Inbetriebnahme das Kühlgerät 2 Stunden aufrecht stehen lassen Währenddessen fließt das Schmier mittel in den Kompressor zurück Unsachgemäßer Umgang mit d...

Страница 12: ... pH Wert Türdichtungen und Geräteteile aus Kunststoff sind empfindlich ge gen Öl und Fett Verunreinigungen möglichst schnell entfernen Nur weiche Tücher verwenden Nach dem Ausschalten 5 Minuten warten Erst danach das Gerät erneut einschalten Nur Originalzubehörteile verwenden Einzelne Geräteteile nicht in der Spül maschine waschen Sie sind nicht spülmaschinenfest Gerät niemals mit einem Wasser str...

Страница 13: ...r prüfung eingeschaltet war ist der Gerä teinnenraum beleuchtet wenn Sie eine Bedienung der Türen öffnen und auf dem Display erscheinen die Anzeigen der zuletzt vorgenommenen Einstellungen für den Kühl und den Gefrierbereich Der Kompressor beginnt zu arbeiten das Kältemittel strömt durch die Rohre und Sie hören ein leises Rauschen Das Ge rät ist eingeschaltet Wenn das Gerät bei der Funktionsüber p...

Страница 14: ...onein ander einstellen Die Displayanzeigen leuchten auf wenn Sie eine der Türen öffnen Dann können auf dem Display Eingaben vor genommen werden Wählen Sie zunächst eine mittlere Einstel lung Wählen Sie bei ansteigender Umge bungstemperatur z B im Sommer eine entsprechend niedrigere Einstellung Gefrierbereich Freezer C 18 20 e e e Drücken den Taster 20 Freezer so oft bis die gewünschte Temperatur a...

Страница 15: ...nzeige 24 Um die Funktion Schnelles Kühlen Super Cool manuell zu deaktivieren drücken Sie erneut den Taster 26 Super Die Anzeige 21 im Display erlischt und die Temperaturanzeige springt auf den zu vor eingestellten Wert zurück Urlaubsmodus WARNUNG Gesundheitsgefahr Durch unzureichende Kühlung können eingelagerte Lebensmittel verderben Bei Verzehr besteht die Gefahr einer Le bensmittelvergiftung Be...

Страница 16: ...h heraus nehmen und an neuer Postion einsetzen 3 Ziehen Sie die Türablagen 3 nach oben heraus 4 Setzen Sie die Türablagen 3 von oben ein Der Klapptürborb Sie können den Klapptürkorb 10 entnehmen Zum Entnehmen des Klapptürkorbs 10 klappen Sie den Klapptürkorb aus und ziehen Sie ihn aus der Halterung 10 Zum Wiedereinsetzen des Klapptür korbs 10 klappen Sie die Halterung her aus und setzen Sie den Kl...

Страница 17: ...n Wenn die Tür für eine längere Zeit ge öffnet wird kann es zu einem erheb lichen Temperaturanstieg in den Fä chern des Gerätes kommen Die Flächen die mit Lebensmitteln und zugänglichen Ablaufsystemen in Berührung kommen können regel mäßig reinigen Rohes Fleisch und Fisch in geeigne ten Behältern im Kühlschrank so auf bewahren dass es andere Lebensmit tel nicht berührt oder auf diese tropft Wenn d...

Страница 18: ...t Gemüseschubladen 9 und die breite Schublade 8 Legen Sie getrennt zu lagerndes Kühlgut sowie Medikamente im Klapptürkorb 10 Lagern Sie hochprozentigen Alkohol nur stehend und fest verschlossen Lassen Sie warme Lebensmittel abkühlen bevor Sie sie in den Kühlbereich stellen Wenn Sie den Kühlbereich mit größeren Mengen an Lebensmitteln neu befüllen stellen Sie etwa 2 Stunden vor dem Befül len Schnel...

Страница 19: ... ob die eingelagerten Lebensmittel noch genießbar sind Auf oder angetaute Lebensmittel nicht wieder einfrieren sondern sofort verbrauchen Zur Bereitung von Eiswürfeln nur Trinkwasser verwenden VORSICHT Verletzungsgefahr Unsachgemäßer Umgang mit dem Ge rät kann zu Verletzungen führen Ver brennungsgefahr durch Tieftemperatu ren Die Lebensmittel und die Innenwän de des Gefrierbereichs haben eine sehr...

Страница 20: ...ie möglichst flache Portionen diese frieren schneller bis in den Kern durch Streichen Sie die Luft aus dem Gefrier beutel heraus denn sie begünstigt das Austrocknen und nimmt Platz weg Verwenden Sie zum Verschließen Plas tik Clips Gummiringe oder Klebebänder Befüllen Sie Flüssigkeitsbehälter max zu denn beim Frieren dehnt sich Flüs sigkeit aus Lagern Sie keine mit Flüssigkeit gefüllten Glas oder M...

Страница 21: ...iten auf der Verpackung Tiefkühlkost können Sie im gesamten Ge frierbereich lagern Lebensmittel auftauen Beachten Sie folgende Grundregeln wenn Sie Lebensmittel auftauen Um Lebensmittel aufzutauen nehmen Sie sie aus dem Gefrierbereich und lassen Sie sie am besten bei Raumtemperatur oder im Kühlbereich auftauen Um Lebensmittel schnell aufzutauen nutzen Sie z B die Auftaufunktion Ihrer Mikrowelle Be...

Страница 22: ...ied brechen VORSICHT Verletzungsgefahr Eiswürfel zerstoßenes Eis oder Eis am Stiel nicht direkt aus dem Gefrierbe reich in den Mund nehmen Kaltwasser entnehmen HINWEIS Beschädigungsgefahr Überhitzung kann zu Beschädigung des Eisbereiters führen Nicht länger als für maximal 3 Minu ten Wasser aus dem Kaltwasseraus lass entnehmen 33 1 Um gekühltes Wasser zu entnehmen drücken Sie ein Gefäß gegen das E...

Страница 23: ...n werden im Abschnitt Eiswürfelbehälter reinigen auf Seite DE 26 beschrieben Um zu verhindern dass der Motor des Eis bereiters überhitzt stoppt die Entnahme von Eis nach ca 1 Minute Warten Sie in diesem Fall einen Moment bis der Motor seine Be triebstemperatur erreicht hat Wenn im Eiswürfelbehälter nicht genug Eis würfel vorhanden sind kann es vorkommen dass kein Eis entnommen werden kann War ten ...

Страница 24: ...erunreinigungen mög lichst schnell entfernen Nur weiche Tücher verwenden Einzelne Geräteteile nicht in der Spül maschine waschen Sie sind nicht spülmaschinenfest Gerät niemals mit einem Wasser strahl z B Hochdruckreiniger ab spritzen Daraufachten dasskeinWasserindie elektrischen Teile des Geräts dringt Türdichtungen kontrollieren und reinigen Die Türdichtungen müssen regelmäßig kon trolliert werde...

Страница 25: ...bildung vorzubeugen 4 Reinigen Sie die Türdichtung nur mit kla rem Wasser sie ist empfindlich gegen über Öl und Fett 5 Wischen Sie den Innenraum trocken und lassen Sie die Tür zum Lüften noch einige Zeit offen Wieder in Betrieb nehmen 1 Setzen Sie die entnommene Innenaus stattung wieder ein 2 Stecken Sie den Netzstecker in die Steck dose bzw schalten Sie die Sicherung wieder ein 3 Legen Sie die Le...

Страница 26: ...mit Spülmittel und trocknen Sie sie gründlich ab 3 Wischen Sie den Innenraum mit warmem Wasser und Spülmittel aus 4 Geben Sie beim Nachwischen einige Tropfen Essig ins Wasser um Schimmel bildung vorzubeugen 5 Reinigen Sie die Türdichtung nur mit kla rem Wasser sie ist empfindlich gegen Öl und Fett 6 Reiben Sie alles einschließlich der Tür dichtung gründlich trocken und lassen Sie die Tür zum Lüfte...

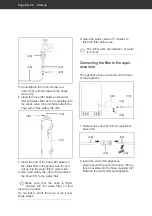
Страница 27: ...serzufuhr ab 3 Entnehmen Sie den Wasserfilter 37 aus den Wandhalterungen 36 4 Halten Sie ein Gefäß oder ein Tuch unter den Wasserfilter um ggf kleine Mengen an austretendem Restwasser aufzufan gen 37 36 38 35 39 5 Lösen Sie die roten Sicherheitsclips 39 vom Schlauch 35 zwischen Wasserfilter und Gerät und vom Schlauch 38 zwi schen Wasseranschluss und Wasserfilter Ziehen Sie die Schläuche 35 und 38 ...

Страница 28: ...nes neuen Wasserfilters vor Drücken Sie anschließend Taster 18 Ice On und 20 Freezer gleichzeitig 3 Se kunden lang Auch wenn die Anzeige nicht blinkt ist dieser Schritt erforderlich um den neuen Wasserfilter in Betrieb zu nehmen und den neuen Betriebszyklus zu starten Wasserfilterdaten Durchflussmenge 1 9 Liter pro Minute 0 5 gpm Temperatur 1 C 38 C Druck 30 100 psi 207 689 kPa Funktion Chemische ...

Страница 29: ...dampfers mit scharfen Gegenständen Abknicken von Rohrleitungen usw Damit im Fall einer Leckage des Kälte mittelkreislaufskeinzündfähigesGas Luft Gemisch entstehen kann muss der Aufstellraum laut Norm EN378 eine Mindestgröße von 1 m3 je 8 g Kältemittel haben Die Menge des Kältemittels in Ihrem Gerät finden Sie auf dem Datenblatt siehe Tech nische Daten auf Seite DE 41 Herausspritzendes Kältemittel ...

Страница 30: ... telkreislaufs kein zündfähiges Gas Luft Ge misch entstehen kann muss der Aufstellraum folgende Mindestgröße aufweisen bei Geräten mit 70 g Kältemittel 9 m3 bei Geräten mit 90 g Kältemittel 12 m3 Sie finden die Mengenangabe des Kältemit tels im Datenblatt auf Seite DE 40 Gut geeignet sind Standorte die trocken gut belüftet und möglichst kühl sind Ungünstig sind Standorte mit direkter Sonneneinstra...

Страница 31: ...ilfe der beiden vorderen Schraubfüße 6 aus Schließen Sie dazu die Türen Kippen Sie das Gerät leicht nach hinten und drehen Sie die Schraubfüße hinein bzw heraus Richten Sie das Gerät wieder auf und überprüfen Sie die Ausrichtung mit einer Wasserwaage Wiederholen Sie den Vorgang bis das Gerät senkrecht ausgerichtet ist Beim Öffnen der Türen darf sich das Gerät nicht bewegen Grundreinigung Um den Ge...

Страница 32: ...hine Kreuzschlitz Schraubendreher Zollstock Wasserwaage Bleistift Die Montage darf nur an einer geeig neten massiven Wand erfolgen Bei Leichtbauwänden können spezielle Dübel oder Anker erforderlich sein Ziehen Sie einen Fachmann zurate Montieren Sie den Wasserfilter an einem gut zugänglichen Ort damit Sie ihn bei Bedarf auswechseln können Wasserfilter anschließen 36 43 1 Befestigen Sie die Wandhal...

Страница 33: ...Schlauch verwenden 1 Schneiden Sie den Schlauch 41 in zwei Teile auf die Länge die Sie benötigen um Wasseranschluss Wasserfilter und Gerät zu verbinden Die Gesamt Schlauchlänge muss unter 5 m bleiben Sind die Schlauch teile 35 und 38 zusammen länger als 5 m kann die Funktion des Eiswürfelbe reiters und des Kaltwasserspenders durch ungenügendem Wasserdruck beeinträchtigt sein Schneiden Sie den Schl...

Страница 34: ...teil 35 mithilfe eines roten Sicherheitsclips 39 an den Wasserfilter Achten Sie darauf dass das Schlauch ende fest in den Wasserfilter einge führt sind um Leckstellen zu vermeiden Den Schlauchteil nicht knicken oder klemmen und nicht über scharfe Kanten legen 9 Öffnen Sie den Wasserhahn für etwa fünf Minuten um den Wasserfilter vor der Be nutzung durchzuspülen Die anfängliche dunkle Verfärbung des...

Страница 35: ...e Leckstelle um kleine Mengen an aus tretendem Wasser aufzufangen 3 Lösen Sie die Schlauchverbindung an der Leckstelle 4 Schließen Sie den Schlauch erneut an 5 Öffnen Sie die Wasserzufuhr 6 Prüfen Sie nochmals die Schlauchverbin dung auf Wasseraustritt Sollte das Problem weiterhin bestehen nehmen Sie bitte Kontakt mit unserem Ser vice auf siehe Seite DE 38 Gerät ohne Wasserfilter be treiben Wenn d...

Страница 36: ...hlgerät möglichst nicht in die Horizontale kippen Nach dem Transport und vor dem An schließen das Gerät ca 2 Stunden aufrecht stehen lassen Dadurch hat das Schmiermittel genügend Zeit um in den Kompressor zurückzufließen Stecken Sie den Netzstecker in eine leicht zugängliche Steckdose 220 240 V 50 Hz Wenn Sie eine Gerätetür öffnen ist der Ge räteinnenraum beleuchtet Alles Wichtige zur Bedienung fi...

Страница 37: ...tur einstellen auf Seite DE 14 Gerät kühlt nicht ausreichend Temperatur ist zu hoch ein gestellt Niedrigere Einstellung wählen siehe Tem peratur einstellen auf Seite DE 14 Tür ist nicht fest verschlos sen oder Türdichtung liegt nicht voll auf Siehe Türdichtungen kontrollieren und reini gen auf Seite DE 24 Gerät steht in der Nähe einer Wärmequelle Isolierplatte zwischen die Geräte stellen oder Stan...

Страница 38: ...ahl Optik 6756 4766 Service Reparaturen und Ersatzteile Kunden in Deutschland Wenden Sie sich bitte an unseren Tech nik Service Telefon 0 18 06 18 05 00 Festnetz 20 Cent Anruf Mobilfunk max 60 Cent Anruf Kunden in Österreich Wenden Sie sich bitte an das Kundencen ter oder die Produktberatung Ihres Ver sandhauses Bitte beachten Sie Sie sind für den einwandfreien Zustand des Geräts und die fachgerec...

Страница 39: ...ei Austritt von Kältemittel besteht Brandgefahr Achten Sie darauf dass an einem Kühlgerät bis zur fachgerechten Ent sorgung keine Kühlrippen oder Rohre beschädigt werden Unser Beitrag zum Schutz der Ozonschicht In diesem Gerät wurden 100 FCKW und FKW freie Kälte und Aufschäummittel verwendet Dadurch wird die Ozonschicht geschützt und der Treibhauseffekt reduziert Unsere Verpackungen werden aus umw...

Страница 40: ...dlage von Ergebnissen der Normprüfung über 24 Stunden Der tatsächliche Verbrauch hängt von der Nutzung und vom Standort des Geräts ab Nutzinhalt Kühlbereich 413 L Nutzinhalt Gefrierbereich frostfrei Sterne Einstufung 107 L 4 Sterne Lagerzeit bei Störung 16 h Gefriervermögen 10 kg 24 h Klimaklasse SN N ST T Dieses Gerät ist für den Betrieb bei einer Umgebungstemperatur zwischen 10 C und 43 C bestim...

Страница 41: ...ination Modell HFD18560A1WDI Gerätemaße Höhe Breite Tiefe mit Anschlüssen 1778 mm 914 mm 725 mm Leergewicht 120 kg Kältemittel R600a Kältemittel Füllmenge 75 g Schaummittel Zyklopentan Leistungsaufnahme 207 W Versorgungsspannung Frequenz Nennstrom 220 240 V 50 Hz 0 9 A Schutzklasse I Technische Daten ...

Страница 42: ......

Страница 43: ...Fridge freezer with water dispenser and ice maker User manual Manual version 197180 EN 20190726 Article no 6756 4766 Reproduction even of excerpts is not permitted HFD18560A1WDI ...

Страница 44: ...freezer EN 25 Cleaning the ice cube container EN 26 Replacing the water filter EN 27 Lighting EN 28 Start up EN 29 Before starting to use the appliance EN 29 Transporting unpacking and set up EN 29 Setting up the appliance EN 31 Installing the water filter EN 31 Operating the appliance without a water filter EN 35 Connecting the appliance to the power supply EN 36 Troubleshooting table EN 37 Servi...

Страница 45: ... white 5 m 1 Water filter 2 Wall brackets 2 Screws 1 Check valve inch 1 Hose coupling 4 Red safety clip 2 Blue safety clip 1 User manual Check the delivery 1 Move the appliance to a suitable place and unpack it see Start up on page EN 29 2 Check that the delivery is complete 3 Check whether the appliance was dam aged during transit 4 If the delivery is incomplete or the appli ance has been damaged...

Страница 46: ... with space divider 6 Adjustable screw feet 7 Front castor wheels 8 Large drawer could contain wider items lowest temperature in the fridge room 9 Fruit vegetable drawers 10 Flip door basket to store seal needed food or medicines 11 Glasscoverabovefruit vegetabledrawers 12 Glass shelves 13 Sealing strip 14 Interior lighting 15 Left fridge door Appliance doors opened 1 2 3 3 3 3 4 5 6 7 8 9 10 11 1...

Страница 47: ...e the freezer 21 Super freeze signal Illuminates when Super freeze is selected 22 Freezer temperature display 23 Fridge temperature display 24 Super cool signal Illuminates when Super cool function is selected 25 Fridge button for regulating the tem perature inside the fridge 26 Super cool button for switching Super cool function on and off 27 Holiday button for switching Holiday mode on and off 2...

Страница 48: ...r It is not suitable for lighting a room Explanation of terms The following symbols can be found in this user manual WARNING This symbol indicates a hazard with a medium level of risk which if not avoid ed could result in death or serious injury CAUTION This symbol indicates a hazard with a low level of risk which if not avoided could result in minor or moderate injury NOTICE This symbol warns aga...

Страница 49: ...mer or a sepa rate remote controlled system for dis tance monitoring and control The appliance can only be complete ly disconnected from the power sup ply by pulling out the mains plug The appliance must therefore be connect ed to an easily accessible socket so that it can be quickly disconnected from the power supply in the event of breakdown If the mains plug is no longer acces sible after insta...

Страница 50: ...e packaging film Prevent children from pulling small parts from the device or taking them out of the accessory bag and putting them in their mouths Risks when dealing with chemical substances Danger of explosion Improper handling of chemical sub stances can lead to explosions Do not store explosive substances or spray cans with flammable propel lants inside the appliance as they may cause ignitabl...

Страница 51: ...th sharp objects bend ing the piping cutting open the insu lation etc Refrigerant is flammable when spurt ing out and can damage the eyes In this case rinse your eyes in clean wa ter and seek medical assistance im mediately To prevent the formation of a flam mable gas air mixture in the event of a leakage in the refrigeration cir cuit the installation space must have a minimum size of 1 m3 per 8 g...

Страница 52: ...ficiently cool place or in another refrigerating ap pliance maximum storage time in case of malfunction 16 hours After a malfunction check wheth er the stored food is still edible Con sume thawed and defrosted foods immediately do not refreeze Use only drinking water to make ice cubes The water filter can only filter out float ing particles from the water It does not destroy bacteria or microbes O...

Страница 53: ... or means other than those recommend ed by the manufacturer The interior light must only be used to illuminate the interior of the appli ance It is not suitable for lighting a room Do not store glass or metal contain ers containing water lemonade beer etc Water expands when frozen and can burst the container Defrost the appliance in a timely manner before it forms a layer of ice and frost of more ...

Страница 54: ...e The appliance s water pressure is set at 2 7 bar For higher water pressure a pressure regulator needs to be in stalled If in doubt enquire about the water pressure with the water supply company Do not connect the appliance to the tap or mixing arm of a water heat er e g continuous flow heater pres sure free boiler etc Ensure that the hoses are not kinked and are carefully connected Do not extend...

Страница 55: ...peration recently made settings for the fridge and freezer are shown on the display The compressor starts to work the re frigerant flows through the pipes and a quiet humming sound can be heard The appliance is switched on If the appliance was switched off dur ing the functional check the OF signal appears twice The appliance s interior lighting is switched off 2 If the appliance makes unusual noi...

Страница 56: ...r example in summer the ambient temperature increases select a lower set ting accordingly Freezer Freezer C 18 20 e e e Press the Freezer button 20 until the desired temperature is displayed 14 C 15 C 16 C 17 C 18 C 24 C 23 C 22 C 21 C 20 C 19 C The temperature settings range between 14 C and 24 C The ideal temperature for the freezer is 18 C Fridge Fridge C 4 25 d d d Press the Fridge button 25 u...

Страница 57: ...red food can spoil from insufficient cooling This could lead to a risk of food poisoning when consumed Note that the shelf life of stored food may be shortened due to a rise in the temperature inside the appliance Remove stored food from the appli ance even when only switching off the appliance temporarily and store it in a sufficiently cool place or in an other refrigerating appliance Consume tha...

Страница 58: ...n remove the flip door basket 10 To remove the flip door basket 10 pop out the shelf and pull it out of the holder 10 To reinsert the flip door basket 10 pull out the holder and reinsert the flip door basket 10 Moisture control in the fruit vegetable drawer 31 The glass cover 11 of the fruit vegetable drawers 9 is equipped with moisture control If the ventilation controller 31 in the glass cover 1...

Страница 59: ...tly Clean the surfaces that can come in to contact with food and all accessi ble parts of the outlet system on a regular basis When storing raw meat or fish in the refrigerator put them in suitable con tainers to prevent them from coming into contact with or dripping onto other food If the refrigerating appliance is left empty for long periods switch off defrost clean dry and leave the door open t...

Страница 60: ...Place seal needed food or medicine in the flip door basket 10 Store strong alcohol only standing upright and closed tightly Allow hot food to cool before placing it in the fridge If you intended to refill the fridge with large amounts of food set Super cool about 2 hours before you intend to fill it If you intended to refill the fridge with large amounts of food set Super cool about 2 hours before...

Страница 61: ...ction 16 hours After a malfunction check wheth er the stored food is still edible Con sume thawed and defrosted foods immediately do not refreeze Use only drinking water to make ice cubes CAUTION Risk of injury Improper handling of the appliance mayresultininjury Riskofburnscaused by low temperatures The food and the inside walls of the freezer have a very low temperature Never touch them with wet...

Страница 62: ...this causes the contents to dry out and takes up space Use plastic clips rubber bands or adhe sive tapes to seal Fill liquid containers no more full be cause liquids expand when frozen Do not store any glass or metal contain ers containing liquid These containers could break Only store strong alcohol standing upright and closed tightly Label the frozen food by type quantity amount and expiry date ...

Страница 63: ...ds in the entire freezer Defrosting food Observe the following basic rules when de frosting food To defrost food remove it from the freezer and let it defrost at room temperature or in the fridge compartment To defrost food quickly use the defrost function on your microwave for example Observe the manufacturer s instructions and note that bacteria and germs can form in this way Cook or use thawed ...

Страница 64: ...njury Do not put ice cubes crushed ice or ice lollies straight into your mouth from the freezer Dispensing cold water NOTICE Risk of damage Overheating can result in damage to the ice maker Do not dispense water from the cold water outlet for longer than 3 min utes at a time 33 1 To pour cold water push the vessel against the dispenser guide 33 Cold water will begin to pour into the ves sel 2 Remo...

Страница 65: ... page EN 26 In order to avoid overheating the ice maker s motor the dispensing of ice will stop after about 1 minute In this case wait a moment until the motor has returned to operating tem perature If there are not enough ice cubes in the ice cube container it may not be possible to dis pense any ice If this is the case please wait until fresh ice cubes are produced In order to prevent unpleasant...

Страница 66: ... pressure cleaner Make sure that no water gets into the electrical parts of the appliance Checking and cleaning the door seals The door seals must be checked regularly so that no air can enter the appliance 1 To test them clamp a thin piece of paper in various places The paper should be difficult to pull through at all points 2 If the seal is not uniform everywhere Warm the seal in the appropriate...

Страница 67: ... Danger of explosion Improper handling of the appliance can lead to deflagration or explosion Never use defrosting sprays They can generate explosive gases NOTICE Do not use any means other than those recommended by the manufac turer to speed up defrosting For ex ample do not use any electric heat ing equipment knives or devices with an open flame such as a candle The thermal insulation and the in...

Страница 68: ...itch on the fuse again 3 To quickly cool the fridge and freezer switch on Super freeze and Super cool at the same time see page EN 15 4 Place the frozen food back into the freez er once the freezer has reached a tem perature of 18 C and switch off Super cool and Super freeze 5 Set the desired fridge and freezer temper ature see page EN 14 Cleaning the ice cube con tainer It is possible that ice cu...

Страница 69: ...old a vessel or towel under the water filter 37 to catch any residual water that might flow out 37 36 38 35 39 5 Remove the red safety clips 39 from the hose 35 between the water filter and the appliance and from the hose 38 between the water connection and water filter Remove the hoses 35 and 38 6 Remove the water filter 37 from the wall brackets 36 Insert the new water fil ter 37 into the wall b...

Страница 70: ... the Ice On 18 and Super freeze 20 buttons for 3 seconds Even if the signal is not flashing this step is still necessary before the new water filter can go into operation Water filter data Flow rate 1 9 litres per minute 0 5 gpm Temperature 1 C 38 C Pressure 30 100 psi 207 689 kPa Function Chemical reduction Capacity 3 785 litres Maximum service life 6 months Flushing 5 minutes Certification NSF A...

Страница 71: ...the tubing etc To prevent the formation of a flam mable gas air mixture in the event of a leakage in the refrigeration cir cuit the installation space must have a minimum size of 1 m3 per 8 g of refrigerant in compliance with the EN 378 standard The amount of re frigerant contained in your appliance can be found on the data sheet see Product fiche concerning EU Direc tive no 1060 2010 on page EN 4...

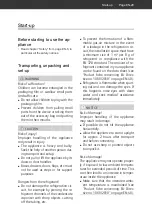
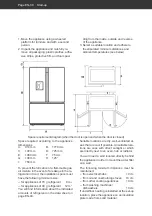
Страница 72: ...llowing minimum size for appliances of 70 g refrigerant 9 m3 for appliances of 90 g refrigerant 12 m3 You will find information about the indicated amounts of refrigerant on the data sheet on page EN 40 Suitable locations are dry well ventilated ar eas that are cool if possible Unsuitable loca tions are ones with direct sunlight or which are directly next to an oven hob or radiator You will need a...

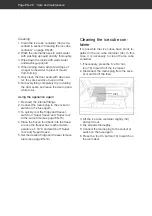
Страница 73: ...ilt the appliance backwards slightly and screw unscrew the screw feet Stand the appliance back up again and check the alignment with a spirit level Repeat the process until the appliance is standing up vertically The appliance should not move when opening the doors Cleaning before use To remove the odour that comes with all new appliances clean the appliance before using it see Cleaning the fridge...

Страница 74: ...age contents Drill Cross head screwdriver Measuring stick Level Pencil Installation must only occur on a suit able non hollow solid wall Special wall plugs or anchors may be necessary for drywall Consult with an expert Install the water filter in an easily accessible location so you can replace it if required Attaching the water filter 36 43 1 Use the screws 36 to attach the water filter s wall br...

Страница 75: ...not use old or previously installed hoses 1 Cut the hose 41 in two pieces to the length required to connect the water con nection water filter and appliance The length of the pieces combined must be less than 5 metres If the hoses combined are longer than 5 metres the ice cube maker and cold water dis penser may not work properly due to insuffi cient water pressure Make sure to cut the hose on a s...

Страница 76: ...firmly attach the hose 35 to the water filter Make sure that the hose is firmly inserted into the water filter so that there are no leaks Do not kink or pinch the hose or lay it over sharp edges 9 Open the water valve for 5 minutes to flush the filter before use The initial dark discoloration of water is normal Connecting the filter to the appli ance inlet The appliance hose is located on the back...

Страница 77: ...or towel under the leak to catch any water that might flow out 3 Loosen the hose connection at the leak 4 Reattach the hose 5 Open the water supply 6 Check the hose connections for leaks once more If the problem persists please contact our Service Centre see page EN 38 Operating the appliance with out a water filter If the tap water in your home is free of parti cles and residue you can operate th...

Страница 78: ...not tilt the refrigerat ing appliance horizontally Allow the appliance to stand upright for approx 2 hours after transport and before connecting This allows the lubricant enough time to flow back into the compressor Insert the mains plug into an easily acces sible socket 220 240 V 50 Hz When you open one of the appliance doors the interior of the appliance is lit up You will find all important inf...

Страница 79: ...gher setting see Setting the tem perature on page EN 14 The appliance doesn t cool suffi ciently Temperature has been set too high Select a lower setting see Setting the tem perature on page EN 14 Door is not tightly closed or door seal is not completely tight See Checking and cleaning the door seals on page EN 24 The appliance is near a heat source Place insulation plate between the applianc es o...

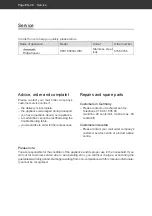
Страница 80: ...r HFD18560A1WDI Stainless steel look 6756 4766 Service Repairs and spare parts Customers in Germany Please contact our technical service Telephone 0 18 06 18 05 00 Landline 20 cents call mobile max 60 cents call Customers in Austria Please contact your mail order company s customer service centre or product advice centre Please note You are responsible for the condition of the appliance and its pr...

Страница 81: ...nsulation have to be proper ly disposed of Refrigerant leakage may cause a fire hazard Until the point of proper disposal ensure that none of the cooling fins or tubes on a cooling appliance are damaged Our contribution to the protec tion of the ozone layer 100 CFC and HFC free refrigerants and foaming agents were used in this appliance This protects the ozone layer and reduces the greenhouse effe...

Страница 82: ...l energy consumption will depend on how the appliance is used and where it is located Storage volume Refrigerator 413 L Storage volume Freezer frost free Star rating 107 L 4 star Power cut safe 16 h Freezing capacity 10 kg 24 h Climate class SN N ST T This appliance is intended to be used at an ambient temperature between 10 C and 43 C Airborne acoustical noise emissions 41 dB A re 1 pW Built in a...

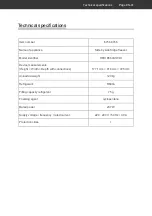
Страница 83: ...er HFD18560A1WDI Device measurements Height Width Depth with connections 1778 mm 914 mm 725 mm Unloaded weight 120 kg Refrigerant R600a Filling capacity refrigerant 75 g Foaming agent cyclopentane Rated power 207 W Supply voltage frequency rated current 220 240 V 50 Hz 0 9 A Protection class I Technical specifications ...

Страница 84: ......

Отзывы: