background image

Kühlschrank

Gebrauchsanleitung

Anleitung/Version:
2101-01167 DE 20220429 
Artikel-Nr.: 
59608308, 41129700
Nachdruck, auch aus zugs-
 wei se, nicht ge stat tet!

HKS18560EDW

HKS18560EDI

Beinhaltet die Montageanleitung für die optionale 
Erweiterung zur Side by Side-Kühl-Gefrier-Kombination.

Содержание 41129700

Страница 1: ...tung Version 2101 01167 DE 20220429 Artikel Nr 59608308 41129700 Nachdruck auch auszugs weise nicht gestattet HKS18560EDW HKS18560EDI Beinhaltet die Montageanleitung für die optionale Erweiterung zur Side by Side Kühl Gefrier Kombination ...

Страница 2: ...ellen DE 19 Grundreinigung DE 22 Türgriff montieren DE 22 Elektrischer Anschluss DE 23 Geräte im Tandem aufstellen DE 24 Fehlersuchtabelle DE 26 Service DE 27 Beratung Reklamation und Bestellung DE 27 Reparaturen und Ersatzteile DE 27 Abfallvermeidung Rücknahme und Entsorgung DE 28 Abfallvermeidung DE 28 Kostenlose Altgeräte Rücknahme DE 28 Entsorgung DE 28 Verpackung DE 29 Produktdatenblatt nach ...

Страница 3: ...Risikograd die wenn sie nicht vermieden wird eine geringfü gige oder mäßige Verletzung zur Folge haben kann HINWEIS Dieser Signalbegriff warnt vor möglichen Sachschäden Symbolerklärung Folgende Symbole finden Sie in dieser Ge brauchsanleitung Dieses Symbol verweist auf nützliche Zusatzinformationen Vorsicht Brandgefahr entflammbare Materialien Definitionen Lebensmittel bezeichnet Nahrungsmittel Zu...

Страница 4: ...schließlich wie in dieser Gebrauchsanleitung beschrieben Jede andere Verwendung gilt als nicht be stimmungsgemäß und kann zu Sachschäden oder sogar zu Personenschäden führen Der Hersteller übernimmt keine Haftung für Schä den die durch nicht bestimmungsgemäßen Gebrauch entstanden sind Sicherheitshinweise In diesem Kapitel finden Sie allgemeine Si cherheitshinweise die Sie zu Ihrem eigenen Schutz u...

Страница 5: ...rmationen hierzu finden Sie auf dem Typschild Die vollständige Trennung vom Stromnetz erfolgt bei diesem Gerät nur durch Ziehen des Netzsteckers aus der Steckdose Gerät daher nur an eine gut zugängliche Steckdo se anschließen damit es im Störfall schnell vom Stromnetz getrennt wer den kann Falls der Netzstecker nach dem An schluss nicht mehr zugänglich ist muss eine allpolige Trennvorrichtung gemäß...

Страница 6: ...d zu Verletzun gen und zu Sachschäden führen Der Anschluss an eine Zeitschaltuhr oder ein separates Fernwirksystem zur Fernüberwachung und steuerung ist unzulässig Ortsveränderliche Mehrfachsteckdo sen oder Netzteile nicht an der Rück seite des Geräts platzieren Risiken im Umgang mit Kältemitteln WARNUNG Brand und Explosionsgefahr Im Kältemittelkreislauf Ihres Gerätes befindet sich das umweltfreund...

Страница 7: ...ft Gemische bilden können Zum Abtauen auf keinen Fall Abtau sprays verwenden Sie können explo sive Gase bilden Brand und Gesundheitsgefahr Die Wärmedämmung und der Innenbe hälter sind kratz und hitzeempfindlich oder können schmelzen oder in Brand geraten Kunststoffe wie sie in der Wärmedäm mung verbaut sind können wenn sie schmelzen oder in Brand geraten gifti ge Dämpfe freisetzen Keine elektrische...

Страница 8: ...siehe Bestimmungsgemäßer Gebrauch auf Seite DE 4 HINWEIS Brandgefahr Unsachgemäßer Umgang mit dem Ge rät kann zu einem Brand und zu Sach schäden führen Gerät nur an eine ordnungsgemäß installierte Schutzkontakt Steckdose anschließen Der Anschluss an eine Steckdosenleis te oder eine Mehrfachsteckdose ist unzulässig Gerät nicht direkt an die Wand stel len und die Mindestabstände einhal ten siehe Ers...

Страница 9: ...erätetür 3 große Türablagen 4 kleine Türablage 5 Türgriff 6 Flaschenablagen in der Gerätetür 7 Schraubfüße 8 Obst und Gemüseschublade 9 Fisch und Fleischschublade 10 Glasablage als Abdeckung für die Fisch und Fleischschublade 11 Flaschenablage 12 Glasablagen 1 3 2 7 8 9 11 10 12 12 Gerät 4 5 6 1 ...

Страница 10: ...0 13 14 15 13 Temperaturanzeigen 14 Anzeige Schnelles Kühlen aktiv 15 Taster zur Einstellung der Temperatur 16 Taster zum Abschalten des Tonsignals bei geöffneter Gerätetür sowie zum Aktivieren und Deaktivieren des Stand by Modus Bedienfeld 16 ...

Страница 11: ...eld leuchten für 3 Sekunden Macht das Gerät störende Geräusche überprüfen Sie den festen Stand und entfernen Sie Gegenstände die auf dem Gerät liegen Standby Modus aktivieren und deaktivieren Das Gerät verfügt über einen Standby Mo dus in dem es zwar nicht in Betrieb aber auch nicht ausgeschaltet ist Um den Standby Modus zu aktivieren drü cken Sie den Taster 16 ca 10 Sekunden lang Ein Tonsignal er...

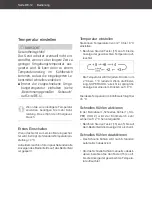
Страница 12: ...alle Anzeigen des Bedienfelds auf das Bedienfeld ist gesperrt Temperatur einstellen Sie können Temperaturen von 2 C bis 8 C einstellen 1 Berühren Sie den Taster 15 so oft bis die Anzeige der gewünschten Temperatur auf leuchtet 8 6 4 3 2 Die Temperatur wird mit jedem Drücken um 2 C bzw 1 C reduziert Wenn die Einstel lung SUPER COOL erreicht ist springt die Anzeige bei erneutem Drücken auf 8 C Die i...

Страница 13: ...sie an beiden Enden ein wenig zusammen und nehmen Sie sie he raus 2 Setzen Sie die kleine Türablage 4 an der gewünschten Position wieder ein Die effizienteste Energienutzung für Ihr Gerät erzielen Sie wenn Sie die Schubladen Glas und Türablagen wie in der Abbildung auf Sei te DE 9 gezeigt kombinieren Piktogramme Auf der Obst und Gemüseschublade 8 fin den Sie folgende Piktogramme Das bedeutet dass ...

Страница 14: ...h in geeigne ten Behältern im Kühlschrank so auf bewahren dass es andere Lebensmit tel nicht berührt oder auf diese tropft Kühlbereich bestücken 12 12 12 12 1 12 12 10 10 10 0 12 12 12 12 12 12 8 8 8 8 8 11 11 3 3 3 3 3 3 6 6 6 6 6 4 4 4 Kombinieren Sie die Schubladen Glas und Türablagen wie in der Abbildung auf Seite DE 14 gezeigt um die effizienteste Energienutzung für Ihr Gerät zu erzielen Eine...

Страница 15: ...isch und Fleischschublade 9 oder auf der Glasablage 10 über der Fisch und Fleischschublade 9 Dort ist die Tempe ratur am niedrigsten Lagern Sie hochprozentigen Alkohol nur stehend und fest verschlossen Lassen Sie warme Lebensmittel abkühlen bevor Sie sie in den Kühlbereich stellen Die Temperaturen im Gerät und damit der Energieverbrauch können anstei gen wenn die Gerätetür 2 häufig oder lan ge geö...

Страница 16: ...ächen an Empfehlenswert sind Allzweckreiniger mit einem neutralen pH Wert Türdichtungen und Geräteteile aus Kunststoff sind empfindlich gegen Öl und Fett Verunreinigungen mög lichst schnell entfernen Nur weiche Tücher verwenden Türdichtungen kontrollieren und reinigen Die Türdichtungen müssen regelmäßig kon trolliert werden damit keine warme Luft in das Gerät eindringt 1 Klemmen Sie zur Prüfung ein...

Страница 17: ...s 7 Reinigen Sie alle Teile in lauwarmem Spülwasser Trocknen Sie danach alles gründlich ab 8 Wischen Sie den Innenraum mit warmem Wasser und Spülmittel aus 9 Geben Sie beim Nachwischen etwas Es sig ins Wasser um Schimmelbildung vor zubeugen 10 Wischen Sie den Innenraum trocken 11 Reinigen Sie die Türdichtungen nur mit klarem Wasser sie sind empfindlich ge gen Öl und Fett 12 Setzen Sie die Glasabla...

Страница 18: ... Erstinbetriebnahme auf Sei te DE 19 2 Entfernen Sie alle Verpackungsteile Kunst stoffprofile Klebestreifen und Schaumpols ter 3 Prüfen Sie ob die Lieferung vollständig ist 4 Kontrollieren Sie ob das Gerät Transport schäden aufweist 5 Sollte die Lieferung unvollständig sein oder das Gerät einen Transportschaden aufwei sen nehmen Sie bitte Kontakt mit unserem Service auf siehe Seite DE 27 WARNUNG S...

Страница 19: ...es Verdampfers mit scharfen Gegenständen Abknicken von Rohrleitungen usw Herausspritzendes Kältemittel ist brennbar und kann zu Augenschäden führen Spülen Sie in diesem Fall die Augen unter klarem Wasser und rufen Sie sofort einen Arzt HINWEIS Beschädigungsgefahr Unsachgemäßer Umgang mit dem Ge rät kann zu Beschädigungen führen Das Kühlgerät möglichst nicht in die Horizontale kippen Zum Auspacken ...

Страница 20: ... Ungünstig sind Standorte mit direkter Sonneneinstrahlung oder unmittelbar ne ben einem Ofen Herd oder Heizkörper 3 Wenn am Aufstellungsort eine Fußbo denheizung installiert ist stellen Sie das Kühlgerät auf eine Isolierplatte aus festem Material Sorgen Sie dafür dass die Um gebungstemperaturen der Klimaklasse des Geräts entsprechen siehe Bestimmungs gemäßer Gebrauch auf Seite DE 4 4 Überprüfen Si...

Страница 21: ...Zone N Dieses Kühlgerät ist für die Verwendung bei Umge bungstemperaturen von 16 C bis 32 C bestimmt subtropische Zone ST Dieses Kühlgerät ist für die Verwendung bei Umge bungstemperaturen von 16 C bis 38 C bestimmt tropische Zone T Dieses Kühlgerät ist für die Verwendung bei Umge bungstemperaturen von 16 C bis 43 C bestimmt Sinkt die Raumtemperatur wesentlich darunter schaltet sich das Gerät nich...

Страница 22: ...t in Betrieb nehmen soll ten Sie den Türgriff 5 montieren 17 2 1 Schrauben Sie die beiden Blindstopfen 17 aus der Seite der Gerätetür 2 18 5 2 2 Schrauben Sie den Türgriff 5 mit den beiliegenden Schrauben 18 an die Gerä tetür 2 19 21 20 22 22 3 Setzen Sie die Zierblenden 19 so auf die Griffgelenke 20 dass jeweils der Ha ken 21 auf der Innenseite der Zierblen de 19 in die Aufnahme 22 im Griffge len...

Страница 23: ...vorge schaltet sein ziehen Sie gegebe nenfalls eine Fachkraft zurate siehe Service auf Seite DE 27 Netzanschlussleitung nicht knicken oder klemmen und nicht über scharfe Kanten legen Die Folge kann ein Ka belbruch sein VORSICHT Brandgefahr Unsachgemäßer Umgang mit dem Ge rät kann zu einem Brand und zu Sach schäden führen Gerät nur an eine ordnungsgemäß installierte Schutzkontakt Steckdose anschlie...

Страница 24: ...für das Verbindungsstück Gerätevorderseite 25 27 8 Schraube zur Befestigung des Verbindungsstücks auf der Gerätevor derseite 25 4 2 und des Verbindungsstücks 25 und der obe ren Abdeckung 23 4 28 2 Schrauben zur Befestigung der Verbindungsstücke an der Geräte rückseite 24 29 1 Dichtungsprofil 1 Stellen Sie die beiden Geräte nebeneinan der auf und richten Sie sie mithilfe der je weiligen Schraubfüße...

Страница 25: ...23 und das Verbin dungsstück 25 fest 29 5 Bringen Sie das Dichtungsprofil 29 an 31 6 Hebeln Sie mithilfe eines Bindfadens oder eines kleinen Schraubendrehers die Blindstopfen 31 an den Vorderseiten der Geräte heraus 27 7 Verbinden Sie die Geräte an der Vordersei te mit dem anderen Verbindungsstück 25 und 2 der Schrauben 27 8 Bringen Sie die Abdeckblende 26 für das Verbindungsstück 25 an 28 24 9 Ve...

Страница 26: ...Höhere Einstellung wählen siehe Temperatur einstellen auf Seite DE 12 Gerät kühlt nicht ausreichend Temperatur zu hoch eingestellt Niedrigere Einstellung wählen siehe Temperatur einstellen auf Seite DE 12 Tür nicht fest verschlossen oder Türdichtung liegt nicht voll auf Siehe Türdichtungen kontrollieren und reinigen auf Seite DE 16 Gerät steht in der Nähe einer Wärmequelle Isolierplatte zwischen d...

Страница 27: ...eiden Wenden Sie sich an un seren Service Ersatzteile stehen für eine Mindestdauer von sieben Jahren nach dem Inverkehrbringen des letzten Exemplars des Modells zur Ver fügung Türdichtungen stehen für einen Zeit raum von zehn Jahren zur Verfügung Kunden in Deutschland Wenden Sie sich an unseren Technik Service Telefon 040 36 03 31 50 Kunden in Österreich Wenden Sie sich bitte an das Kundencenter o...

Страница 28: ... Verbraucher bis zu drei Altgeräte einer Geräteart bei einer Sam melstelle eines Vertreibers unentgeltlich ab geben ohne dass dies an den Erwerb eines Neugeräts geknüpft ist Allerdings darf keine der äußeren Abmessungen des Altgerätes 25 cm überschreiten Entsorgung Elektro Altgeräte umweltgerecht entsorgen Elektrogeräte enthalten Schad stoffe und wertvolle Ressourcen Jeder Verbraucher ist deshalb ...

Страница 29: ... und Um welt haben Kleben Sie daher bei lithiumhalti gen Batterien und Akkus vor der Entsorgung die Pole ab um einen äußeren Kurzschluss zu vermeiden Batterien und Akkus die nicht fest im Gerät verbaut sind müssen vor der Entsorgung ent fernt und separat entsorgt werden Batterien und Akkus bitte nur in entladenem Zustand abgeben Verwenden Sie wenn möglich Akkus anstelle von Einwegbatterien gekennz...

Страница 30: ...hnische Daten Technische Daten Bestellnummer 59608308 41129700 Gerätebezeichnung Kühlschrank Modellkennung HKS18560EDW HKS18560EDI Gerätemaße Höhe Breite Tiefe 1850 mm 595 mm 618 mm Leergewicht 59 kg Kältemittel R600a Kältemittel Füllmenge 42 g Schaummittel Zyklopentan Leistungsaufnahme 98 W Versorgungsspannung Frequenz Nennstrom 220 240 V 50 Hz 0 6 A Schutzklasse I Klimaklasse SN N ST T Dieses Ge...

Страница 31: ...rsion 2101 01167 EN 20220429 Item no 59608308 41129700 Reproduction even of ex cerpts is not permitted HKS18560EDW HKS18560EDI Contains the assembly instructions for the optional extension of the side by side fridge freezer combination ...

Страница 32: ... Cleaning before use EN 22 Attaching the door handle EN 22 Electrical connections EN 23 Setting up appliances in tandem EN 24 Troubleshooting table EN 26 Service EN 27 Advice complaints and orders EN 27 Repairs and spare parts EN 27 Waste prevention free return and disposal EN 28 Waste prevention EN 28 Free return of old electrical appliances EN 28 Disposal EN 28 Packaging EN 29 Product fiche conc...

Страница 33: ...AUTION This signal term indicates a hazard with a low level of risk which if not avoided could result in minor or moderate injury NOTICE This signal term warns against possible dam age to property Explanation of symbols The following symbols can be found in this user manual This symbol refers to useful additional information Caution Fire hazard flammable materials Definitions Food refers to foods ...

Страница 34: ... result in damage to property or even personal injury The manufacturer accepts no liability for damage caused by im proper use Safety notices In this chapter you will find general safety notices that you must always observe for your own protection and that of third parties Please also observe the warning notices in the individual chapters Risks to children and certain groups of individuals WARNING...

Страница 35: ...an easi ly accessible socket so that it can be quickly disconnected from the power supply in the event of malfunction Since all poles of the appliance can not be disconnected from the mains via an accessible disconnecting de vice an all pole disconnecting device in accordance with overvoltage cate gory III must be connected within the house installation with at least 3 mm contact clearance consult...

Страница 36: ...ance s refrigeration circuit contains the environmentally friendly but flammable and as a mixture of air and gas explosive refrigerant R600a isobutane Do not use mechanical devices or oth er means to accelerate the defrost ing process other than those recom mended by the manufacturer Mechanical intervention in the refrig eration system must only be carried out by authorised specialists Do not damag...

Страница 37: ...es if they melt or catch fire Do not use any electric heating equip ment knives or devices with an open flame such as candles Do not use electrical appliances in side the food storage compartments of the appliance unless they are of the type recommended by the manu facturer Keep the appliance away from open flames and hot surfaces Risks associated with using refrigerators WARNING Fire hazard Improper...

Страница 38: ... socket Do not connect to a multi socket ex tension cable or a multi socket plug Do not position the appliance direct ly against the wall and adhere to the minimum distances specified see First use on page EN 19 Risk of damage to property Water expands when frozen and can burst the container Do not store glass or metal contain ers containing water lemonade beer etc The thermal insulation and the in...

Страница 39: ... light 2 Appliance door 3 Large door shelves 4 Small door shelf 5 Door handle 6 Bottle racks in the appliance door 7 Screw feet 8 Fruit vegetable drawer 9 Fish meat drawer 10 Glass shelf as a cover for the fish meat drawer 11 Bottle rack 12 Glass shelves 1 3 2 7 8 9 11 10 12 12 Appliance 4 5 6 1 ...

Страница 40: ... 14 15 13 Temperature indicators 14 Quick refrigerating indicator 15 Button for setting the temperature 16 Button for deactivating the beeping that sounds if the door is left open as well as for activating and deactivating standby mode Control panel 16 ...

Страница 41: ...cators on the control panel illuminate for 3 seconds If the appliance is making unusual noises check that it is stable and re move any objects that may be on top of it Activating and deactivating standby mode The appliance has a standby mode where it is not in use but not switched off To activate standby mode press the 16 button for approx 10 seconds A beep will sound and the indicator for the sel...

Страница 42: ... a couple of seconds the control panel is locked Setting the temperature You can set the temperature to between 2 C and 8 C 1 Touch the button 15 repeatedly until the indicator for the desired temperature lights up 8 6 4 3 2 The temperature is reduced by 2 C or 1 C respecively each time you press the button If the setting reaches SUPER COOL the indicator will return to 8 C next time you press the ...

Страница 43: ... 4 press both ends together slightly and pull it out 2 Place the small door shelf 4 back into the desired position You will achieve the most efficient use of en ergy for your appliance if you combine the drawers glass shelves and door shelves as shown in the figure on page EN 9 Pictograms The following pictograms can be found on the fruit vegetable drawer 8 This means that you can store fresh frui...

Страница 44: ... in the refrigerator so that it is not in contact with or drip onto other food Filling the fridge 12 12 12 12 1 12 12 10 10 10 0 12 12 12 12 12 12 8 8 8 8 8 11 11 3 3 3 3 3 3 6 6 6 6 6 4 4 4 Combine the drawers glass shelves and door shelves as shown in the diagram on page EN 14 to achieve the most efficient use of energy for your appliance A temperature setting that is too high or too low can red...

Страница 45: ...h meat draw er 9 This is where the temperature is lowest Only store strong alcohol standing upright and tightly closed Allow hot food to cool before placing it in the fridge The temperatures within the appliance and therefore its energy consumption may increase if the appliance door 2 is fre quently opened or kept open for long peri ods or if the ambient temperature exceeds the stipulated minimum ...

Страница 46: ...urfaces All purpose cleaners with a neutral pH are recommended Door seals and plastic parts are sen sitive to oil and grease Remove con taminants as quickly as possible Only use soft cloths Checking and cleaning door seals The door seals must be checked regularly so that no air can enter the appliance 1 To test them clamp a thin piece of paper in various places between the door seal and frame of t...

Страница 47: ... 3 and 4 simply push them upwards out of the holders 7 Clean all of the parts in lukewarm soapy water Then dry everything thoroughly 8 Wipe down the inside with warm water and washing up liquid 9 When wiping clean add a few drops of vinegar to the water to prevent mould from forming 10 Wipe the interior dry 11 Clean the door seals with clean water only they are sensitive to oil and fat 12 Replace ...

Страница 48: ...ble place and unpack it see First use on page EN 19 2 Remove all parts of the packaging plastic profiles tape and foam padding 3 Check that the delivery is complete 4 Check whether the appliance was dam aged during transit 5 If the delivery is incomplete or the appli ance has been damaged during transport please contact our service department see page EN 27 WARNING Risk of electric shock Touching ...

Страница 49: ...rigerant is flammable when spurt ing out and can damage the eyes In this case rinse your eyes in clean wa ter and seek medical assistance im mediately NOTICE Risk of damage Improper handling of the appliance may result in damage If possible do not tilt the cooling ap pliance horizontally Do not use sharp or pointed objects to unpack it When unpacking the appliance nev er damage the insulation mater...

Страница 50: ...25 mm Minimum distances and room size 3 If underfloor heating is installed at the set up location place the cooling appliance on an insulation plate made from solid mate rial Make sure that the ambient tempera tures match the climate category of the ap pliance see Intended use on page EN 4 4 Check the position of the appliance with a spirit level ...

Страница 51: ...emperate zone N This cooling appliance is designed for use at ambient temperatures of 16 C to 32 C subtropical zone ST This cooling appliance is designed for use at ambient temperatures of 16 C to 38 C tropical zone T This cooling appliance is designed for use at ambient temperatures of 16 C to 43 C If the room temperature drops significantly below this the appliance will not switch on as often Th...

Страница 52: ... Attach the door handle 5 before starting to use the appliance 17 2 1 Unscrew both blind plugs 17 from the side of the appliance door 2 18 5 2 2 Screw the door handle 5 to the appliance door 2 using the screws provided 18 19 21 20 22 22 3 Place the decorative covers 19 on the handle joints 20 so that the hook 21 on the inside of each cover 19 engages in the mount 22 in the handle joint 20 19 4 The...

Страница 53: ... at least 3 mm contact clearance consult a qualified professional if necessary see Ser vice on page EN 27 Do not kink or pinch the supply cord or lay it over sharp edges This can re sult in a break in the cable CAUTION Fire hazard Improper handling of the appliance can lead to fire and property damage Connect the appliance only to a properly installed and earthed elec tric socket Do not connect to a...

Страница 54: ...ce 26 1 Cover panel for the connecting piece for the front of the appliance 25 27 8 Screw to secure the connecting piece to the front of the appliance 25 4 2 and the connecting piece 25 and the upper cover 23 4 28 2 Screws to secure the connecting pieces to the back of the appli ance 24 29 1 x seal profile 1 Place the two appliances next to each other and use the screw feet on each appliance to en...

Страница 55: ...to attach the upper cov er 23 and the connecting piece 25 29 5 Attach the seal profile 29 31 6 Use a string or a small screwdriver to re move the blind plugs 31 on the front of the appliances 27 7 Then connect the appliances at the front using the other connecting piece 25 and two of the screws 27 8 Attach the cover panel 26 for the connect ing piece 25 28 24 9 Then connect both appliances at the ...

Страница 56: ...oo low Select a higher setting see Setting the temperature on page EN 12 The appliance doesn t cool sufficiently Temperature has been set too high Select a lower setting see Setting the temperature on page EN 12 Door not tightly closed or door seal is not completely tight See Checking and cleaning the door seals on page EN 16 The appliance is near a heat source Place insulation plate between the a...

Страница 57: ...ving your defec tive appliances repaired Please contact our Service regarding this Spare parts are available for a minimum peri od of seven years after the final version of the model has been placed on the market Door seals are available for a period of ten years Customers in Germany Please contact our Technical Service Phone 49 0 40 36 03 31 50 Customers in Austria Please contact your mail order ...

Страница 58: ...lectrical appliances of the same type to a distributor s collection point for free with out having to purchase a new electrical ap pliance In this case however the old appli ances external dimensions may not exceed 25 cm Disposal Disposing of old electrical devices in an environmentally friendly manner Electrical appliances contain harm ful substances as well as valuable resources Every consumer i...

Страница 59: ...to tape off the poles of lithium batteries and rechargeable batteries before disposing of them to prevent an exter nal short circuit Before disposing of the appliance batteries and rechargeable batteries which are not permanently built into the appliance must be removed and disposed of separately Please only dispose of batteries and re chargeable batteries in a discharged state If possible use rec...

Страница 60: ...echnical specifications Item number 59608308 41129700 Name of appliance Refrigerator Model identifier HKS18560EDW HKS18560EDI Device measurements Height Width Depth 1850 mm 595 mm 618 mm Unloaded weight 59 kg Refrigerant R600a Filling capacity refrigerant 42 g Foaming agent cyclopentane Rated power 98 W Supply voltage frequency rated current 220 240 V 50 Hz 0 6 A Protection class I Climate class S...

Отзывы: