background image


Hansa C27EU O&M Manual 

– OM-023 Revision A 16/10/19 

© Hansa Chippers 2019 


Feeding material 

Cuts and scrapes 

Wear tight fitting safety gloves 
Wear tight fitting long sleeves and pants to cover bare skin 
when operating the machinery 


Weight of the chipper 

Straining, crushing 

Place the machinery on level ground  


Do NOT


attempt to move the machinery up/down 

slopes unless is attached to a towing vehicle 


Petrol, oil, grease 

Poisoning, skin irritation, 
harmful vapours 

Take care when handling petrol, oil and grease  
Wash skin if contaminated with petrol, oil or grease 


Do NOT

 refuel the chipper in enclosed areas 

Towing safety 


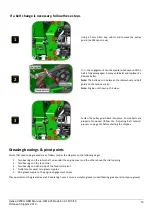
Rotate the discharge chute to face the opposite direction of the towing vehicle before towing and lock into position. 


Lock the feed table in the up position. 


Do not exceed maximum towing speed of 90km/hr. 


Connect the tow coupling to the towing vehicle (check the ball dimensions are the same as the coupling).  


Connect safety chain with shackle.  


If the machine is fitted with brakes, check handbrake is off and road brakes are on by removing the reversing lever.  


Plug in lights and check they are operational. 


Check wheel nuts and axle U-bolts periodically to make sure they are secure. 


Ensure the jockey wheel is in the up position and locked away during transport. 


Ensure the rotating assembly is positioned facing forwards (with the engine at the front, feed chute at the rear) and the 
chassis rotation locking pins are down in the locked position. 


Operation


The chipper is self-feeding and has a large inlet opening.  It can process: 


Prunings, stalks, vines, leaves, roots and vegetable matter, paper and cardboard  


Freshly cut material is better to process than dry material 


Maximum capacity is 160 mm diameter branches 

It is recommended to keep a wooden stick handy, approx. 60 mm diameter x 1000 mm long for: 


Pushing in short, brushy and very leafy materials  


Keeping the inlet table clear 

Outlet chute adjustment 

The  C27  is  fitted  with  a  freely  rotating  outlet  chute,  allowing  the  operator  to  precisely 
control  the  direction  of  material  discharge  from  the  machine.  The  chute  can  easily  be 
adjusted by undoing the clamping bolt, adjusting the outlet chute direction as needed, then 
doing the clamping bolt back up. 

Additionally, the end of the outlet chute is fitted with two deflector plates that you  can 
adjust to control the angle and distance that material is discharged. A wingnut is located on 
the side of the upper deflector to lock it in place.  

360-degree turntable adjustment 

The chipping components of the C27 are coupled to the chassis via 
a freely rotating turntable. This allows the operator to feed material 
into the chipper from any direction, eliminating the time and effort 
spent  repositioning  the  machine,  and  allowing  you  to  use  the 
chipper while still being coupled to the tow vehicle. To reposition 
the turntable, lift the locking pins on each side of the chipper, rotate 
the  chipper,  then  resecure  the  pins.  Check  the  table  is  locked 
properly by ensuring each pin locks into one of the 24 positions on 
the base of the turntable. 

Locking pin 

in the ‘locked’ 

position 

Содержание C27

Страница 1: ...refer to www hansaproducts com for a current list of our authorised dealers and contact details relevant to your territory Operation maintenance and safety manual Original Instructions All operators must fully read and understand this operator s manual before using the chipper Keep this manual for future reference ...

Страница 2: ...HOUR METER TACHOMETER 5 EMERGENCY STOP 6 CHECKLIST BEFORE OPERATION 6 SAFE SETUP PROCEDURES 6 SAFE OPERATING PROCEDURES 7 STARTING PROCEDURE 8 SHUTDOWN PROCEDURE 9 TROUBLESHOOTING 10 WHAT TO DO IF 10 MAINTENANCE SERVICE 11 KNIFE RE SHARPENING AND KNIFE REPLACEMENT 11 ANVIL ADJUSTMENT 14 BELT TENSION 14 BELT REPLACEMENT 15 GREASING BEARINGS PIVOT POINTS 16 HYDRAULIC SYSTEM 17 ENGINE SERVICING 17 OT...

Страница 3: ...d hire rental companies Do NOT use the chipper for any other purpose Organic wastes include Prunings stalks roots vegetable matter hay grass bark Branches Palm fronds Dead and hard timbers Note these will dull the knives faster Paper or cardboard Do NOT process Flax root balls Soil bones sand grit stones metal If you have any questions contact your authorised dealer Do NOT exceed 160 mm branch dia...

Страница 4: ...Hansa C27EU O M Manual OM 023 Revision A 16 10 19 Hansa Chippers 2019 2 Engine components ...

Страница 5: ...he eyes Respiratory irritation Wear safety glasses Process freshly cut materials and or wear a dust mask Exhaust Fumes Respiratory irritation Place the chipper in a manner that the operator or onlookers are not exposed to direct exhaust fumes Hot Exhaust Heat burns Keep bare hands and other body parts a safe distance away from hot exhaust Fire Heat burns Clear any build up of chipping debris aroun...

Страница 6: ...the locked position Operation The chipper is self feeding and has a large inlet opening It can process Prunings stalks vines leaves roots and vegetable matter paper and cardboard Freshly cut material is better to process than dry material Maximum capacity is 160 mm diameter branches It is recommended to keep a wooden stick handy approx 60 mm diameter x 1000 mm long for Pushing in short brushy and ...

Страница 7: ...ery The feed roller will only work once the engine is turned on and the engine has reached full throttle after engaging the rotor If the green LED light on the AFC controller is flashing this indicates the feed roller isn t turning When this changes to a solid green light when the engine reaches maximum throttle of 3000RPM the feed roller will be operational The AFC has 19 different pre set positi...

Страница 8: ...ood condition Check all labels are legible Replace if necessary contact Hansa for replacements Refer to maintenance section for more details Safe setup procedures Ensure all pre operation checks have been done Setup the work site so there is no danger to traffic or public and provide adequate warnings Ensure the chipper is positioned on level ground Ensure the feed roller control bar is not jammed...

Страница 9: ...achinery Prune to a size that suits the chipper s capabilities Pre cut side branches The branch will self feed more efficiently Keep the engine clean of debris and other accumulations This prevents damage to the engine or possible fire Feed limbs and branches through butt end first leaving the bushy head on This helps guide the limb down the inlet chute It reduces spinning and the occurrence of ej...

Страница 10: ... or pieces of metal into the chipper This will damage the sharp edge of the cutting knives and can rebound and injure the operator Put root balls and dead wood into the chipper This dulls the knives quickly Overload the chipper If the cutting rotor is slowing down feed the material in slower Transport the chipper while the engine is running Tamper with the engine governor settings on the chipper T...

Страница 11: ... and slowly engage the rotor by winding the engagement handle in the clock wise direction until it comes to a stop This should be done slowly over a period of 20 seconds to allow enough time for the cutting rotor to pick up speed without stalling the engine Increase throttle to full for chipping move the throttle lever to the left most position Note Engine must run at full throttle for the automat...

Страница 12: ...e ensure rotor has completely stopped remove debris then close and lock the outlet chute Outlet chute is blocked Outlet is pasted with wet leafy material Feed hard dry material in with softer material Turn the engine off disconnect the spark plug wire and ensure rotor has completely stopped Open up the outlet chute and clear blockage The material is ejected in long strips The knives and or anvil m...

Страница 13: ...How do I know that the knives need re sharpening Chipper is vibrating excessively when processing material Chipper is making more noise than usual when processing material Rotor RPM is dropping more quickly than usual Material comes out in long strips How to re sharpen the knives If you don t have a surface grinder or are unsure how to re sharpen the knives contact a professional saw doctor or Han...

Страница 14: ...three bolts that you must remove on each knife to do so Be careful not to drop the bolts or knives into the chipper A stick magnet can be used to retrieve them if this does occur Measure the width of the knife and check that it will be at least 96 mm after sharpening If the knives will be shorter than 105 mm then the knives should be replaced Please contact your nearest Hansa dealer Sharpen the kn...

Страница 15: ...er Now tighten or loosen the two adjustment bolts Tightening these bolts will cause the anvil mounting plate to slide further along the slotted holes Ensure you tighten the two bolts evenly to avoid setting the anvil on an angle Once the correct anvil position has been set ensure the locking nuts on the adjustment bolts are tightened Additionally ensure the clamping nuts are torqued to 44 Nm Remov...

Страница 16: ...e the gap between the knife holding block and the edge of the anvil is 4 5 mm If not then the anvil can be adjusted via the two adjustment bolts between the clamping bolts If the other side of the anvil hasn t been used yet rotate the anvil 180 degrees and place it back on the feed roller housing wall If both sides of the anvil are blunt remove the anvil and replace it with a new one Contact Hansa...

Страница 17: ...nded tension for the belt drive when in the fully engaged position Note For new belts allow another half revolution as the tension will need to be increased after belt wear Using two 24 mm spanners screw the two M16 adjustment nuts downwards until they touch the adjustment block Then turn the top nut clockwise and the bottom nut anti clockwise simultaneously to lock the nuts in place The new belts...

Страница 18: ...e Ensure belts are properly tensioned follow the Adjusting belt tension process on page 15 before starting the chipper Greasing bearings pivot points Points that need to be greased are as follows as per the diagram on the following page 1 Two bearings on the rotor shaft one under the engine cover and the other above the inlet opening 2 Two bearings on the feed roller 3 Two bearings on either side ...

Страница 19: ...nd U bolts are fastened correctly Check and repack wheel bearings with grease every 12 months Check air pressure in tires Inflate to pressure as indicated on the tire Check safety chains and hitch Rotor bearing replacement Replacing rotor bearing on inlet chute side of rotor 1 Remove the four bearing guard buttonhead screws using an 8mm Allen key 2 Remove two grub screws in the bearing 3 Remove M1...

Страница 20: ...or 100 250 500 or 800 Yearly As req Service Daily Weekly Biannually Engine oil change initial change Initial Hydraulic oil filter initial replacement Initial Belt tension check Initial Engine oil level check Air cleaner element clean Bearings grease Engine engagement rod grease Outlet swivel grease Knives check sharpen or replace Belt guarding remove and clean chip build up Drive belts tension che...

Страница 21: ...P Kohler ECH749 Type of fuel Petrol Capacities Fuel tank 23 L Hydraulic oil tank 20 L Chassis Frame description 75 x 50 x 3 mm RHS Wheels 13 wheels Cutting System Disc speed 1800 RPM Disc diameter 650 x 20 mm Shaft diameter 50 mm Knives Two Feed System Feed opening 330 x 178 mm 13 x 7 Chipping capacity 160 mm 6 5 Feed table height 700 mm Feed table length 1550 mm Inlet chute opening 960 x 650 mm R...

Страница 22: ...anty is available to domestic non commercial and commercial customers excluding commercial customers in the business of plant equipment hire All HANSA products that have not complied with the Extended Warranty registration and maintenance requirements are entitled to the Non Registered warranty period set out below Any authorised HANSA dealer is further authorised to repair or replace any part whi...

Страница 23: ...ou purchased your HANSA product Conditional Warranty This is a HANSA extended warranty period for products that are Purchased from an authorised HANSA Dealer Registered at the time of sale through the Hansa Chippers website www hansachippers com registration Serviced by a HANSA Dealer in accordance with the Hansa service schedule using genuine HANSA parts Meeting all other warranty requirements Wa...

Страница 24: ...eneral machine safety and inlet chute considerations Side of inlet chute both sides Inlet chute safety Inside of inlet table both sides Rotor engagement control Belt guard next to engagement arm Weekly service checks Rotor cover back Feed direction control button Below button on inlet table one of both sides ...

Страница 25: ...6 10 19 Hansa Chippers 2019 23 Feed roller control Feed control box on inlet table one on both sides Stopping procedure Side of feed roller cover Starting procedure Side of feed roller cover Pulley guard safety x2 Top belt guard Side belt guard ...

Страница 26: ...M Manual OM 023 Revision A 16 10 19 Hansa Chippers 2019 24 Rotor and housing safety Rotor cover top face Outlet chute and deflector safety labels Outlet chute Guaranteed sound power level label Lower swing arm guard ...

Страница 27: ...4 EC is as follows Hansa C27 123 dB A relative to 1pW The wood chipper s sound pressure level at the operator s position is measured in accordance with Directive 2000 14 EC is as follows Hansa C27 103 dB A The values stated above are subject to the common uncertainty of the measuring method and the estimated variation in a product series for the type of machine Detailed information about the measu...

Страница 28: ... chipper Product model C27 Serial number Serial Manufacture The object of the declaration described above is in conformity with the relevant Union harmonisation legislation Machinery Directive 2006 42 EC Noise emissions Directive 2000 14 EC Electromagnetic Compatibility Directive 2014 30 EU Restriction of Hazardous Substances Directive 2011 65 EU Waste Electrical and Electronic Equipment Directive...

Отзывы: