background image

35

English

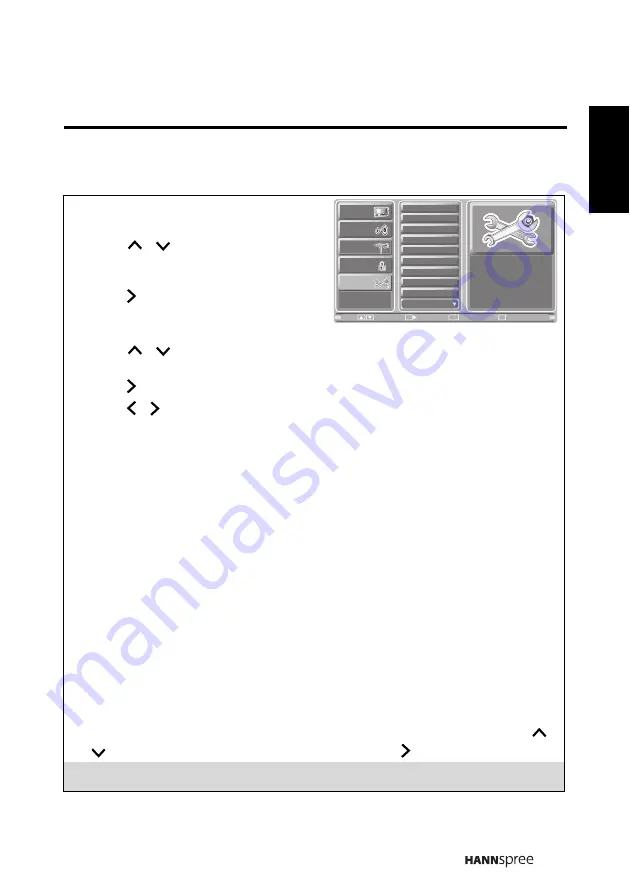
3.6 Adjusting Setup Settings

1

Press MENU to enter the OSD Main 
Menu screen.

2

Press 

 / 

 on the remote control or 

CH

S

 / 

CH

T

 on the control panel to select 

Setup menu.

3

Press  

OK 

on the remote control or 

INPUT

 on the control panel to enter the 

Setup menu.

4

Press 

 / 

 on the remote control or 

CH

S

 / 

CH

T

 on the control panel to select 

an item.

5

Press  

OK

 on the remote control or 

INPUT

 on the control panel to enter the item.

6

Press   /   on the remote control or 

VOL+

VOL-

 on the control panel to change 

the scales or press 

OK

 on the remote control or 

INPUT

 on the control panel to mark 

an item.

7

Press 

RETURN

 to return to the Setup menu.

8

Press 

MENU


to exit the Setup menu.

9

The Setup menu can be used to adjust the 

Setup Wizard

,

 OSD Language

OSD 

TIme, Clock Mode

Clock Set

Time Zone

Sleep Time

Vivid Motion

CC Mode

Analog CC

, and 

CC Style 

settings. Clock Set is only available for adjustments when 

Clock Mode is set to 

Manual

; Clock Mode can be set to 

Auto

 or 

Manual

.

• Setup Wizard can be used to set up 

OSD Language

Clock Mode

Time Zone

TV RF Source

, and 

Channel Scan

.

• The five available OSD languages are: 

English

Spanish

French

Traditional 

Chinese

, and 

Simplified Chinese

.

• OSD Time can be set to 

10 secs

,

 20 secs

30 secs

,

 and 60 secs

.

• The Time Zone can be set to 

Eastern

,

 Central

,

 Mountain

,

 Pacific

,

 Alaska

, and


Hawaii.

• The Sleep Time can be set to 

Sleep


Off

,

 15 mins, 30 mins

,

 45 mins, 60 mins

,

 90 

mins

,


and

 120 mins.

• The Vivid Motion can be set to 

Off

Low

Medium

, and 

High

.

10

To change settings in 

CC Mode

Analog CC

Digital CC

, and 

CC Style

, press 

 / 

 on the remote control to select the items and press   / 

OK

 to activate the item.

Note:
The items available on the OSD may vary depending on the input signal source.

Picture

Audio

Channel

V-CHIP

Setup

Setup Wizard

OSD Language

OSD Time

Clock Mode

Clock Set

Time Zone

Sleep Time

Vivid Motion

CC Mode

Next Page

Exit

Return

Enter

OK

Menu

Move

Return

Содержание ST55FMUR

Страница 1: ...S_ST55F_UM_US_V01_H 55 Liquid Crystal Display Television Téléviseur à Écran à Cristaux Liquides TV de Pantalla de Cristal Líquido ...

Страница 2: ...tions 22 2 1 1 Power Connection 22 2 1 2 Connecting an Antenna or Cable TV 22 2 2 Connecting External Devices 23 2 2 1 Connecting External Earphones 23 2 2 2 Connecting to AV Devices 24 2 2 3 Connecting a VCR Set top box DVD Player Using Video Inputs 25 2 2 4 Connecting a PC using VGA 26 2 2 5 Connecting a PC using DVI 26 2 2 6 Connecting HDMI 27 2 2 7 Connecting USB 27 2 3 Using the TV 28 2 3 1 T...

Страница 3: ...ttings 35 4 Troubleshooting 36 5 Specifications 37 6 Appendix Remote Control Guide 39 6 1 Introduction 39 6 1 2 Setting Program Codes 39 6 1 3 Searching Codes 40 6 1 4 Setting Volume Lock 41 6 1 5 Setting Channel Lock 41 6 1 6 Factory Setting Mode 42 6 1 7 Description 44 6 2 Other Descriptions 44 6 2 1 Double Clicking 44 6 2 2 Buttons Information 44 6 2 3 Power out Protection Capability 44 6 3 Com...

Страница 4: ...pment does cause harmful interference to radio or television reception which can be determined by turning the equipment off and on the user is encouraged to try to correct the interference by one or more of the following measures Reorient or relocate the receiving antenna Increase the separation between the equipment and receiver Connect the equipment into an outlet on a circuit different from tha...

Страница 5: ...ING This symbol is used to alert users to pay attention to important descriptions regarding usage maintenance repair and additional important information related to this TV CAUTION This symbol is used to alert users to the risk of electric shocks due to dangerous and uninsulated components ...

Страница 6: ...o dripping or splashing and no objects filled with liquids such as vases shall be placed on the apparatus CAUTION These servicing instructions are for use by qualified service personnel only To reduce the risk of electric shock do not perform any servicing other than that contained in the operating instructions unless you are qualified to do so Notes The LCD TV is for entertainment use only and vi...

Страница 7: ...blades with one wider than the other A grounding type plug has two blades and a third grounding prong The wide blade or the third prong are provided for your safety If the provided plug does not fit into your outlet consult an electrician for replacement of the obsolete outlet NOTE Applies to US only 10 Protect the power cord from being walked on or pinched particularly at plugs convenience recept...

Страница 8: ... does not operate normally or has been dropped 15 WARNING To reduce the risk of fire or electric shock do not expose this apparatus to rain or moisture 16 The apparatus shall be connected to a MAINS socket outlet with a protective earthing connection 17 Where the MAINS plug or an appliance coupler is used as the disconnect device the disconnect device shall remain readily operable 18 The apparatus...

Страница 9: ...tact an authorized service technician 5 If any fluid is sprayed or dropped into the TV contact an authorized service technician 6 The screen of the TV is made of glass Avoid hitting or scraping it If the screen is broken do not touch the broken glass 7 Do not allow children to use the TV unattended 8 Be careful when disconnecting the power plug Hold the plug Do not attempt to disconnect the plug b...

Страница 10: ...d using the TV The information in this manual has been carefully checked for accuracy however no guarantee is given to the correctness of the contents The information in this manual is subject to change without notice To the extent allowed by applicable law Hannspree Inc Hannspree shall not be liable for direct indirect special exemplary incidental or consequential damages arising from any defect ...

Страница 11: ... TV described in this manual may include copyrighted software of Hannspree or other third parties Hannspree or other third parties preserves the exclusive rights for copyrighted software such as the right to distribute or reproduce the copyrighted software Accordingly and to the extent allowed by applicable law any copyrighted software contained in the product described herein shall not be distrib...

Страница 12: ...DMI technology HDMI the HDMI logo and High Definition Multimedia Interface are trademarks or registered trademarks of HDMI Licensing LLC License Notice and Trademark Acknowledgment Manufactured under license from Dolby Laboratories Dolby and the double D symbol are trademarks of Dolby Laboratories ...

Страница 13: ...llowing components are included in the box Please contact Hannspree Customer Service immediately if anything is missing or damaged TV Power cord Remote control and batteries User s manual Quick start guide Warranty card Attention notice card Cleaning cloth HDMI cable ...

Страница 14: ...y to use on screen display menu system The built in stereo speakers provide full rich sound and a convenient audio output port lets you connect to an external audio system or earphones 1 2 1 Features Built in TV tuner Audio Video support PC audio input YPBPR input AV or Composite input S Video input 3 5 mm stereo earphone output VGA input HDMI input USB One set for R L audio inputs for AV or Compo...

Страница 15: ...er or move upward to the previous item on the OSD menu Channel select Press to decrease the channel number or move downward to the next item on the OSD menu Volume adjust Press to increase the volume or move to the right on the OSD menu Volume adjust Press to decrease the volume or move to the left on the OSD menu Remote IR sensor Receive incoming remote control commands Power Standby indicator In...

Страница 16: ...I 3 input Connect to an external device such as a DVD player set top box or a PC s DVI HDMI port HDMI 4 input Connect to an external device such as a DVD player set top box or a PC s DVI HDMI port VGA PC input Connect to a PC s VGA port Audio input PC Connect to a PC s audio port Component inputs video x 2 Connect to an external device such as a VCR set top box or a DVD player Component inputs aud...

Страница 17: ... a VCR set top box or a DVD player S Video 2 input Connect to an external device such as a VCR set top box or a DVD player Composite input video Connect to an external device such as a VCR set top box or a DVD player Composite input audio Connect to an external device such as a VCR set top box or a DVD player Earphone output Connect to earphones or external speakers with built in amplifiers Descri...

Страница 18: ...Information INFO Press to display program information Menu MENU Press to turn the on screen display OSD menu on off confirm the setting Arrows Press up down left or right to scroll through the on screen display menus Select OK Press to confirm the TV source selection Guide channel list GUIDE Press to view the EPG screen Return RETURN Press to return to the previous menu Select channel Press to inc...

Страница 19: ... select a programmed DVD player AUDIO AUDIO Press to select a programmed Audio Receiver Amp Home Theatre System CABLE CABLE Press to select a programmed Cable TV set top box or a satellite TV set top box TV TV Press to enter TV mode Favorite channels FAV Press to switch to favorite channels if no favorite channel was set Not Available will display on the screen Aspect ratio Press to adjust the wid...

Страница 20: ...ss to start playing Stop Press to stop playing Previous Press to skip to the previous section Rewind Press to go backwards Fast forward Press to go forwards Next Press to skip to the next section Description Icon Function ...

Страница 21: ...ntrol Batteries 1 Open the battery compartment cover at the back of the remote control 2 Insert the batteries paying attention to the polarity markings inside the battery compartment 3 Close the battery compartment cover P R E S S P R E S S ...

Страница 22: ...tact with leaked chemical fluids If your remote control has two batteries do not mix new and old batteries or the life of the new batteries will be shortened Chemical fluids may leak from the old batteries Danger of explosion if battery is incorrectly replaced Replace only with the same or equivalent type recommended by the equipment manufacturer Discard used batteries according to manufacturer s ...

Страница 23: ...lug at the other end of the power cord into a power outlet 2 1 2 Connecting an Antenna or Cable TV Connect one end of the VHF UHF Antenna or CATV cable to VHF UHF jack on the rear of the TV Note If you cannot receive channels after connecting to an antenna or cable TV line try scanning for channels CABLE ANTENNA VHF UHF Ground Clamp Ground Coaxial Cable Antenna ...

Страница 24: ...opriate ports on the rear of the TV 2 2 1 Connecting External Earphones Note External speakers or headphones are not included with the TV The internal TV speakers will not output sound when headphones are plugged in Use external speakers with built in amplifiers only Only one external device for sound can be connected at a time Speakers Headphones Built in Amplifiers ...

Страница 25: ...ices HDMI 4 or or or A B HDMI IN AUDIO VIDEO PR PB R L Y Y L R HDMI PR PB C S VIDEO R L VIDEO S VIDEO 1 R AUDIO L VIDEO 1 2 3 Audio Cable Optional Video Cable Optional Audio Video Cable Optional HDMI Cable Optional VCR STB DVD Game Console ...

Страница 26: ...nnect the TV to a VCR set top box DVD player using the video inputs VIDEO Y PB AUDIO L R 1 2 PR DVD Video Cable Audio Cable STB VCR Optional Optional S VIDEO 1 AUDIO L R 1 DVD STB VCR Video Cable Audio Cable Optional Optional DVD STB VCR Video Cable Audio Cable Optional Optional ...

Страница 27: ...en to audio from the PC 2 2 5 Connecting a PC using DVI Connect the TV to your PC to use it as the monitor using the DVI port as shown 1 Connect the HDMI 1 or HDMI 2 port of the TV to the DVI output of the PC 2 Connect the PC LINE IN port of your TV to the line out port of the PC of your TV to listen to audio from the PC AUDIO IN VGA VGA Cable Audio Cable PC Optional Optional AUDIO IN HDMI HDMI 4 ...

Страница 28: ... the USB flash drive to the TV using the USB port as shown The JPEG and MP3 files are supported Note When the HDMI cable is connected connecting the audio cable is not necessary However it is necessary to do so if a HDMI to DVI cable is connected Note The USB hub USB card reader and digital camera as USB mass storage device are supported The USB HDD is not supported HDMI 4 HDMI IN 1 2 3 HDMI Cable...

Страница 29: ...forming an Automatic Channel Search Before using the TV to view programs you need to activate the channel search first 1 Press MENU on the control panel or remote control then select to enter the Channel menu 2 Select Antenna to set the signal source Air or Cable default is Air 3 Select Auto scan then Start option 4 Press OK on the remote control to run the channel search 2 3 4 Selecting Channels ...

Страница 30: ...press the volume buttons to restore the original volume 2 3 6 Editing Channel Table or Favorite Channel 1 Press MENU on the control panel or remote control then select to enter the Channel menu 2 Select Channel List 3 If you want to add or remove channel from channel table please select the channel and press OK to mark S column If you want to add or remove favorite channel please select the channe...

Страница 31: ...u MENU MENU Up CH S Arrow Down CH T Arrow Increase VOL Arrow Decrease VOL Arrow Select INPUT VOL OK Arrow Return MENU VOL RETURN Arrow Picture Audio Channel V CHIP Setup Picture Mode Brightness Contrast Sharpness Color Tint Color Temp Back Light Digital NR Next Page Exit Return Enter Menu Move Return OK CURRENT MENU Displays the title of the currently chosen menu MAIN MENU Displays a list of menu ...

Страница 32: ...INPUT on the control panel to mark an item 7 Press RETURN to return to the Picture menu 8 Press MENU to exit the Picture menu 9 The Picture menu can be used to adjust the Picture mode Brightness Contrast Sharpness Color Tint Color Temp Back Light Digital NR X Contrast Aspect Ratio and Recall settings Brightness Contrast Sharpness Color Tint Color Temp and Back Light are only available for adjustme...

Страница 33: ...to the Audio menu 8 Press MENU to exit the Audio menu 9 The Audio menu can be used to adjust the Audio Mode Equalizer Balance DRC DTV only MTS ATV only Auto Volume ATV only and Recall settings Equalizer is available for adjustment only if you select User in Audio Mode The Audio Mode can be set to Dynamic Standard Soft or User Press on the remote control or VOL VOL on the control panel to adjust th...

Страница 34: ...or press OK on the remote control or INPUT on the control panel to mark an item 7 Press RETURN to return to the Channel menu 8 Press MENU to exit the Channel menu 9 The Channel menu can be used to perform a channel search and edit channel list see Performing an Automatic Channel Search on page 28 and Editing Channel Table or Favorite Channel on page 29 The Antenna can be set to Air or Cable The Sc...

Страница 35: ...NPUT on the control panel to enter the item 7 Press OK on the remote control or INPUT on the control panel to mark an item 8 Press RETURN to return to the V CHIP menu 9 Press MENU to exit the V CHIP menu 10 The V CHIP menu can set Change Password Lock Unrated Block MPAA TV Rating Can English and Can French settings Note Super Password Step 1 Input password 7071 But OSD will display Error Step 2 In...

Страница 36: ... settings Clock Set is only available for adjustments when Clock Mode is set to Manual Clock Mode can be set to Auto or Manual Setup Wizard can be used to set up OSD Language Clock Mode Time Zone TV RF Source and Channel Scan The five available OSD languages are English Spanish French Traditional Chinese and Simplified Chinese OSD Time can be set to 10 secs 20 secs 30 secs and 60 secs The Time Zon...

Страница 37: ... receive some TV channels using cable TV Try the Auto Scan function in the OSD Channel menu Want to reset TV settings Use the Setup Wizard function in the OSD Setup menu Cannot operate menus If OSD items are colored in gray the system is in a state such that those settings are not available Screen image turns over Make sure the video signal cable is connected properly Snow appears on the screen Ad...

Страница 38: ... Video x2 HDMI HDMI 1 HDMI 2 HDMI 3 HDMI 4 HDTV YPbPr x2 PC VGA Photo System USB JPEG Audio System AV S Video RCA x2 R L in HDTV RCAx2 R L in HDMI HDMI 1 HDMI 2 HDMI 3 HDMI 4 USB MP3 PC Audio in Phone jack Black Audio out Earphone jack Green Built in Stereo Amplifier Output 15 W x 2 Power Consumption Standby under 1W Power on 350W Typical Power Supply AC Input 100V 240V 50Hz 60Hz ...

Страница 39: ...V SVGA 800x600 60Hz 37 879 60 317 40 000 V V XGA 1024x768 60Hz 48 363 60 004 65 000 V V SXGA 1280x1024 60Hz 63 981 60 020 108 000 V V WXGA 1440x900 60Hz 55 935 59 887 106 500 V V WSXGA 1680x1050 60Hz 65 290 59 954 146 250 V V VESA 1920x1080 60Hz 67 500 60 000 148 500 V V Resolution active dot HDMI YPbPr 640x480p 60Hz V 720x480i 60Hz V V 720x480p 60Hz V V 1280x720p 60Hz V V 1920x1080i 60Hz V V 1920...

Страница 40: ...ent codes can be looked up in the electronic equipment code list of the appendix Electronic equipment code setting mode has the following operating procedures 1 Select a 4 digit code from the list start from the first code if more than one 2 Select the desired corresponding mode of electronic equipment type for example DVD players 3 Press DVD button The indicator light will come on for 2 seconds t...

Страница 41: ... comes on again after going off for 6 seconds prompting user to re enter mode codes 3 If setting is successful the electronic equipment code searching state is entered upon releasing the electronic equipment button The POWER signal of all manufacturers codes under the current electronic equipment mode is then transmitted automatically every 5 seconds 4 During search the indicator light will flash ...

Страница 42: ...p The indicator light then goes off and setting mode is exited 4 During the setting process releasing the electronic equipment button exits the setting mode immediately without changing the status prior to setting 5 Buttons other than VOL VOL are not functional during search Volume buttons include VOL VOL and MUTE 6 1 5 Setting Channel Lock Operating procedures are as follows 1 Press the correspon...

Страница 43: ...r light will come on for 2 seconds then it goes off after 3 seconds the indicator light will come on again showing that the setting mode has been entered 2 While holding the electronic equipment button first press left arrow then press OK The indicator then goes off and setting mode is exited showing factory setting has been restored 3 During the setting process releasing the electronic equipment ...

Страница 44: ...equipment CH and CH Note TV Transmit TV code Provided by manufacturer CABLE Transmit CABLE code Unlocked AUDIO Transmit AUDIO code Unlocked DVD Transmit DVD code Unlocked Note Each re powering restores factory setting and all electronic equipment modes transmit TV mode infrared IR signal until being set up through code setting For example setting the electronic equipment code of CABLE as 0001 stop...

Страница 45: ...essed the corresponding code is just output Two or more buttons simultaneously pressed do not output any code 6 2 2 Buttons Information Except TV equipment all the buttons on remote controls corresponding to other electronic equipments AUDIO CABLE and DVD are not necessarily functional but most of those remote controls only include power control channel control volume control etc 6 2 3 Power out P...

Страница 46: ...ernex 2024 CyberPower 2102 Daewoo 2010 2017 2025 Dell 2102 Denon 2008 Direc TV 2059 Durabrand 2007 2006 Electrohome 2005 Electrophonic 2005 Emerex 2002 Emerson 2004 2005 2021 2024 2010 2018 2009 2022 2001 2025 2027 Fisher 2011 2017 Fuji 2004 2003 Fujitsu 2010 Gateway 2102 GE 2013 2004 2024 General 2010 Go Video 2026 Setup Code for VCR s GoldStar 2005 2022 2006 2023 HaoJie 2024 Harman Kardon 2016 2...

Страница 47: ...022 2001 2027 Panasonic 2087 2004 2020 2043 2023 Penney 2004 2005 2024 2008 2006 Pentax 2008 Philco 2004 2027 Philips 2004 2016 2059 2044 Pilot 2005 Pioneer 2008 2014 Polk Audio 2016 Profitronic 2024 Proscan 2013 Protec 2015 Puslar 2007 Qisheng 2013 Quasar 2004 2020 Radix 2005 Randex 2005 Setup Code for VCR s RCA 2013 2004 2024 2008 2077 Realistic 2004 2005 2012 2011 2017 Replay TV 2043 Runco 2007...

Страница 48: ...076 Apex Digital 2053 2058 2067 2086 2066 2084 Blaupunkt 2058 Blue Parade 2039 Broksonic 2055 Changhong 2046 2086 CineVision 2076 Coby 2090 Curtis Mathes 2091 CyberHome 2082 2081 2094 2070 2093 Daewoo 2073 2097 2076 Denon 2028 DVD2000 2031 Emerson 2042 2054 Enterprise 2042 Funai 2054 Gateway 2096 2088 GE 2032 2058 Setup Code for DVD s Go Video 2060 2073 2092 2063 2089 2076 2100 Greenhill 2058 Harm...

Страница 49: ...nics 2028 Theta Digital 2039 Toshiba 2029 2055 V Inc 2019 Urban Concepts 2029 Xbox 2032 Yamaha 2028 2036 2037 Zenith 2029 2042 2076 Setup Code for Cable ABC 0002 0003 0006 Americast 0039 Bell Howell 0006 Bell South 0039 Clearmaster 0038 ClearMax 0038 Coolmax 0038 Daeryung 0059 0037 0020 0003 Setup Code for Cable Digi 0024 Diector 0019 Dumont 0024 Gehua 0019 General Instrument 0019 0033 0015 0002 0...

Страница 50: ...0 0031 0054 Dishpro 0040 0031 0054 Echostar 0040 0031 0054 Expressvu 0031 GE 0023 General Instrument 0036 GOL 0031 Hisense 0055 Hitachi 0034 HTS 0031 Hughes Network Systems 0044 0029 0057 0053 I Lo 0055 JVC 0031 LG 0052 0045 Magnavox 0028 0027 Memorex 0028 Mitsubishi 0029 Motorola 0036 Next Level 0036 Setup Code for Satellite Panasonic 0013 0026 Paysat 0028 Philips 0044 0029 0057 0028 0060 0027 00...

Страница 51: ... Pioneer 3038 3005 Polk Audio 3019 Proton 3019 QED 3019 Quad 3004 RCA 3038 3005 3027 3022 3008 Realistic 3027 3022 Rotel 3019 3027 SAE 3019 Sansui 3019 Sanyo 3022 SAST 3049 Sharp 3007 Silsonic 3006 Sonic Frontiers 3019 Sony 3028 3001 3012 TAG Mclaren 3019 Tascam 3027 Teac 3027 Technics 3004 Victor 3009 Wards 3019 3008 Setup Code for CD Yamaha 3006 Zonda 3019 Setup Code for Audio Amp s Bose 3033 GE...

Страница 52: ...56 KLH 3053 Magnavox 3042 3046 3029 Marantz 3042 3046 Onkyo 3035 3017 Optimus 3036 3018 3002 3031 3029 Proscan 3044 Qisheng 3057 RCA 3036 3057 3044 3029 3039 Silsonic 3021 Sony 3037 3054 3045 3058 Soundesign 3032 Stereophonics 2025 Sunfire 3050 Setup Code for Audio Amp Tuner s Teac 3049 Technics 3043 3055 Thorens 3042 Victor 3010 Wards 3002 Yamaha 3021 3048 3041 ...

Страница 53: ...g the LCD TV requires special skill that should only be performed by qualified service personnel Customers should not attempt to do the work themselves please contact with Hannspree dealers in wall mount bracket You can ask a qualified service personnel about using an optional bracket to mount the TV to the wall Please add rubber cover when this TV is mounted on the wall Equipment to be used with ...

Отзывы: