background image

14

Engl

ish

Tap the Wi-Fi switch button to turn Wi-Fi on or off.

• The Wi-Fi icon showing 

 indicates Wi-Fi is turned off.

• The Wi-Fi icon showing 

 indicates Wi-Fi is turned on.

Connect to an Access Point

1. Turn on Wi-Fi. The device searches for available networks within range and displays the 

searched Access Point (AP) names on the right panel.

2. Tap an access point name that you want to connect to. If the selected access point is 

protected by a password, the device will prompt for the password.

3. If prompted, enter the password to connect to the AP.

4. Tap 

Connect

.

Other Wi-Fi Options

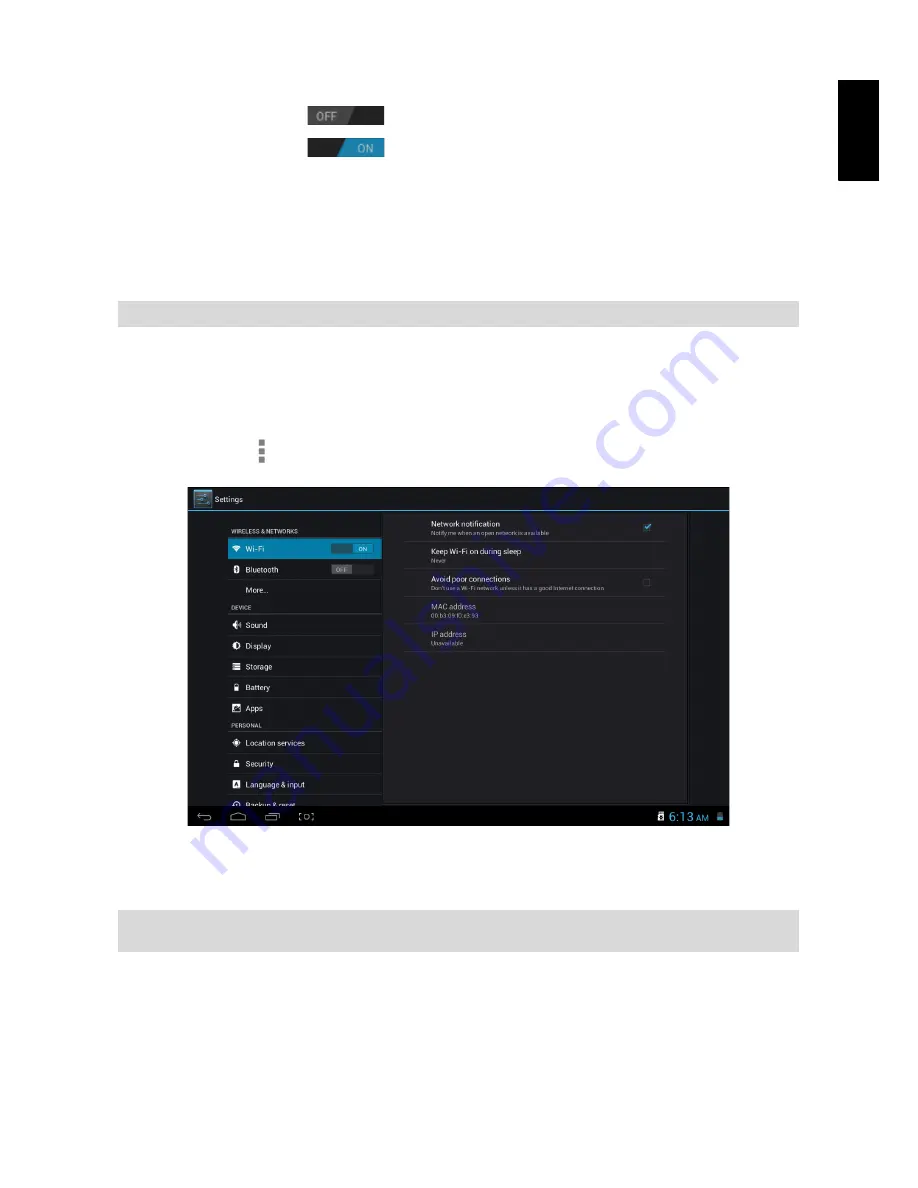
Tap the 

Advanced


 icon on the upper-right corner of the screen to display advanced options and 

other network information.

When the 

Network notification

 option is checked, the system automatically scans and displays 

available networks within range. If it is unchecked, you must tap 

SCAN

 to manually scan for nearby 

networks and tap 

ADD NETWORK

 to manually add a network.

NOTE:

 The password entry is required only when connecting to the AP for the first time.

NOTE:

 This tablet PC keeps track and recognizes Wi-Fi networks that have been connected before. Once Wi-Fi 

is turned on and a known connection is detected, the device automatically connects to that network.

Содержание HANNSpad SN1AT7

Страница 1: ...SN1AT7 HSG1279...

Страница 2: ...ation Menu 12 4 Basic Settings 13 4 1 Wi Fi and Network 13 4 1 1 Wi Fi 13 4 2 Device 15 4 2 1 Sound 15 4 2 2 Display 15 4 2 3 Storage 16 4 2 4 Battery 17 4 2 5 Apps 17 4 3 Personal 18 4 3 1 Location a...

Страница 3: ...the dealer or an experienced radio TV technician for help RF Warning Statement The device has been evaluated to meet general RF exposure requirement The device can be used in portable exposure condit...

Страница 4: ...irement laid down in the applicable EN 50332 1 and or EN 50332 2 standards The Li ion battery package in the product is not serviced and replaced Trademark Notice Hannspree products incorporate High D...

Страница 5: ...device Using the device and the earpiece during bicycling car and motorcycle driving is likely to cause danger Never use higher volume which may damage your hearing ability Divide scraped packing batt...

Страница 6: ...cluded If any item is damaged or missing contact your point of purchase for assistance Use only approved accessories Accessories may vary by country or region Micro USB cable Power adapter Tablet PC S...

Страница 7: ...ys the user interface and receives touch input 2 Front Camera For video chatting or taking self portrait pictures 3 Power Key Press and hold to turn the device on or off Press to turn the backlight on...

Страница 8: ...additional storage space 4 HDMI Port Output images using HDMI cable sold separately to an HDMI television or display device 5 Microphone For audio input 6 Earphone Jack Connects to an earphone using...

Страница 9: ...mage caused by depletion or by the use of an unauthorized charger are not covered by the warranty 2 2 Turning on off the Tablet PC Power on Press and hold the Power button for 2 seconds Power off Pres...

Страница 10: ...C you will find two removable disks the front one is the built in memory disk the other one is the Micro SD card disk If there is no card plugged in the second disk cannot be opened The device support...

Страница 11: ...icon to the home screen to add as shortcut Remove application shortcuts Long press an application icon in the home screen the top of the screen displays Drag the application icon towards until it tur...

Страница 12: ...Tap the right side icons to view the date and time and other information 3 4 Using the Touch Screen The tablet PC is equipped with a 10 1 inch touch screen The following describes the main touch scre...

Страница 13: ...touch an application icon to open the application In applications with browsing capabilities such as Explorer Music and Gallery etc you can drag the scroll bar up and down or flick the screen to scrol...

Страница 14: ...To open the Settings page do one of the following Tap the Application icon then tap Settings Tap the notification icons on the right side of the status bar then tap Tap an item on the left panel menu...

Страница 15: ...word to connect to the AP 4 Tap Connect Other Wi Fi Options Tap the Advanced icon on the upper right corner of the screen to display advanced options and other network information When the Network not...

Страница 16: ...o adjust the corresponding volume Default notification Set the default notification ringtone Touch sounds Produce sound when you make selection on the screen Screen lock sound Produce sound when you u...

Страница 17: ...ere are four options Small Normal Large Huge Accelerometer calibration Select to calibrate the accelerometer HDMI Set the setting to ON to enable the HDMI output function Output screen resize Set the...

Страница 18: ...more details 4 2 5 Apps Displays the status of the applications in the device DOWNLOADED Lists applications installed by the user ON SD CARD Lists applications in the SD card RUNNING Displays the runn...

Страница 19: ...i Fi or mobile networks to determine your approximate location Location Google search When checked applications let Google to use your location to improve search results and other services 4 3 2 Secur...

Страница 20: ...credentials Store trusted credentials used by the system or the user Install from SD card To import trusted credentials from the SD card Clear credentials Clear all the credentials recorded by the sy...

Страница 21: ...Backup account Set up a backup account Automatic restore Check this option to automatically restore the backed up settings and data when reinstalling an application PERSONAL DATA Factory data reset Cl...

Страница 22: ...estart the device for the settings to take effect Set date Access to date setting interface and set the date Set time Access to time setting interface and set the time Select time zone Access to time...

Страница 23: ...xt to speech output Set the text to speech settings Touch hold delay Set the response speed of the touch screen Enhance web accessibility Whether to install the script from Google or not for viewing t...

Страница 24: ...ck bounds margin etc Show GPU view updates Check this option to let the views inside windows flash when being drawn with the GPU Show surface updates Check this option to let the entire window surface...

Страница 25: ...ery power network and other information Legal information View Open source licenses Model number Display the device model number Android version Display the version number of Android Kernel version Di...

Страница 26: ...ware Update Android devices automatically receive over the air OTA updates whenever the manufacturer of the tablet rolls out official updates Usually users check for updates by heading to Settings Abo...

Страница 27: ...10 points Communications WLAN WLAN 802 11 b g n Bluetooth BT3 0 Camera Front camera 0 3M pixel Rear camera 2 0M pixel Sensor 3 axis Accelerometer Yes Supported x y z axis and direction G Sensor Yes re...

Страница 28: ...t option 3 Select Factory data reset 4 Leave the erase SD card option unticked and touch Reset tablet 5 Touch erase everything 6 The unit will now reset itself back to factory reset and any previous i...

Отзывы: