46
MAINTENANCE
10. MAINTENANCE
10.1. ELECTRODE CONDITIONING & MAINTENANCE
Preparation
Remove the electrode protective cap.
Do not be alarmed if any salt deposits are present. This is normal with electrodes and they will disappear when rinsed with water.
During transport tiny bubbles of air may have formed inside the glass bulb. The electrode cannot function properly under these
conditions. These bubbles can be removed by “shaking down” the electrode as you would do with a clinical thermometer.
If the bulb and/or junction are dry, soak the electrode in
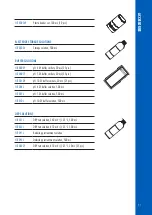
HI70300
Storage solution for at least one hour.
Storage
To minimize clogging and ensure a quick response time, the glass bulb and the junction should be kept hydrated and not
allowed to dry out. This can be achieved by installing the electrode in such a way that it is constantly in the flow cell or the
pipe filled with the sample.
When not in use, replace the solution in the protective cap with a few drops of
HI70300
Storage solution or, in its absence,
HI7082
KCl 3.5M solution.
Follow the Preparation procedure above before taking any measurements.
Note:
Never store the electrode in distilled or deionized water.
10.2. PUMP TUBING REPLACEMENT
For pump tubing replacement please wear protective gloves and eye protection at all times; and follow the steps below:
1. Power off the controller.
2. Disconnect the tubing from the pumps.
3. Unscrew and remove the plastic cover from the pumps.
4. Starting from the left side of the pump, grab the tubing and rotate the pump rotor manually to the right, until the tubing
is removed.
5. Take the new tubing and place it on the left side of the pump and start to manually rotate the pump rotor to the right
until the tubing is on the pump.


