HANION L-1933 Скачать руководство пользователя страница 126


17


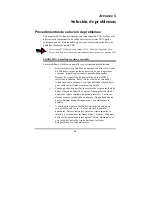
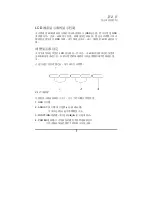
PROBLEMA: No hay visión LCD 

Si no hay visión en la pantalla LCD, consulte lo siguiente: 

1.


Asegúrese de que el indicador de alimentación del monitor LCD 
está encendido, todas las conexiones estén aseguradas, y el 
sistema se está ejecutando con la temporización adecuada. 
Consulte el Apéndice para información sobre la temporización. 

2.


Desactive el monitor LCD y vuelva a encenderlo de nuevo.  
Pulse el botón del Menú OSD (consulte el Capítulo 2) y depués 
pulse cualquier botón de Control de Ajustes varias veces.  Si 
aún no ve nada, pulse otro botón de ajuste de control varias 
veces. 

3.


Se el paso 2 no funcionó, conecte su sistema PC a otro monitor 
externo. Si su sistema PC funciona normalmente con otro 
monitor pero no funciona con el monitor LCD, y el LED de 
alimentación del monitor LCD está parpadeando, la 
temporización de la tarjeta VGA de salida podría estar fuera del 
rango de sincronismo LCD. Cambie a uno de los modos 
alternativos, listados en el Apéndice, o reemplace la tarjeta 
VGA y repita los pasos 1 y 2. 

4.


Si el PC no funciona tampoco con un monitor CRT, consulte la 
BIOS para detectar posibles opciones seleccionadas de escaneo 
dual en el modo de pantalla.  Configura el modo de pantalla de 
la BIOS en Dual Scan o CRT e inténtelo de nuevo.  Si aún no 
ve nada, puede que haya un problema con su sistema.  Póngase 
en contacto con el soporte técnico. 

5.


Si el LED de alimentación no está encendido, compruebe que el 
contector de alimentación AC se encuentra bien conectado. 
Verifique que el adaptador AC se encuentre encendido. Si el 
LED del adaptador AC no está encendido, póngase en contacto 
con su distribuidor para obtener ayuda. 

Содержание L-1933

Страница 1: ......

Страница 2: ...munications However there is no guarantee that interference will not occur in a particular in stallation If this equipment does cause harmful interference to radio or television reception which can be...

Страница 3: ...required to take adequate measures Canadian Doc Notice For Class B Computing Devices This digital apparatus does not exceed the Class B limits for radio noise emis sions from digital apparatus as set...

Страница 4: ...he cord is placed in an area where it will not be stepped on 4 Do not apply pressure to the LCD screen Excessive pressure may cause permanent damage to the display 5 Do not remove the cover or attempt...

Страница 5: ...th ground connection Japan VCTF type 3 wires or with ground wire T mark approval is required U S VW 1 18AWG X 3C SVT with national approval as UL and or CSA approval number s Europe VDE VE and or KEMA...

Страница 6: ...Monitor Rear View 3 Adjusting the Viewing Angle 4 Connecting AC Power Video Audio 6 Power Management System 6 CHAPTER 2 7 The LCD Monitor s Display Controls 7 Adjusting the Monitor s Display 8 OSD Ma...

Страница 7: ...od condition LCD Monitor Monitor to PC Analog signal cable 15 pin Stereo Jack Audio Cable Power cord User s manual If you find that any of these items are missing or appear damaged con tact your deale...

Страница 8: ...to apply the monitor setting auto matically A small AUTO ADJUST OSD is also displayed 2 Adjust volume short cut button Press button 3 to allow you to adjust the audio volume directly 3 Contrast adjust...

Страница 9: ...3 The LCD Monitor Rear View Figure 1 2 LCD Monitor s Rear Ports 1 Audio Line in 2 AC Power Jack 3 VGA Cable Connector...

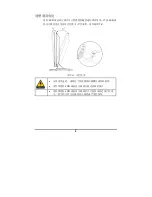
Страница 10: ...4 Adjusting the Viewing Angle The LCD Monitor s vertical angle setting range is from 3 to 20 Please see Figure 1 3 Figure 1 3 Angle Settings...

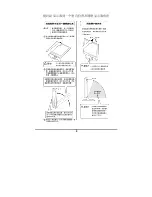
Страница 11: ...5 Raising Your Monitor to an Upright Position and Adjust ing Monitor Angle...

Страница 12: ...ith the VESA DPMS version 1 0p power management proposal The VESA DPMS proposal provides four phases of power saving modes by detecting the horizontal or vertical sync signal When the LCD Monitor is i...

Страница 13: ...Adjustment Control Buttons These two buttons allow you to adjust the selected control func tions in the OSD 3 Function Select Buttons These two buttons allow you to select the control functions in th...

Страница 14: ...highlighted Analog mode Each main menu and submenu item is covered below Pressing the OSD Menu button causes the following screen to appear an example Figure 2 2 The OSD Main Menu The Monitor Control...

Страница 15: ...se and Clock parameters GRAPH TEXT Press the Function Enter button to switch between the text and graphic options EXIT Pressing the Function Enter button exits the Monitor Control submenu OSD Control...

Страница 16: ...el on the LCD monitor s display screen It should be adjusted in conjunction with the Contrast item COLOR Use either of the Adjustment Control buttons to select the LCD monitor s color display The avai...

Страница 17: ...Control buttons to scroll to the desired OSD display language The sup ported languages are German English French Spanish and Italian AUDIO VOLUME Use the Adjustment Control but tons to increase or de...

Страница 18: ...will be displayed 2 Signal out of monitor s supported range Please refer to Addendum When the frequency range is out of the monitor s specifi cations or the incoming resolution is higher than 1280x10...

Страница 19: ...Text Port Select Exit OSD Control OSD Horizontal Position OSD Vertical Posi tion OSD Timer Exit Graphic Con trol Contrast Brightness Color R G B Auto Level Reset Exit Misc Control Language Audio Volum...

Страница 20: ...Meets VESA DPMS Power Consumption ON OFF W ON 45W max OFF 5W max ON 50W max OFF 5W max Measured from AC inlet Dimensions WxHxD mm 419 W x 427 H x 218 D Net Weight Kg Approx 6 7 Power Supply Built In...

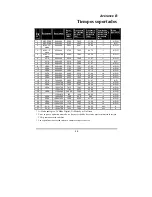
Страница 21: ...A 800x600 40 00 60 32 37 88 A D G 13 VESA 800x600 50 00 72 19 48 08 A D G 14 VESA 800x600 49 50 75 00 46 88 A D G 15 VGA 720x400 28 32 70 09 31 47 A G 16 XGA 1024x768 65 00 60 00 48 36 A D G 17 VESA 1...

Страница 22: ...or you can select the window shut down screen 2 After you have the wallpaper loaded open the OSD and select the Clock function Press the top or bottom Adjustment Control button and continue pressing...

Страница 23: ...rk connect your PC system to another ex ternal CRT If your PC System functions properly with a CRT Monitor but it does not function with the LCD Monitor and the LCD Monitor s power LED is blinking the...

Страница 24: ...i LCD Copyright 2003 FCC FCC 15 1 2 FCC FCC 15 Class B...

Страница 25: ...ns Commission FCC FCC Class B ITE CE EN55022 1998 EN61000 3 2 1995 EN61000 3 3 1995 EN55024 1998 EN60950 1992 A1 A2 A3 A4 A11 FCC Class B Doc FCC Class B Canadian Department of Commu nications Radio I...

Страница 26: ...iii 1 2 3 PC 4 5 6 20 60 7 PC 8 9 VCTF 3 T VW 1 18AWG X 3C SVT UL CSA VDE VE KEMA H05VV F 3G 0 75...

Страница 27: ...iv 1 2 3 4 5 6 1 7 EMI...

Страница 28: ...v I V 1 1 1 2 2 LCD 3 4 AC 6 6 2 7 LCD 7 7 A 13 LCD 13 B 15 C 16 16...

Страница 29: ...1 1 LCD LCD LCD 15 Pin LCD...

Страница 30: ...2 1 1 1 FUNCTION 2 OSD 2 ADJUST 3 ADJUST 3 ADJUST 4 ADJUST 5 OSD...

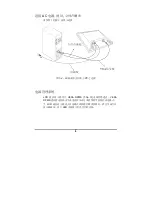
Страница 31: ...3 LCD 1 2 LCD 1 LCD 2 AC AC 3 VGA 15 D Sub VGA VGA...

Страница 32: ...4 LCD LCD 3 20 1 3 1 3 LCD LCD...

Страница 33: ...5...

Страница 34: ...6 AC 1 4 LCD PC LCD VESA DPMS 1 0p VESA DPMS LCD LED...

Страница 35: ...7 2 LCD LCD OSD OSD OSD LCD LCD LCD OSD 2 1 1 OSD 2 ADJUST 3 FUNCTION 4 POWER 1 1...

Страница 36: ...8 OSD 2 2 OSD OSD 15 20 Monitor Control LCD Function Auto Adjust Function ADJUST H Position Adjustment Control LCD...

Страница 37: ...9 V Position Adjustment Control LCD Phase Adjustment Control Clock Adjustment Control Reset Adjustment Control EXIT OSD OSD OSD Control OSD OSD Function OSD OSD OSD 5 10 15 20 25 30 6 EXIT OSD...

Страница 38: ...10 Graphic Control LCD Function Contrast LCD Brightness LCD Color LCD 9300 6500 9300 6500 CIE 9300 6500 R G B R G B Auto Level RESET YES LCD Exit...

Страница 39: ...11 Misc Control OSD Function Language OSD Audio Volume LCD Information Exit OSD OSD Exit OSD OSD Exit OSD OSD...

Страница 40: ...12 Note 1 NO VIDEO 2 1280x1024 OVER RANGE...

Страница 41: ...13 A LCD LCD 19 SXGAFST1904K1 K2 K2U 1A 2B OSD OSD OSD OSD R G B OSD OSD 376 32x 301 056mm 19 inch diagonal 16 7M VGA RGB 15 D Sub...

Страница 42: ...14 OSD 24 80K 50 75 H V Hz 30 80k 50 75 VESA DPMS 45W 50W USB 5W 5W 419mm W x 427mm H x 218mm D 6 7 100 240VAC 50 60Hz 0 40 C 10 85 1 0W x 2 cUL CE FCC B DoC VCCI...

Страница 43: ...6 A D G 12 SVGA 800x600 40 00 60 32 37 88 A D G 13 VESA 800x600 50 00 72 19 48 08 A D G 14 VESA 800x600 49 50 75 00 46 88 A D G 15 VGA 720x400 28 32 70 09 31 47 A 16 XGA 1024x768 65 00 60 00 48 36 A D...

Страница 44: ...16 C VGA VGA VGA LCD VGA LCD VGA 1 Windows 2 OSD Clock 3 4 Phase...

Страница 45: ...17 LCD 1 2 2 3 CRT CRT LED VGA VGA 4 CRT BIOS BIOS Dual Scan CRT 5 LED AC AC LED AC LED...

Страница 46: ...ne marchera dessus 4 N appliquez aucune pression sur l cran LCD Une pression excessive peut provoquer des dommages permanents l cran 5 Ne d montez pas le couvercle ou ne tentez pas de r parer cet quip...

Страница 47: ...se la terre Japon Type VCTF 3 fils ou avec fil reli la terre approbation T mark requise Etat Unis VW 1 18AWG X 3C SVT avec certification nationale comme UL et ou le s num ro s d approbation CSA Europe...

Страница 48: ...ecter l Alimentation CA le C ble Vid o le C ble Audio 5 Syst me de Gestion d Energie 6 CHAPITRE 2 7 Contr les d Affichage du Moniteur LCD 7 R glage de l Affichage du Moniteur 8 Menu Principal de l OSD...

Страница 49: ...en bon tat Moniteur LCD C ble de signal analogique moniteur vers ordinateur 15 broches C ble audio pour prise st r o Cordon d alimentation Manuel Utilisateur Si l un des l ments est manquant ou ab m c...

Страница 50: ...lage automatique du moniteur Une petite fen tre REGLAGE AUTO de l OSD appara tra 2 Touche de raccourci R glage du Volume Pressez le bouton 3 pour vous permettre de r gler directement le volume du son...

Страница 51: ...3 Moniteur LCD Vue Arri re Figure 1 2 Ports arri res du moniteur LCD 1 Entr e de ligne audio optionnel 2 Prise d alimentation CC 3 Connecteur de c ble VGA...

Страница 52: ...4 R gler l Angle de Vision Les limites de r glage de l angle vertical du moniteur LCD vont de 3 20 Veuillez vous r f rer la Figure 1 3 Figure 1 3 R glages de l Angle...

Страница 53: ...5...

Страница 54: ...ec les normes de gestion d nergie VESA DPMS version 1 0p Le syst me VESA DPMS fournit quatre tapes de modes d conomie d nergie en d tectant le signal de synchronisation horizontal ou vertical Lorsque...

Страница 55: ...s permettent de r gler et d effectuer les fonctions de contr le s lectionn es dans l OSD 3 Boutons de S lection de Fonctions Ces deux boutons vous permettent de choisir les fonctions de contr le dans...

Страница 56: ...era mise en vidence Mode Analogique Chaque item du menu principal et ceux des sous menus sont d crits ci dessous Presser le bouton du Menu OSD fera appara tre l cran suivant un exemple Figure 2 2 Menu...

Страница 57: ...sez l un des boutons de Contr le du R glage pour r initialiser les param tres de la Position H de la Position V de la Phase et de l Horloge GRAPH TEXTE Pressez le bouton d Acc s aux Fonctions pour bas...

Страница 58: ...de Contr le du R glage pour r gler la diff rence entre la zone la plus lumineuse et la zone la plus sombre de l affichage du moniteur LCD LUMINOSITE Utilisez les boutons de Contr le du R glage pour r...

Страница 59: ...tilisez les boutons de S lection des Fonctions pour s lectionner l une des options du sous menu ci dessous LANGUE Utilisez les boutons de Contr le du R glage pour s lectionner la langue d sir e pour l...

Страница 60: ...ra 2 Signal hors limites support es par le moniteur Veuillez vous r f rer l Addenda Appara t lorsque la fr quence est au del des sp cifications du moniteur ou lorsque la r solution du signal re u est...

Страница 61: ...Port Quitter Contr le OSD Position Horizontale OSD Position Verticale OSD Minuterie OSD Quitter Contr le Graphique Contraste Luminosit Couleurs R V B Niveau Auto R init Quitter Contr le Divers Langue...

Страница 62: ...que Marche Arr t W Marche Sans l USB 45W max Arr t 5W max Marche Avec l USB 50W max Arr t 5W max mesur e partir d une prise CA Dimensions L x H x P mm 419mm Larg x 427mm Haut x 218mm Prof Poids Net Kg...

Страница 63: ...GA 800x600 40 00 60 32 37 88 A D G 13 VESA 800x600 50 00 72 19 48 08 A D G 14 VESA 800x600 49 50 75 00 46 88 A D G 15 VGA 720x400 28 32 70 09 31 47 A G 16 XGA 1024x768 65 00 60 00 48 36 A D G 17 VESA...

Страница 64: ...un fond d cran comportant des lignes verticales vous pouvez galement s lectionner l cran d arr t de Windows 2 Une fois que vous aurez charg le fond d cran ouvrez l OSD et s lectionnez la fonction Hor...

Страница 65: ...n de Contr le du R glage 3 Si l tape 2 ne marche pas connectez votre ordinateur un cran CRT externe Si votre ordinateur fonctionne correctement avec un cran CRT et s il ne fonctionne pas avec un monit...

Страница 66: ...irm nicht berm iger Druck kann zu dauerhaften Sch den an dem Bildschirm f hren 5 Entfernen Sie das Geh use nicht Versuchen Sie niemals das Ger t in eigener Regie instand zu setzen Die Garantie kann da...

Страница 67: ...r mit Leiter mit Erdungsleitung Das T Genehmigungszeichen ist erforderlich U S VW 1 18AWG X 3C SVT mit einem Nationalen Genehmigungszeichen wie z B UL und oder CSA Genehmigungszeichen nummer n Europa...

Страница 68: ...n des Monitors zur aufrechten Position und Einstellen des Monitorwinkels 5 Anschlie en des Netzkabels Video Audio 6 Energieverwaltungssystem 6 KAPITEL 2 7 Bedienfeld des LCD Monitors 7 Einstellen der...

Страница 69: ...tand sind LCD Monitor Monitor zu PC Analogsignalkabel 15 polig Stereo Audiokabel Netzkabel Benutzerhandbuch Wenden Sie sich bitte unverz glich an Ihren H ndler wenn irgendein Artikel fehlt oder besch...

Страница 70: ...matische Monitoreinstellung zu aktivieren Ein kleines AUTO EINSTELLEN Fenster erscheint daraufhin 2 Lautst rke Hotkey Dr cken Sie Taste 3 um die Lautst rke direkt einzustellen 3 Kontrast Hotkey Dr cke...

Страница 71: ...3 Der LCD Monitor R ckseite Abb 1 2 Anschl sse an der R ckseite des LCD Monitors 1 Audio Line in 2 Wechselstrombuchse 3 VGA Kabelanschluss...

Страница 72: ...Einstellen des Blickwinkels Sie k nnen den LCD Monitor kippen um einen bequemen Blickwinkel zu erhalten Dieser LCD Monitor kann um 3 bis 20 gekippt werden Siehe Abb 1 3 Abb 1 3 Blickwinkeleinstellung...

Страница 73: ...5 Anheben des Monitors zur aufrechten Position und Einstellen des Monitorwinkels...

Страница 74: ...r VESA DPMS Version 1 0p Energieverwaltungsnorm Die VESA DPMS Norm definiert vier Energiesparmodi die durch die Erkennung des horizontalen oder vertikalen Sync Signals aktiviert werden Wenn der LCD Mo...

Страница 75: ...ktionen in dem OSD Men einzustellen 3 Funktionsauswahltasten Die zwei Tasten gestatten Ihnen die Steuerungsfunktionen in dem OSD Men auszuw hlen Dr cken Sie eine der Tasten um die Hauptmen oder Submen...

Страница 76: ...n Die Monitor Kontrolle Option Die Monitor Kontrolle Option gestattet Ihnen die Anzeigeeigenschaften des LCD Monitors einzustellen W hlen Sie das Monitor Kontrolle Symbol und dr cken dann die Funktion...

Страница 77: ...um das Monitor Kontrolle Submen zu beenden Die OSD Kontrolle Option Die OSD Kontrolle Option gestattet Ihnen die OSD Position auf dem Bildschirm einzustellen Verwenden Sie die Funktionsauswahlstasten...

Страница 78: ...llt werden FARBE Verwenden Sie die Einstellungstasten um die LCD Anzeigefarbe zu w hlen Die verf gbaren Farbtemperatureinstellungen sind 9300 6500 und Benutzer Mit der Option 9300 oder 6500 stellen Si...

Страница 79: ...um das gew nschte OSD Anzeigemen zu w hlen Die unterst tzten Sprachen sind Deutsch Englisch Franz sisch Spanisch und Italienisch LAUTST RKE Verwenden Sie die Einstellungstasten um die Lautst rke des S...

Страница 80: ...al empfangen hat 2 Signalfrequenz au erhalb des vom Monitor unterst tzten Bereichs siehe bitte den Anhang Wenn die Frequenz au erhalb des Frequenzbereichs des Monitors liegt oder die einge hende Aufl...

Страница 81: ...ssauswahl Beenden OSD Kontrolle Horizontale OSD Position Vertikale OSD Position OSD Timer Beenden Grafik Kontrolle Kontrast Helligkeit Farbe R G B Auto Balance Reset Beenden Ver schiedenes Sprache Lau...

Страница 82: ...rbrauch ON OFF W Ein ohne USB 45W max Aus 5W max Ein mit USB 50W max Aus 5W max Am AC Eingang gemessen Abmessungen WxHxD mm 419 W x 427 H x 218 D ca Nettogewicht Kg 6 7 Stromversorgung Eingebauter Uni...

Страница 83: ...8 A D G 13 VESA 800x600 50 00 72 19 48 08 A D G 14 VESA 800x600 49 50 75 00 46 88 A D G 15 VGA 720x400 28 32 70 09 31 47 A G 16 XGA 1024x768 65 00 60 00 48 36 A D G 17 VESA 1024x768 75 00 70 07 56 48...

Страница 84: ...auf dem Bildschirm angezeigt werden Wenn Sie Windows verwenden laden Sie bitte eine Bitmap Datei als Hintergrundbild das vertikale Linien hat Sie k nnen ebenfalls das Windows Beenden Bild verwenden 2...

Страница 85: ...andere Einstellungstaste mehrmals wenn es immer noch keine Anzeige gibt 3 Schlie en Sie Ihren PC an einen externen CRT Monitor an wenn Schritt 2 nicht hilft Wenn Ihr PC System mit einem CRT Monitor ri...

Страница 86: ...18 Adapters nicht leuchtet wenden Sie sich bitte an Ihren H ndler f r Hilfe...

Страница 87: ...pressione sullo schermo LCD La pressione eccessiva pu provocare danni permanenti allo schermo 5 Non rimuovere la copertura o cercare di eseguire da s la manutenzione di questa unit La garanzia potreb...

Страница 88: ...Giappone tipo VCTF a 3 fili o con massa a terra richiesto il marchio d approvazione T Stati Uniti VW 1 18AWG X 3C SVT con approvazione nazionale come UL e o approvazione numero i CSA Europa approvazi...

Страница 89: ...monitor LCD 3 Regolare l angolo di visuale 4 Sistema d amministrazione energetica 6 CAPITOLO 2 7 I controlli dello schermo del monitor LCD 7 Regolazione dello schermo 7 Menu principale OSD fare rifer...

Страница 90: ...nalogico da monitor a PC 15 pin Connettore cavo audio stereo Cavo d alimentazione Manuale utente Se uno qualsiasi di questi elementi manca o danneggiato mettersi immediatamente in contatto con il prop...

Страница 91: ...utomaticamente le impostazioni del monitor Sar anche visualizzato in piccoli caratteri il messaggio OSD Regolazione Autom 2 Tasto di scelta rapida Regolazione volume Premere il tasto 3 per regolare di...

Страница 92: ...3 Vista posteriore del monitor LCD Figura 1 2 porte posteriori del monitor LCD 1 Ingresso linea audio 2 Connettore alimentazione CA 3 Connettore cavo VGA...

Страница 93: ...4 Regolare l angolo di visuale L ampiezza d impostazione dell angolo verticale del monitor LCD va dai 3 ai 20 Fare riferimento alla Figura 1 3 Figura 1 3 impostazioni dell angolo...

Страница 94: ...5...

Страница 95: ...iva sul risparmio energetico della VESA DPMS versione 1 0p La direttiva VESA DPMS fornisce quattro fasi di modalit di risparmio energetico rilevando il segnale di sincronizzazione orizzontale o vertic...

Страница 96: ...re le funzioni selezionate nell OSD 3 Tasti di selezione funzione Questi due tasti permettono di selezionare le funzioni nell OSD Premere uno dei due tasti per scorrere tra le voci del menu principale...

Страница 97: ...arire la seguente schermata dimostrativa Figura 2 2 Menu principale OSD L opzione Controllo monitor L opzione Controllo monitor permette di regolare le caratteristiche di visualizzazione del monitor L...

Страница 98: ...ase e Registro GRAFICA TESTO premere il tasto Regolazione per cambiare tra le opzioni grafica e testo ESCI la pressione del tasto Accesso funzione fa uscire dal menu secondario Controllo monitor Contr...

Страница 99: ...immagine su schermo del monitor LCD Questa funzione dovrebbe essere regolata insieme al Contrasto COLORE utilizzare uno qualsiasi dei tasti Regolazione per selezionare i colori dell immagine su scherm...

Страница 100: ...seguenti opzioni del menu secondario LINGUA utilizzare i tasti Regolazione per scorrere alla lingua desiderata per le schermate OSD Le lingue supportate sono Tedesco Inglese Francese Spagnolo ed Itali...

Страница 101: ...ASSENZA VIDEO 2 Il segnale al di fuori della portata del monitor fare riferimento all Appendice Quando la portata della frequenza eccede le specifiche del monitor oppure quando la risoluzione in entr...

Страница 102: ...osizione orizzontale OSD Posizione verticale OSD Timer OSD Esci Controllo grafico Contrasto Luminosit Colore R G B Bilanciamento automatico Ripristino Esci Controlli vari Lingua Volume Informazioni Es...

Страница 103: ...azione energetica Conforme a VESA DPMS Consumo energetico ON OFF W ON senza USB 45W max OFF 5W max ON con USB 50W max OFF 5W max misurati sull ingresso CA Dimensioni larg x alt x prof mm 419 W x 427 H...

Страница 104: ...SVGA 800x600 40 00 60 32 37 88 A D G 13 VESA 800x600 50 00 72 19 48 08 A D G 14 VESA 800x600 49 50 75 00 46 88 A D G 15 VGA 720x400 28 32 70 09 31 47 A G 16 XGA 1024x768 65 00 60 00 48 36 A D G 17 VE...

Страница 105: ...rmata di righe verticali Con Windows caricare uno sfondo bitmap che abbia delle righe verticali Oppure selezionare la finestra di chiusura 2 Dopo avere caricato lo sfondo aprire l OSD e selezionare la...

Страница 106: ...RT esterno Se il sistema PC funziona correttamente con un monitor CRT e non funziona con il monitor LCD e se il LED indicatore d alimentazione del monitor LCD sta lampeggiando significa che l uscita d...

Страница 107: ...l cable de se al del monitor Aseg rese de que el cable est colocar en una zona donde no sea pisado 4 No aplique presi n en la pantalla LCD La presi n excesiva podr a dar lugar a da os permanentes en l...

Страница 108: ...i n con conexi n a masa Jap n Tipo VCTF 3 hilos o cable de masa se requiere el marcaje T U S VW 1 18AWG X 3C SVT con aprobaci n nacional UL y o aprobaci n CSA Europa aprobaci n VDE VE y o KEMA H05VV F...

Страница 109: ...Ajuste de ngulo de Inclinaci n 4 Conexi n de alimentaci n AC V deo Audio 6 Sistema de administraci n de energ a 6 CAP TULO 2 7 Los Controles de Visi n del Monitor LCD 7 Ajuste de la pantalla del monit...

Страница 110: ...es Monitor LCD Cable de se al Monitor a PC 15 pin Cable de Audio Est reo Cable de alimentaci n Manual del Usuario Si encuentra que cualquiera de los elementos citados no se encuentran o parecen da ado...

Страница 111: ...para aplicar las opciones de monitor autom ticamente Aparecer un peque o OSD AJUSTE AUTOM TICO 2 Bot n de acceso r pido a Ajuste de volumen Pulse el primer bot n 3 para poder ajustar el volumen del so...

Страница 112: ...3 Vista posterior del Monitor LCD Figura 1 2 Puertos traseros de Monitor LCD 1 Entrada de L nea de Sonido 2 Conector de Alimentaci n AC 3 Conector Cable VGA...

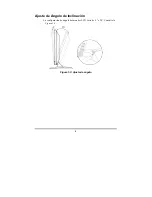
Страница 113: ...4 Ajuste de ngulo de Inclinaci n La configuraci n de ngulo del monitor LCD var a de 3 a 20 Consulte la Figura 1 3 Figura 1 3 Ajuste de ngulo...

Страница 114: ...5...

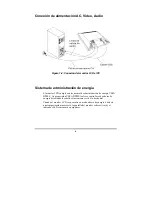
Страница 115: ...normas de administraci n de energ a VESA DPMS La proposici n VESA DPMS le ofrece cuatro fases de ahorro de energ a detectando la se al de sincronismo vertical u horizontal Cuando el monitor LCD se en...

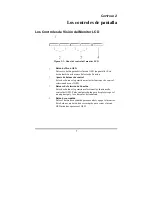
Страница 116: ...e control Estos dos botones le permiten ajustar las funciones de control seleccionadas en el OSD 3 Botones de Selecci n de Funci n Estos dos botones le permiten seleccionar las funciones de control de...

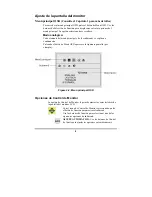
Страница 117: ...en s se explican a continuaci n Pulsando el bot n de Men OSD aparecer la siguiente pantalla por ejemplo Figura 2 2 Men principal OSD Opciones de Control de Monitor La opci n de Control de Monitor le p...

Страница 118: ...e las opciones gr ficas y de texto SALIR Pulse el bot n de funci n para salir del submen de Control de Monitor Opciones de Control OSD El men de Control OSD le permite ajustar la posici n del OSD en l...

Страница 119: ...R Use cualquiera de los botones de control de ajustes para seleccionar el color de la pantalla del monitor LCD Las opciones disponibles son 9300 6500 y Usuario Las opciones 9300 y 6500 le permiten con...

Страница 120: ...splazarse hasta el idioma OSD deseado Los idiomas soportados son Alem n Ingl s Franc s Espa ol e Italiano VOLUMEN DE AUDIO Use los botones de control de ajuste para incrementar o decrementar el volume...

Страница 121: ...e SIN VIDEO 2 Se al fuera del rango soportado por el monitor Consulte el ap ndice Cuando el rango de frecuencia se encuentre fuera de las especificaciones del monitor o la resoluci n entrante sea mayo...

Страница 122: ...Puerto Salida Control OSD Posici n horizontal OSD Posici n Vertical OSD Temporizador OSD Salida Control Gr fico Contraste Brillo Color R G B Nivel autom tico Reinicio Salida Control miscel Idioma Soni...

Страница 123: ...sumo de energ a ON OFF W ON Sin USB 45W m x OFF 5W m x ON Con USB 50W m x OFF 5W m x Medido desde entrada CA Dimensiones XxYxZ mm 419 W x 427 H x 218 D Peso neto aproximado Kg Approx 6 7 Fuente de ali...

Страница 124: ...A D G 12 SVGA 800x600 40 00 60 32 37 88 A D G 13 VESA 800x600 50 00 72 19 48 08 A D G 14 VESA 800x600 49 50 75 00 46 88 A D G 15 VGA 720x400 28 32 70 09 31 47 A G 16 XGA 1024x768 65 00 60 00 48 36 A D...

Страница 125: ...la pantalla de apagado 2 Despu s de cargar el fondo de escritorio abra el OSD y seleccione la funci n Reloj Pulse el bot n de Control de Ajuste superior o inferior y continue pulsando el bot n hasta q...

Страница 126: ...funciona con el monitor LCD y el LED de alimentaci n del monitor LCD est parpadeando la temporizaci n de la tarjeta VGA de salida podr a estar fuera del rango de sincronismo LCD Cambie a uno de los mo...

Страница 127: ...i LCD Copyright 2003 FCC FCC 15 1 2 FCC FCC 15 Class B...

Страница 128: ...ns Commission FCC FCC Class B ITE CE EN55022 1998 EN61000 3 2 1995 EN61000 3 3 1995 EN55024 1998 EN60950 1992 A1 A2 A3 A4 A11 FCC Class B Doc FCC Class B Canadian Department of Commu nications Radio I...

Страница 129: ...iii 1 2 3 PC 4 5 6 20 60 7 PC 8 9 VCTF 3 T VW 1 18AWG X 3C SVT UL CSA VDE VE KEMA H05VV F 3G 0 75...

Страница 130: ...iv 1 2 3 4 5 6 1 7 EMI...

Страница 131: ...v I V 1 1 1 2 2 LCD 3 4 AC 6 6 2 7 LCD 7 7 A 13 LCD 13 B 15 C 16 16...

Страница 132: ...1 1 LCD LCD LCD 15 Pin LCD...

Страница 133: ...2 1 1 1 FUNCTION 2 OSD 2 ADJUST 3 ADJUST 3 ADJUST 4 ADJUST 5 OSD...

Страница 134: ...3 LCD 1 2 LCD 1 LCD 2 AC AC 3 VGA 15 D Sub VGA VGA...

Страница 135: ...4 LCD LCD 3 20 1 3 1 3 LCD LCD...

Страница 136: ...5...

Страница 137: ...6 AC 1 4 LCD PC LCD VESA DPMS 1 0p VESA DPMS LCD LED...

Страница 138: ...7 2 LCD LCD OSD OSD OSD LCD LCD LCD OSD 2 1 1 OSD 2 ADJUST 3 FUNCTION 4 POWER 1 1...

Страница 139: ...8 OSD 2 2 OSD OSD 15 20 Monitor Control LCD Function Auto Adjust Function ADJUST H Position Adjustment Control LCD...

Страница 140: ...9 V Position Adjustment Control LCD Phase Adjustment Control Clock Adjustment Control Reset Adjustment Control EXIT OSD OSD OSD Control OSD OSD Function OSD OSD OSD 5 10 15 20 25 30 6 EXIT OSD...

Страница 141: ...10 Graphic Control LCD Function Contrast LCD Brightness LCD Color LCD 9300 6500 9300 6500 CIE 9300 6500 R G B R G B Auto Level RESET YES LCD Exit...

Страница 142: ...11 Misc Control OSD Function Language OSD Audio Volume LCD Information Exit OSD OSD Exit OSD OSD Exit OSD OSD...

Страница 143: ...12 Note 1 NO VIDEO 2 1280x1024 OVER RANGE...

Страница 144: ...13 A LCD LCD 19 SXGAFST1904K1 K2 K2U 1A 2B OSD OSD OSD OSD R G B OSD OSD 376 32x 301 056mm 19 inch diagonal 16 7M VGA RGB 15 D Sub...

Страница 145: ...14 OSD 24 80K 50 75 H V Hz 30 80k 50 75 VESA DPMS 45W 50W USB 5W 5W 419mm W x 427mm H x 218mm D 6 7 100 240VAC 50 60Hz 0 40 C 10 85 1 0W x 2 cUL CE FCC B DoC VCCI...

Страница 146: ...6 A D G 12 SVGA 800x600 40 00 60 32 37 88 A D G 13 VESA 800x600 50 00 72 19 48 08 A D G 14 VESA 800x600 49 50 75 00 46 88 A D G 15 VGA 720x400 28 32 70 09 31 47 A 16 XGA 1024x768 65 00 60 00 48 36 A D...

Страница 147: ...16 C VGA VGA VGA LCD VGA LCD VGA 1 Windows 2 OSD Clock 3 4 Phase...

Страница 148: ...17 LCD 1 2 2 3 CRT CRT LED VGA VGA 4 CRT BIOS BIOS Dual Scan CRT 5 LED AC AC LED AC LED...

Страница 149: ......

Отзывы: