


14
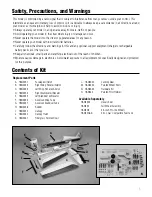
Required Parts
• Fuselage
• Servo
• Pro-Link
• Ball end w/hardware
Required Tools and Adhesives
• 1
1
/
2
-inch Single Side Alum Adj.
Spline Servo Arm
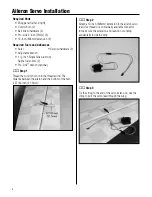
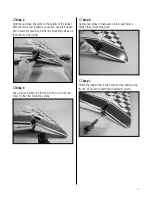
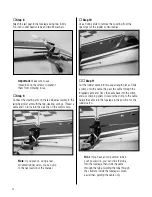
Step 1
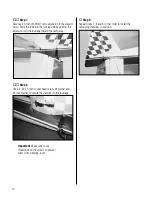
A servo can be mounted in the rear of the fuselage when
using heavier engine options. You will need to remove
the covering for the servo and mount the servo using the
hardware provided with the servo. Use the longer Pro-
Link
™
to connect the servo to the control horn as shown
in the image below.
Required Parts
• Stabilizer assembly (left and right)
• Control horn (2)
• Stabilizer tube
• #4 washer (4)
• #4 lock washer (4)
• 4-40 x 1/2-inch socket head screw (2)
• 4-40 x 1-inch socket head screw (2)
• Ball link w/hardware (2)
• Pro-Link, 2-inch (51mm) (2)
Required Tools and Adhesives
• Ruler
• Servo w/hardware (2)
• Adjustable wrench
• 1
1
/
2
-inch Single Side Alum Adj.
Spline Servo Arm (2)
• Pro-Link wrench (optional)
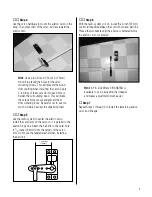
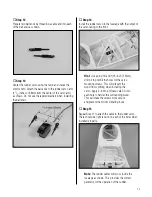
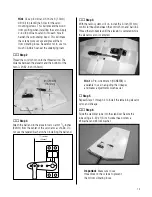
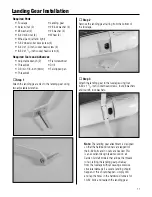
Step 1
Use the servo hardware to mount the elevator servo in
the stabilizer. The output shaft of the servo will face away
from the control horn. Use the radio system to center the
elevator servo. Install the servo arm on the servo so it is
parallel to the elevator hinge line.
Tail Mounted Servo Installation
Stabilizer Servo and Installation


