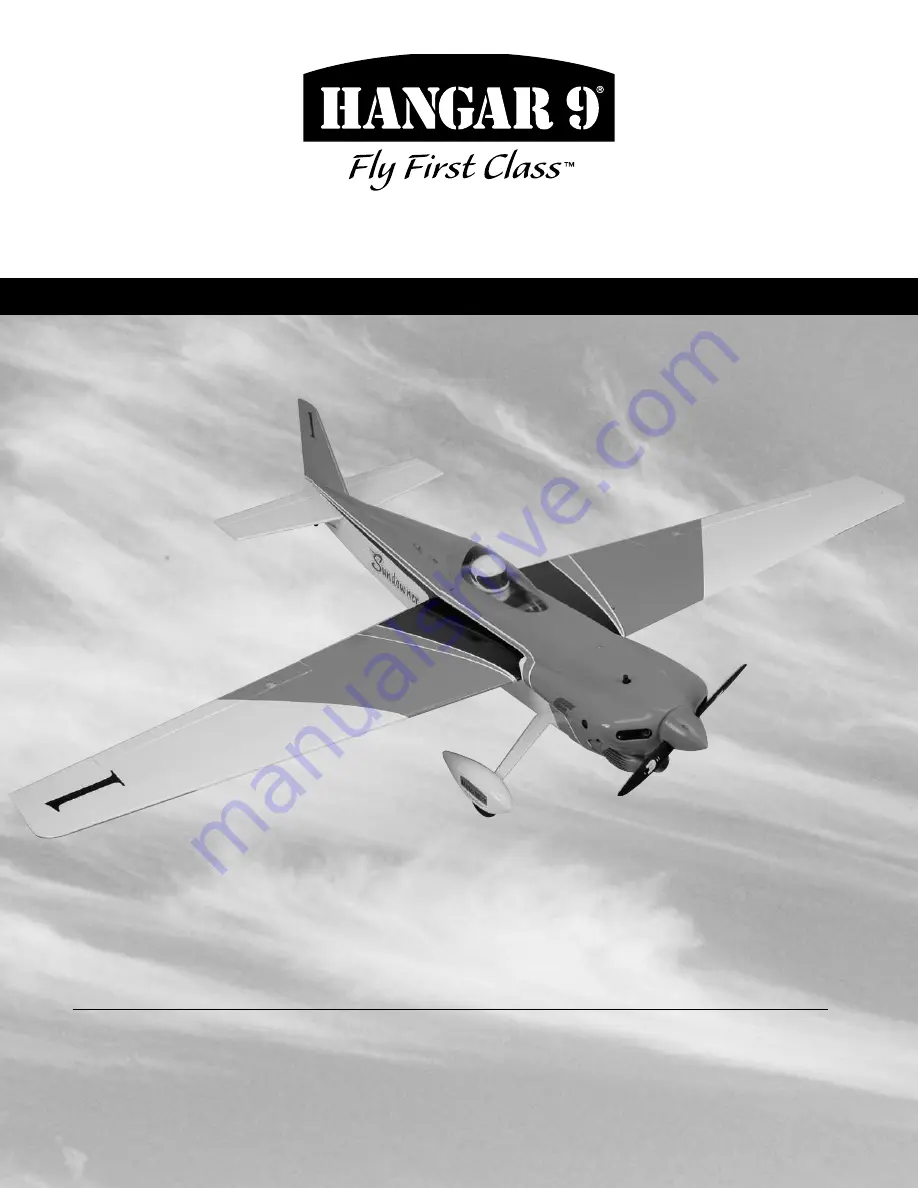
background image

Wingspan ........................................63 in (1600mm)

Wing area .............................572 sq in (36.9 sq dm)

Length ..........................................47.4 in (1204mm)

Weight ................................... 6–6.75 lb (2.72–3 kg)

Assembly mAnuAl

Sundowner 50 ARF

Engine  .....................................  .56–.82 Four-Stroke 

 ....................................... .40–.52 Two-Stroke 

 ...........................................Power 46 Electric

Radio..............4-Channel w/5 Servos (4 for electric)

Specifications

Содержание Sundowner 50 ARF

Страница 1: ...g area 572 sq in 36 9 sq dm Length 47 4 in 1204mm Weight 6 6 75 lb 2 72 3 kg Assembly manual Sundowner 50 ARF Engine 56 82 Four Stroke 40 52 Two Stroke Power 46 Electric Radio 4 Channel w 5 Servos 4 for electric Specifications ...

Страница 2: ...airs 6 Safety Precautions and Warnings 7 Contents of Kit 7 Section 1 Aileron Servo Installation 8 Section 2 Engine Installation 2 Stroke 13 Section 3 Engine Installation 4 Stroke 18 Section 4 Throttle Servo Installation 23 Section 6 Electric Motor Installation 25 Section 7 Wing and Cowling Installation 27 Section 8 Tail Installation 32 Section 9 Landing Gear Installation 37 Section 10 Radio and Pi...

Страница 3: ...per Soldering iron Solder Hex wrench 3 32 inch Drill bit 1 16 inch 1 5mm 5 64 inch 2mm 9 64 inch 3 5mm Adhesives Formula 560 Canopy Glue PAAPT56 Pacer Z 42 Threadlock PAAPT42 Thin CA cyanoacrylate Glue PAAPT07 CA Remover Debonder PAAPT16 UltraCote Covering Colors Pearl Charcoal HANU846 White HANU870 Silver HANU881 Orange HANU877 Before Starting Assembly Before beginning the assembly of the Sundown...

Страница 4: ...AIE082A or SAIE082AGK Propeller 13 x 8 EVO13080 or 14 x 6 EVO14060 Recommended Setup Electric E flite Power 46 BL Outrunner Motor EFLM4046A Castle Creations 60A ESC CSEPHX60 Thunder Power 4S 3850 4500mAh Li Po Battery Pack APC Propeller 13x6 5 inch APC13065E to 14x7 APC14070E FS One With FS One you get more than photorealistic fields gorgeous skies and realistic looking aircraft You get incredibly...

Страница 5: ...o any part of the Product This warranty does not cover damage due to improper installation operation maintenance or attempted repair by anyone other than Horizon Return of any goods by Purchaser must be approved in writing by Horizon before shipment Damage Limits HORIZON SHALL NOT BE LIABLE FOR SPECIAL INDIRECT OR CONSEQUENTIAL DAMAGES LOSS OF PROFITS OR PRODUCTION OR COMMERCIAL LOSS IN ANY WAY CO...

Страница 6: ...rranty Inspection and Repairs To receive warranty service you must include your original sales receipt verifying the proof of purchase date Provided warranty conditions have been met your Product will be repaired or replaced free of charge Repair or replacement decisions are at the sole discretion of Horizon Hobby Non Warranty Repairs Should your repair not be covered by warranty the repair will b...

Страница 7: ... support equipment chargers rechargeable battery packs etc that you use Keep all chemicals small parts and anything electrical out of the reach of children Moisture causes damage to electronics Avoid water exposure to all equipment not specifically designed and protected for this purpose Contents of Kit Replacement Parts A HAN4726 Fuselage w Canopy B HAN4727 Left Wing w Aileron C HAN4728 Right Win...

Страница 8: ...ed marks on the servo cover If the servo does not align between the marks align the servo with the marks closest to the edge and relocate the marking for the remaining block o Step 2 Use sandpaper to roughen the surface of the 3 4 x 9 16 x 5 16 inch 19 x 14 x 8mm hardwood blocks that will be attached to the servo cover Use 30 minute epoxy to attach the blocks to the servo covers o Step 3 Use a fel...

Страница 9: ...into each hole to harden the surrounding wood o Step 6 Attach the aileron servo to the mounting blocks using the screws provided with the servo o Step 7 Attach a long servo horn to the aileron servo after centering the servo with the radio system Remove any unused arms from the servo horn as shown Section 1 Aileron Servo Installation ...

Страница 10: ...hown o Step 9 Work the wheel collar through the wing until the collar exits the wing as shown o Step 10 Tie the end of the string to the aileron servo lead and pull the lead through the wing o Step 11 Secure the aileron servo cover to the wing using four 2 x 3 8 inch sheet metal screws Section 1 Aileron Servo Installation ...

Страница 11: ...it is secure on the pushrod but can still be adjusted o Step 13 Attach the clevis to the aileron control horn o Step 14 Use a felt tipped pen to mark the pushrod where it crosses the outer hole on the servo horn o Step 15 Use a pair of pliers to make a 90 degree bend in the pushrod at the mark made in the previous step Section 1 Aileron Servo Installation ...

Страница 12: ... inch 1 5mm exposed beyond the connector to prevent the wire from coming out of the connector Step 20 Repeat Steps 1 through 19 to install the remaining aileron servo o Step 16 Use a pin drill and a 5 64 inch 2mm drill bit to enlarge the outer hole in the servo arm o Step 17 Slide the pushrod wire through the hole in the servo horn Section 1 Aileron Servo Installation ...

Страница 13: ...ill Drill Side cutters Fuel dot Drill bit 5 64 inch 2mm 5 32 inch 4mm 11 64 inch 4 5mm Step 1 Use a 3 32 inch hex wrench to loosen the two 4 40 screws and remove the canopy from the airframe Step 2 Attach the engine mount to the fuselage using four 8 32 x 3 4 inch machine screws and four 8 washers Make sure to use threadlock on the screws to help prevent them from vibrating loose Step 3 Position t...

Страница 14: ...4 inch 4 5mm drill bit to drill the four holes in the engine mount rails Step 6 Attach the engine to the mount using four 8 32 x 1 inch machine screws four 8 washers and four locknuts The washers are placed between the screw heads and the engine Step 7 Use a felt tipped pen to mark the firewall for the throttle pushrod Section 2 Engine Installation 2 Stroke ...

Страница 15: ...se a drill and 5 32 inch 4mm drill bit to drill a hole in the firewall for the throttle pushrod tube Step 10 Roughen the pushrod tube using sandpaper Slide the tube into the hole drilled in the previous step Use medium CA to glue the pushrod to the firewall Leave about 1 16 inch 1 5mm protruding beyond the front of the firewall Step 11 Use side cutters to trim the throttle pushrod at the location ...

Страница 16: ...s secure on the pushrod but can still be adjusted Step 13 Attach the clevis to the carburetor arm on the engine Step 14 Follow the instructions provided with your engine to attach the muffler Step 15 Slide the fuel tank into the fuselage Make sure to locate the vent line from the fuel tank toward the top of the fuselage Section 2 Engine Installation 2 Stroke ...

Страница 17: ...nsferring to the fuel tank Step 17 Connect the lines from the fuel tank to the engine and muffler We used a fuel dot to allow fueling the tank from outside the cowling Note The throttle must be closed all the way when fueling with this type setup to avoid flooding the engine We clamp the fuel line to the carburetor using forceps Section 2 Engine Installation 2 Stroke ...

Страница 18: ...ll bit 5 64 inch 2mm 5 32 inch 4mm 11 64 inch 4 5mm Step 1 Use a 3 32 inch hex wrench to loosen the two 4 40 screws and remove the canopy from the airframe Step 2 Attach the engine mount to the fuselage using four 8 32 x 3 4 inch machine screws and four 8 washers Make sure to use threadlock on the screws to help prevent them from vibrating loose Step 3 It may be necessary to rotate the carburetor ...

Страница 19: ...tation in the mount for the engine mounting screws Step 6 Use a drill with an 11 64 inch 4 5mm drill bit to drill the four holes in the engine mount rails Step 7 Attach the engine to the mount using four 8 32 x 1 inch machine screws four 8 washers and four locknuts The washers are placed between the locknuts and the engine mounting rails Section 3 Engine Installation 4 Stroke ...

Страница 20: ...meter relocate the mark so the pushrod does not interfere with the fuel tank Step 10 Use a drill and 5 32 inch 4mm drill bit to drill a hole in the firewall for the throttle pushrod tube Step 11 Roughen the pushrod tube using sandpaper Slide the tube into the hole drilled in the previous step Use medium CA to glue the pushrod to the firewall Leave about 1 16 inch 1 5mm protruding beyond the front ...

Страница 21: ...Step 13 Make a Z bend in the 157 8 inch 403mm throttle pushrod Make the bend on the end without the threads Step 14 Attach the Z bend to the carburetor as shown Step 15 Position the engine back on the firewall guiding the throttle pushrod into the pushrod tube Section 3 Engine Installation 4 Stroke ...

Страница 22: ... fuel tank inside the fuselage Make sure to place foam at any points where the fuel tank contacts the airframe to help prevent vibrations from transferring to the fuel tank Step 18 Connect the lines from the fuel tank to the engine and muffler We used a fuel dot to allow fueling the tank from outside the cowling Section 3 Engine Installation 4 Stroke ...

Страница 23: ...d Use a felt tipped pen to mark the locations for the servo mounting screws Step 2 Drill the holes for the servo mounting screws using a drill and 5 64 inch 2mm drill bit Use 2 3 drops of thin CA in each hole to harden the surrounding wood Step 4 Secure the throttle servo using the screws provided with the servo Step 5 Slide the plywood pushrod standoff onto the pushrod tube The exact location wil...

Страница 24: ...loose Step 10 Slide the pushrod standoff so it can be glued to the side of the fuselage using medium CA as shown Step 6 Enlarge the outer hole in the throttle servo horn using a 5 64 inch 2mm drill bit and pin drill Slide the brass connector into the hole as shown Step 7 Secure the connector to the servo horn using the connector backplate Step 8 With the radio system on center the throttle stick a...

Страница 25: ... to score the plywood along the lines Step 2 Use a hobby knife to remove the plywood from the top of the engine box to provide cooling air to pass through the fuselage The plywood has been partially cut so all that is required is to score the plywood along the lines Step 3 Use a hobby knife and a covering iron to open the cooling air exit in the bottom of the fuselage Cutting the covering 1 8 inch...

Страница 26: ... to prevent them from vibrating loose Step 7 Secure the speed controller to the bottom of the fuselage using a tie wrap as shown Secure the wires between the motor and speed control so they do not interfere with the operation of the motor Step 8 Secure the motor battery inside the fuselage using the two hook and loop straps If the battery moves fore or aft use hook and loop not provided mounted di...

Страница 27: ... 5mm 1 8 inch 3mm 3 8 inch 9 5mm Step 1 Slide the wing tube into one of the wing panels Step 2 Slide the wing panel and wing tube into the fuselage Guide the servo lead from the aileron servo into the hole behind the wing tube Step 3 Secure the wing to the fuselage using a 1 4 20 x 13 8 inch nylon wing bolt Step 4 Slide the remaining wing panel in position and secure it using a 1 4 20 x 13 8 inch ...

Страница 28: ...ocate the cowl mounting blocks Step 7 Slide the cowling on the fuselage Make sure the card stock is on the outside of the cowling Step 8 Attach the propeller and spinner onto the motor engine Follow the instructions provided with your motor engine for the propeller install Section 7 Wing and Cowling Installation ...

Страница 29: ...ep 10 Use thin CA to harden the surrounding wood to help prevent the screws from vibrating loose Step 11 Enlarge the holes in the cowling ONLY using a pin drill and 1 8 inch 3mm drill bit Step 12 Secure the cowling to the fuselage using four 4 x 1 2 inch sheet metal screws Section 7 Wing and Cowling Installation ...

Страница 30: ...r cutting the cowling for a 4 stroke engine Make sure to make cutouts for the rocker box covers exhaust and needle valve You will need to drill a 3 8 inch 9 5mm hole in the cowl for mounting the fuel dot as well Section 7 Wing and Cowling Installation ...

Страница 31: ...for cutting the cowling for a 2 stroke engine Make sure to make cutouts for glow plug access muffler and needle valve You will need to drill a 3 8 inch 9 5mm hole in the cowl for mounting the fuel dot as well Section 7 Wing and Cowling Installation ...

Страница 32: ...tabilizer into the slot in the rear of the fuselage View through the slot for the fin to center the stabilizer using the line drawn in the previous step Step 3 Stand back 8 feet 3 meters and view the aircraft from the rear The wing should be parallel to the stabilizer If not lightly sand the opening in the fuselage to correct the alignment Parallel Step 4 Check the alignment between the wing and s...

Страница 33: ...ng wood which will weaken the stabilizer Note Use either a hot knife or soldering iron to melt the covering reducing the chance of cutting into the stabilizer Step 7 Use sandpaper to roughen the ends of the stabilizer joiner This will provide a better bond between it and the elevators Step 8 Slide the joiner wire into the fuselage then the stabilizer Make sure the joiner wire is positioned before ...

Страница 34: ... CA before proceeding Step 10 Use a pin drill with a 1 16 inch 1 5mm drill bit to drill a hole in the center of each of the hinge slots on both the stabilizer and elevator This creates a tunnel for the CA to wick farther into the hinge resulting in a better bond between the hinge and surrounding wood Step 11 Place a T pin in the center of each of the six CA hinges as shown in the below photo Step ...

Страница 35: ...tightly against the stabilizer when installed Step 15 Repeat Steps 13 and 14 to check the fit of the remaining elevator Use 30 minute epoxy on the joiner wire and elevators to glue them together Step 16 Wick thin CA into each of the six hinges on both the top and bottom of the stabilizer Do not use accelerator on the hinges as this will not allow the CA to fully wick into the hinges Section 8 Tail...

Страница 36: ...servos Step 19 Fit the fin into the fuselage and check that it is square to the stabilizer Lightly sand the fuselage to correct for any alignment problems Step 20 Installing the fin follows the steps similar to installing the stabilizer You will need to follow Steps 5 and 6 to remove the covering from the bottom of the fin where it contacts the fuselage Use 30 minute epoxy when gluing the fin to t...

Страница 37: ...esives Threadlock File Adjustable wrench 2 Medium CA Hex wrench included Step 1 Use two adjustable wrenches to attach the axles to the landing gear Step 2 Attach the landing gear to the fuselage using two 8 32 x 3 4 inch machine screws and two 8 washers Make sure to use threadlock on the screws to prevent them from vibrating loose Step 3 Use medium CA to glue the landing gear fairing to the landin...

Страница 38: ... screw to keep it in position for the next few steps Step 6 Slide the wheel onto the axle then another 5 32 inch wheel collar onto the axle Use a 3mm x 4mm machine screw to keep the wheel and collar in position Step 7 Secure the wheel pant to the landing gear using a 4 40 x 3 8 inch socket head machine screw and a 4 washer Use threadlock on the screw to prevent vibrations from loosening the screw ...

Страница 39: ...d will be tightening them using the provided hex wrench Again use threadlock on the setscrews to prevent vibration from causing the loss of your tail wheel Required Parts Fuselage assembly Pilot Pilot support brace Receiver Switch harness Y harness Clevis 2 Clevis retainer 2 Snap link 2 243 4 inch 630mm threaded pushrod rudder 231 4 inch 590mm threaded pushrod elevator Required Tools and Adhesives...

Страница 40: ...is placed on top of the battery or locate as necessary to achieve balance Make sure to isolate the receiver from vibrations by placing foam between it and the fuselage structure Note When using a remote receiver place it as far as possible from the main receiver and at a different level in the fuselage for the best results The higher the remote receiver can be mounted in the fuselage the better St...

Страница 41: ...outer hole in the servo arm o Step 8 Slide the pushrod wire through the hole in the servo horn Slide the snap link onto the pushrod wire then rotate it until it snaps on the wire o Step 9 Use side cutters to remove the excess wire Leave at least 1 16 inch 1 5mm exposed beyond the connector to prevent the wire from coming out of the connector Section 10 Radio and Pilot Installation ...

Страница 42: ... canopy using medium CA Step 10 Thread a clevis onto the 243 4 inch 630mm threaded pushrod for the rudder Slide the pushrod into the tube nearest the rudder control horn and attach the clevis to the horn as shown Step 11 Repeat Steps 5 through 10 to connect the rudder pushrod to the rudder servo horn Section 10 Radio and Pilot Installation ...

Страница 43: ...own Elevator High Rate 5 16 inch 8mm up down Rudder Low Rate 7 16 inch 11mm right left Rudder High Rate 3 4 inch 19mm right left Note All control throws are measured at the widest point of the control surface Once the control throws have been set slide the clevis retainers over the clevis to prevent them from opening during flight An important part of preparing the aircraft for flight is properly ...

Страница 44: ...ilure of any of these components in flight would mean the loss of your aircraft Step 1 Completely read the instructions included with your engine and follow the recommended break in procedure Step 2 At the field adjust the engine to a slightly rich setting at full throttle and adjust the idle and low speed needle so that a consistent idle is achieved Step 3 Before you fly be sure that your engine ...

Страница 45: ...45 Building and Flying Notes ...

Страница 46: ...with metal blade propellers or with gaseous boosts other than air nor will I operate model aircraft with fuels containing tetranitromethane or hydrazine 8 I will not operate model aircraft carrying pyrotechnic devices which explode burn or propel a projectile of any kind Exceptions include Free Flight fuses or devices that burn producing smoke and are securely attached to the model aircraft during...

Страница 47: ... site a day use agreement between sites or testing which determines that no interference exists A frequency management agreement may exist between two or more AMA chartered clubs AMA clubs and individual AMA members or individual AMA members Frequency management agreements including an interference test report if the agreement indicates no interference exists will be signed by all parties and copi...

Страница 48: ... 2007 Horizon Hobby Inc 4105 Fieldstone Road Champaign Illinois 61822 877 504 0233 horizonhobby com 11218 ...

Отзывы: