


35
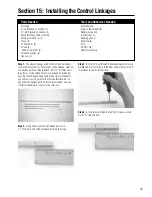
Parts Needed
Tools and Adhesives Needed
Parts Needed
Tools and Adhesives Needed
Section 13: Assembling and Installing the Fuel Tank (Glow/Gas)
Brass tube, long (vent)
Brass tube, long (fuel)
Clunk (fuel pickup)
Fuel tubing, small (glow)
Fuel tank
Plastic cap (2)
Rubber stopper (glow and gas)
3 mm screw
Fuel tubing, gas (not supplied, DUB554/AER1073)
Hobby knife
Phillips screwdriver (medium)
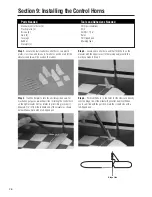
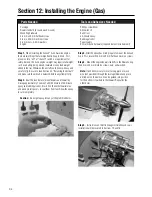
Step 1.
Locate the tank parts.
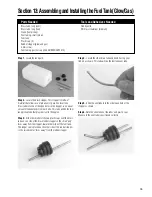
Step 2.
Locate the black stopper. This stopper is made of
material that allows use of glow fuel or gasoline. Insert one
brass tube into one of the open holes in the stopper so an equal
amount of tube extends from each side. This tube will be the fuel
tank pickup tube that provides fuel to the engine.
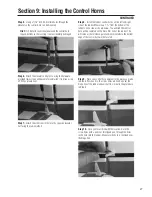
Step 3.
Slide the smaller of the two plastic caps over the brass
tube on one side of the black rubber stopper so the small "peg"
faces away from the stopper, toward the inside of the fuel tank.
The longer cap is placed on the other side of the rubber stopper
so the raised center "faces away" from the rubber stopper.
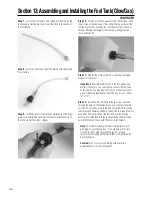
Step 4.
Locate the other brass tube and bend it using your
finders as shown. This tube will be the fuel tank vent tube.
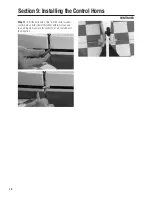
Step 5.
Slide the vent tube into the other open hole of the
stopper as shown.
Step 6.
Note the orientation of the tubes and plastic caps.
Make sure the vent tube is positioned correctly.


