


-19-
PREPARING FOR OPERATION
Before operation, run machine slowly to make sure that the spreader is operating and lubricated properly.
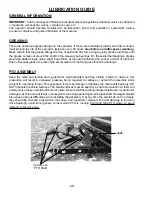
PTO ASSEMBLY
Attach the PTO of the spreader to the tractor by sliding the spring loaded locking collar on PTO yoke
rearward, then sliding it onto the tractor PTO shaft. Release spring loaded collar. Be sure the pins fall into
the groove of the tractor PTO shaft and collar snaps forward into locking position.
CAUTION:
Do not use a steel hammer to aid in joining PTO parts.
Keep the male and female driving elements well lubricated and free sliding. Failure to observe this
precaution will result in excessive pressure being required to collapse or extend the assembly while
subject to operating torque. This excessive force may damage or displace the main shaft bearings. DO
NOT lubricate the shield surfaces. The shield surfaces must be kept dry, as dirt accumulation on them will
quickly cause these units to bind and not rotate. Be sure that the rotating integral shields are not dented or
damaged, as this also will result in excessive force being applied against the jackshaft. Damaged shields
also cause obvious difficulties when installing the assembly. If at any time the shields do not turn freely,
they should be checked to determine the cause, and repaired or cleaned. To avoid damage to the main
drive bearings, avoid turning sharp corners while PTO is running. Start and Stop PTO slowly to avoid
damage to the drive line.
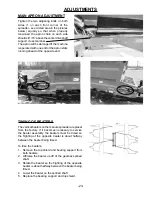
If this implement is attached to a tractor with an
offset in the drawbar, be certain it is in the down
position to prevent damage to the IID guarding
and the IID telescoping members. [See Figure 2]
If this implement is attached to a tractor with a clevis
hitch (hammer-strap) style drawbar, the hammer-strap
must be removed to prevent damage to the IID guard
-
ing and the IID telescoping members. [See Figure 1]
Содержание 6180
Страница 5: ...3 Remove Copy At Perforation...
Страница 6: ...4 Intentionally Left Blank...
Страница 8: ...Intentionally Left Blank 6...
Страница 10: ...Intentionally Left Blank 8...
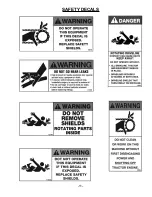
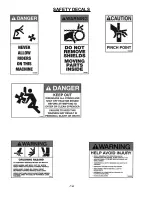
Страница 13: ...11 SAFETY DECALS...
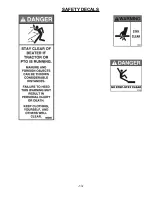
Страница 14: ...12 SAFETY DECALS...
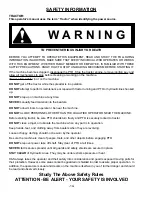
Страница 15: ...13 SAFETY DECALS...
Страница 17: ...15...
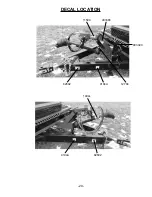
Страница 31: ...DECAL LOCATION 9194A 11599 82602 82602 29 1494L 9194A 12794 093366 093020...
Страница 34: ...DECAL LOCATION 32 DCAMB 1494J 86060 JD5922 DCRED 12794 71494A UNDER SHIELD 1906F 11599 11599 1906C JD5922...
Страница 35: ...DECAL LOCATION 33 51010 1906F DCAMB 093020 DCAMB 9194A 94012 94009...
Страница 39: ......


