background image

ENGLISH 

25 

4. 

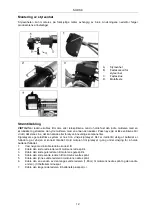
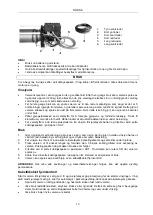
Disengage  by  putting  the  clutch  lever  in  the  OUT  position.  The  drum  can  rotate  freely  when  the 
wire is unwinded. 

5. 

Engage by putting the clutch lever in the IN position. The winch is now ready for use. 

6. 

The wire can be unwinded/winded up by using a cable-connected remote control. 

WARNING:

  Failure  to  follow  all  the  instructions  and  safety  instructions  can  result  in  the  risk  of  serious 

personal injury. 

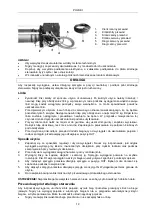
Cable-connected remote control 

To start winching, start the engine, disengage the gears and let the engine idle. Never winch the vehicle 
when in gear, or in park if it has an automatic gearbox, this can damage the transmission. 


Never wind the wire round an object, or hook the hook round the wire. 


Do  not  wear  loose-fitting  clothes,  jewellery,  watches  or  the  like. They  can  fasten  in  moving  parts. 
Keep your hands and other parts of your body away from the drum and wire when winching. 


Do not use the winch if the wire is damaged. 


Make sure that no one is near, or in line with the wire when it is loaded. If the wire comes loose or 
breaks,  the  end  will  be  thrown  back  towards  the  winch  with  great  force  and  could  cause  serious 
personal injury. Always stand at a safe distance to the side of the wire when it is loaded. 


Disconnect the winch from the 12 V connection on the vehicle when the winch is not in use. 


The  remote  control  can  suffer  from  interference  if  several  winches  with  the  same  frequency  are 
used within 70 metres of each other. 


If water gets into the remote control, remove the batteries immediately and clean the circuit board 
with 98% ethanol. 


Replace the batteries in the remote control if there is reduced functionality. 

MAINTENANCE 

Run the winch at least once a month. Unwind the wire with the motorn for 15 metres, pull out another 5 
metres with the drum in neutral, then wind on the wire with the motor with a load of 230 kg. This will keep 
the winch in good condition. 


Jula  reserves  the  right  to  make  changes.  In  the  event  of  problems,  please  contact  our  service 
department. 
www.jula.com 


Содержание 604-098

Страница 1: ...Bruksanvisning f r vinsch Bruksanvisning for vinsj Instrukcja obs ugi wyci garki Operating Instructions for Winch 604 098 10 08 2015 Jula AB SV NO PL EN...

Страница 2: ...ERING 5 Montering 6 Sm rjning 6 F rberedelse f r montering av vajer 6 Montering av styrenhet 6 Elanslutning 7 HANDHAVANDE 7 Vinschvajer 7 Anv ndning 7 Kabelansluten fj rrkontroll 8 UNDERH LL 8 NORSK 9...

Страница 3: ...lektryczne 18 OBS UGA 19 Linka 19 Spos b u ycia 19 Przewodowy pilot zdalnego sterowania 19 KONSERWACJA 20 ENGLISH 21 SAFETY INSTRUCTIONS 21 Use and safety 21 Battery 22 Winch wire 22 TECHNICAL DATA 22...

Страница 4: ...lindningen medf r inga problem vid vinschning men vajern f r inte samlas helt vid ena nden av trumman Om det h nder k r vinschen bakl nges f r att avlasta och flytta f stpunkten n rmare fordonets mitt...

Страница 5: ...ledning V xell da 3 v xlad planetv xel Utv xlingsf rh llande 172 8 1 Broms Automatisk trumbroms Trummans m tt Diameter 64 mm L ngd 224 mm Vajer Diameter 8 2 mm L ngd 28 5 m Linledare 4 v gs linledare...

Страница 6: ...rollera att chassit klarar vinschens nominella dragkraft Sm rjning Alla vinschens r rliga delar r permanentsmorda fr n fabrik med h gtemperaturlitiumfett Under normala f rh llanden beh vs ingen ytterl...

Страница 7: ...e och anslut fj rrkontrollen Koppla inte i medan motorn r ig ng Vinschvajer Vajerns livsl ngd beror p anv ndning och underh ll Efter varje anv ndning ska vajern lindas av och lindas upp med 230 kg las...

Страница 8: ...r belastad Om vajern lossnar eller brister slungas nden tillbaka mot vinschen med stor kraft och kan orsaka allvarlig personskada St alltid p s kert avst nd vid sidan om vajern n r den r belastad Kopp...

Страница 9: ...tuppen av den eller p kroksperren Bruk aldri en krok som er demontert slik at pningen har blitt st rre eller som har en deformert tupp Ikke ber r en spent eller belastet vaier eller krok Kroken skal a...

Страница 10: ...vaieren er skadet Ikke flytt kj ret yet for flytte lasten Ikke bytt ut vaieren med en svakere vaier Overbelast aldri vinsjen Ikke flytt kj ret yet for flytte lasten det kan overbelaste vaieren og skad...

Страница 11: ...m de indre noe som skader vaieren Montering 1 Monter vinsjen med monteringssettet eller p en plan stabil overflate etter anvisningene for monteringssettet 2 Plasser vinsjen over hullene i monteringsse...

Страница 12: ...e komponenter Kj ret yets eget elektriske system er nok til vinsje kj ret yet Det er imidlertid viktig at batteriet er fulladet og at vinsjen er korrekt tilkoblet Hold motoren til kj ret yet i gang un...

Страница 13: ...e m du l sne plusslederen fra vinsjen til kj ret yets batteri og frikoble ved sette koblingsspaken i posisjonen OUT Bruk 1 Gj r deg kjent med betjening og bruk av vinsjen L r deg kjenne igjen hvordan...

Страница 14: ...rukes innen 70 meter fra hverandre Hvis det trenger vann inn i fjernkontrollen m du straks ta ut batteriene og rengj re kretskortet med etanol 98 Bytt batteriene i fjernkontrollen hvis funksjonen blir...

Страница 15: ...a ani przenoszenia os b Nigdy nie przeci aj wyci garki ani linki Zawsze umieszczaj adunek na rodku haka nie na jego czubku ani na blokadzie Nigdy nie u ywaj haka kt ry zosta zdemontowany tak e jego ot...

Страница 16: ...rzyma o ci Nigdy nie przeci aj wyci garki Nie przemieszczaj pojazdu aby przenie adunek Mo e to spowodowa przeci enie linki i jej uszkodzenie awari wyci garki lub niebezpieczne szarpni cie Do szarpni c...

Страница 17: ...odzenia linki Monta 1 Zamontuj wyci gark z u yciem zestawu monta owego lub na p askiej stabilnej powierzchni Przestrzegaj instrukcji obs ugi zestawu monta owego 2 Umie wyci gark nad otworami w zestawi...

Страница 18: ...t w wewn trznych W asny uk ad elektryczny pojazdu wystarcza do wyci gni cia pojazdu Jednak wa ne jest aby akumulator by ca kowicie na adowany a wyci garka prawid owo pod czona Pozostaw silnik pojazdu...

Страница 19: ...w aby uszczelni gwinty i zapobiec wyciekowi Dokr rub dociskow lecz nie za mocno Zapobiega to poluzowaniu si po cze rubowych pod obci eniem Przed wymian linki od cz przew d dodatni biegn cy od wyci ga...

Страница 20: ...dleg o ci mniejszej ni 70 m u ywana b dzie wi ksza liczba wyci garek korzystaj cych z tej samej cz stotliwo ci mo e doj do zak cenia pracy pilota zdalnego sterowania W przypadku dostania si wody do pi...

Страница 21: ...winching but the wire must not collect at one end of the drum If this happens run the winch in reverse to relieve the strain and move the attachment point closer to the middle of the vehicle Unwind a...

Страница 22: ...lanetary gear Gear ratio 172 8 1 Brake Automatic drum brake Drum size Diameter 64 mm Length 224 mm Wire Diameter 8 2 mm Length 28 5 m Fairlead 4 way fairlead Recommended battery Min 650 CCA for winchi...

Страница 23: ...that the chassis can withstand the nominal pulling force of the winch Lubrication All the moving parts on the winch are permanently lubricated at the factory with high temperature lithium grease No fu...

Страница 24: ...e connections can be protected with silicon spray USE To start winching set the clutch lever in neutral and connect the remote control Do not connect while the engine is running Winch wire The useful...

Страница 25: ...the winch if the wire is damaged Make sure that no one is near or in line with the wire when it is loaded If the wire comes loose or breaks the end will be thrown back towards the winch with great fo...

Страница 26: ......

Отзывы: