background image


3


Preensamblaje

PLANIFICACIÓN DEL ENSAMBLAJE 

Lee todas las instrucciones antes de ensamblar.

Para evitar daños al producto, ensámblalo sobre una superficie 
suave y no abrasiva, como una alfombra o un cartón.


NOTA: 

Se puede necesitar más de una persona para 

ensamblar completamente este producto.


NOTA: 

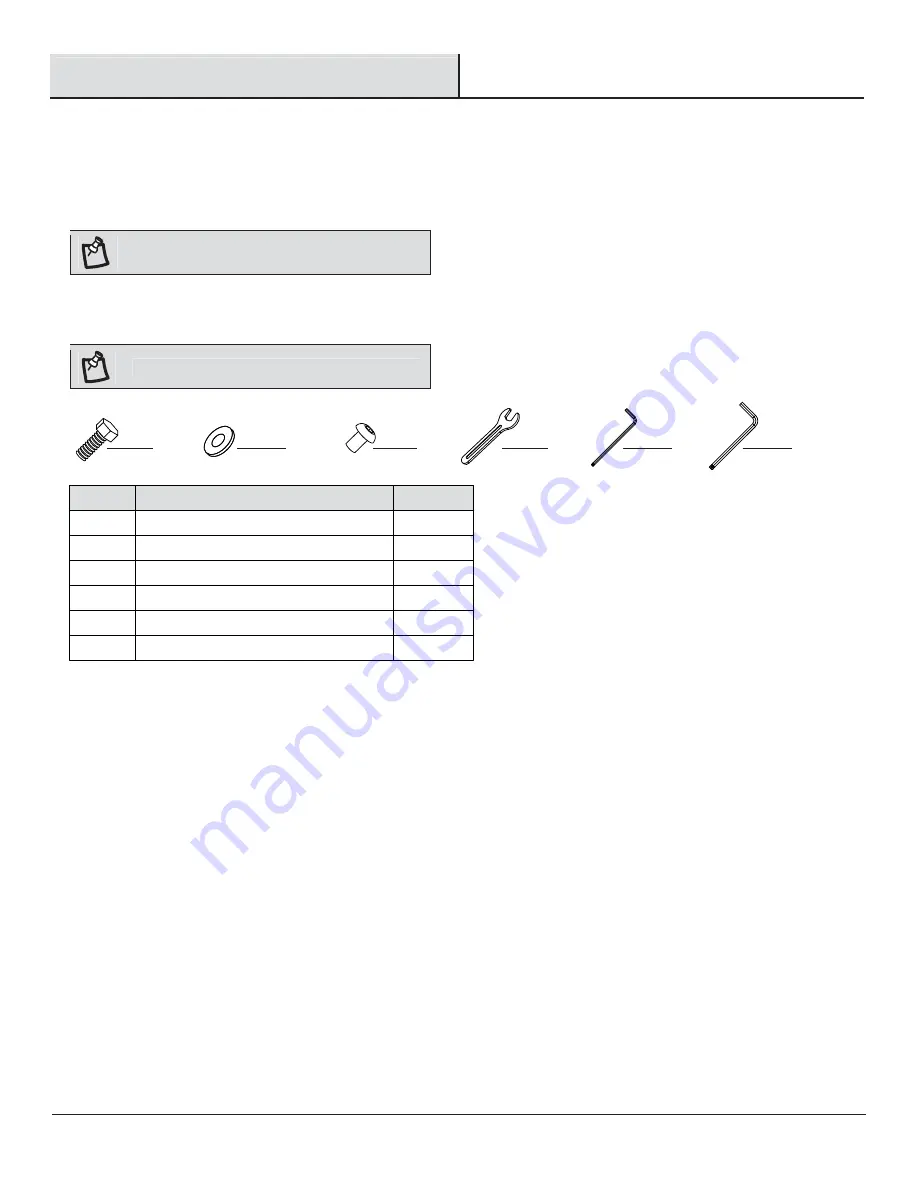
No se muestra el tamaño real de los herrajes.


AA

BB

CC

Pieza

Descripción

Cantidad

AA

BB

CC

DD

EE

FF

Perno hexagonal M8x20

Arandela M8

Perno M5x8

Llave

Llave hexagonal S3

Llave hexagonal S4

4+1

4+1

2+1

1

1

1

DD

EE

HAMPTONBAY.COM 

Para obtener asistencia, llama al 1-855-HD-HAMPTON.

FF

HERRAJES INCLUIDOS

Содержание YJAF052

Страница 1: ...6 p m EST Monday Friday 1 877 527 0313 HOMEDEPOT CA THANK YOU We appreciate the trust and confidence you have placed in Hampton Bay through the purchase of this umbrella We strive to continually crea...

Страница 2: ...are guide PRODUCT CAUTION This umbrella was made for the explicit purpose of providing outdoor functions and is not to be used as a toy This product is intended for normal outdoor use however the manu...

Страница 3: ...as carpet or cardboard NOTE More than one person may be required to complete the assembly of this product H HARDWARE INCLUDED NOTE Hardware not shown to actual size AA BB CC Part Description Quantity...

Страница 4: ...anopy 2 Pre Assembly continued PACKAGE CONTENTS 4 Part Description Quantity A Lower bracket 1 B Upper bracket 1 C Lower umbrella pole 1 D Knob 1 E Solar receiver 1 F Crank 1 G Upper umbrella pole 1 H...

Страница 5: ...brackets Attach the upper bracket B onto the lower bracket A NOTE This umbrella should be set up in its desired location to avoid moving it after assembly B A HOMEDEPOT CA Please contact 1 877 527 03...

Страница 6: ...ng the lower umbrella pole to the brackets Attach the lower umbrella pole C to the upper bracket B and lower bracket A using the M8x20 hex bolts AA and M8 washers BB C BB AA DD A B NOTE Fully tighten...

Страница 7: ...ued 3 Inserting the corner connectors Insert the corner connectors K into the four ends of the attached brackets K K K K K HOMEDEPOT CA e c n a t s i s s a r e h t r u f r o f 1 877 527 0313 t c a t n...

Страница 8: ...8 Assembly continued 4 Sliding the lock panels Slide the perforated lock panels M downward between the corner connectors K M M K K K K...

Страница 9: ...ard between the corner connectors K Connect the two pieces of the support tube rims J Slide the support tube rims J down the lower umbrella pole C and connect it to the brackets A and B HOMEDEPOT CA P...

Страница 10: ...10 Assembly continued 6 Placing the sand bag Place the sandbag N in the umbrella base N Place the umbrella base in the area where the umbrella is to be used It will be heavy once filled with sand...

Страница 11: ...nd only NOTE For proper stability of your offset umbrella the minimum weight of the sand to be placed into each sand bag is 100 lbs for a total of 200 lbs N N N After filling the sand bags N close the...

Страница 12: ...he lid on the base Ensure the locking mechanism on the lock panel M is in the OPEN position by using the wrench DD Attach the bottom covers H to the side panels L Close the bottom covers H and ensure...

Страница 13: ...lower base cover H in place by turning the 12 locking mechanisms on the lock panel M to the CLOSE position using the wrench DD 13 Attach the upper base cover I to the assembled base H DD DD M HOMEDEP...

Страница 14: ...14 Assembly continued 10 Attaching the knob Attach the knob D to the lower umbrella pole C using M5x8 bolts CC NOTE Fully tighten all bolts using the hex wrench EE C CC EE D...

Страница 15: ...inued 11Preparing the umbrella Push down and pull the hinge to prepare the upper umbrella pole G as the picture shows G G HOMEDEPOT CA e c n a t s i s s a r e h t r u f r o f 1 877 527 0313 t c a t n...

Страница 16: ...Attaching the solar reciever Attach the solar receiver E to the top of the upper umbrella pole G by turning the solar receiver E clockwise until fully tightened Insert the plug into the plug hole of...

Страница 17: ...into the pole Insert the upper umbrella pole G into the lower umbrella pole C Rotate the knob D clockwise to secure the upper umbrella pole G to the lower umbrella pole C D D C G G HOMEDEPOT CA Pleas...

Страница 18: ...ank F to the handle as shown below NOTE Align the holes on the crank F to the handle and it will lock If the holes are not aligned the crank F will be easy to take out To take the crank F out insert t...

Страница 19: ...1 by turning counterclockwise Slide the umbrella handle upward as shown in figure 2 until it stops and the umbrella is fully extended Tighten the knob on the handle clockwise as shown in figure 3 to l...

Страница 20: ...the belt on the canopy O The crank handle must be on top of the pole in the up position prior to opening the umbrella Slowly turn the crank clockwise to open the umbrella When the umbrella is open fas...

Страница 21: ...g counterclockwise Use one hand to hold the umbrella handle and the other hand to rotate the umbrella shade The umbrella can turn up to 360 degrees When the umbrella is at the desired position tighten...

Страница 22: ...the umbrella angle release the belt from the pole Loosen the knob on the umbrella handle by turning it counterclockwise then slide the umbrella handle down to adjust the angle of the umbrella When the...

Страница 23: ...e the umbrella turn the crank counterclockwise When the umbrella is closed loosen the knob on the umbrella handle by turning it counterclockwise Pull the umbrella handle downward Tighten the knob on t...

Страница 24: ...ughly This will help prevent mildew by removing dirt particles that may accumulate Do not clean with abrasive materials bleach or solvents Store the umbrella in a dry sheltered place when not in use T...

Страница 25: ...Questions problems missing parts Before returning to the store call Hampton Bay Customer Service 8 a m 6 p m EST Monday Friday 1 877 527 0313 HOMEDEPOT CA Retain this manual for future use...

Страница 26: ...ay de lunes a viernes de 8 a m a 6 p m hora est ndar del Este 1 855 HD HAMPTON HAMPTONBAY COM GRACIAS Apreciamos la confianza que has depositado en Hampton Bay al comprar esta sombrilla Nos esforzamos...

Страница 27: ...de uso y mantenimiento PRECAUCI N SOBRE EL PRODUCTO Esta sombrilla fue fabricada con el prop sito expl cito de usarse como mobiliario de exteriores y no como juguete Este producto est dise ado para un...

Страница 28: ...cart n NOTA Se puede necesitar m s de una persona para ensamblar completamente este producto NOTA No se muestra el tama o real de los herrajes AA BB CC Pieza Descripci n Cantidad AA BB CC DD EE FF Per...

Страница 29: ...reensamblaje continuaci n CONTENIDO DEL PAQUETE 4 Pieza Descripci n Cantidad A Soporte inferior 1 B Soporte superior 1 C Vara inferior de la sombrilla 1 D Perilla 1 E Receptor solar 1 F Manivela 1 G P...

Страница 30: ...oportes Coloca el soporte superior B sobre el soporte inferior A NOTA Debes instalar esta sombrilla en el lugar elegido para evitar moverla despu s del ensamblaje B A HAMPTONBAY COM Para obtener asist...

Страница 31: ...nferior de la sombrilla en los soportes Fija la vara inferior de la sombrilla C al soporte superior B y al soporte inferior A con pernos hexagonales M8x20 AA y arandelas M8 BB C BB AA DD A B NOTA Apri...

Страница 32: ...ntinuaci n 3 Como insertar los conectores de esquina Inserta los conectores de esquina K en los cuatros extremos de los soportes ensamblados K K K K K HAMPTONBAY COM Para obtener asistencia llama al 1...

Страница 33: ...8 Ensamblaje continuaci n 4 C mo deslizar los paneles de cierre Desliza los paneles de cierre perforados M hacia abajo entre los conectores de esquina K M M K K K K...

Страница 34: ...s casquillos de soporte del tubo J Desliza los casquillos de soporte del tubo J hacia abajo por la vara inferior de la sombrilla C y con ctalos a los soportes A y B Inserta los cables largo O y corto...

Страница 35: ...nuaci n 6 C mo colocar la bolsa de arena Coloca la bolsa de arena N en la base de la sombrilla N NOTA Coloca la base en el lugar donde se usar la sombrilla Esta se volver muy pesada despu s de llenar...

Страница 36: ...na nicamente NOTA Para lograr la estabilidad apropiada de la sombrilla suspendida coloca 45 4 kg de arena en cada bolsa para obtener un total de 90 7 kg Despu s de llenar las bolsas de arena N cierra...

Страница 37: ...que el mecanismo de cierre est en la posici n abierta Usando la llave DD aseg rate de que el mecanismo de cierre en el panel del cierre M est en la posici n de OPEN ABIERTO Fija la cubierta de la base...

Страница 38: ...os 12 mecanismos de cierre en el panel de cierre M a la posici n de CLOSE CERRADO usando la llave DD 13 Fija la cubierta superior de la base I a la base ensamblada Cierra la cubierta de la base inferi...

Страница 39: ...rilla C con la llave hexagonal S3 EE y los pernos M5x8 CC Aseg rate de que la perilla de cierre D est colocada como se muestra en la figura 1 antes de fijarla 1 2 C CC EE D 1 2 NOTA Al insertar la per...

Страница 40: ...largo de la parte superior de la sombrilla G un poco hacia afuera mientras sostienes la parte roscada macho del tubo curvo corto hacia abajo para que la bisagra encaje en su lugar como se muestra a c...

Страница 41: ...solar Fija el receptor solar E a la parte superior de la sombrilla G girando el receptor solar E en sentido de las manecillas del reloj hasta que quede bien apretado Inserta la clavija en el orificio...

Страница 42: ...r de la sombrilla G en la vara inferior de sta C como se muestra en la figura 2 Gira la perilla de cierre D 180 de izquierda a derecha como se muestra en la figura 3 HAMPTONBAY COM Para obtener asiste...

Страница 43: ...l orificio en la manivela F hasta que encaje en su lugar Para desenganchar la manivela se requiere la llave EE para presionar en la parte roscada macho y quitar la manivela F Fija la manivela F sin us...

Страница 44: ...ompleto Sost n la manija de la sombrilla y empuja el tubo curvo largo hacia arriba como se muestra en la figura 2 hasta que se detenga y la sombrilla quede completamente extendida Ajusta bien la peril...

Страница 45: ...llas de la sombrilla Gira lentamente la manivela F en el sentido de las manecillas del reloj para abrir la sombrilla Cuando la sombrilla est completamente abierta ajusta la correa debajo de la bisagra...

Страница 46: ...a mano para girar la sombrilla como se muestra en la figura 2 La sombrilla puede girar hasta 360 Cuando la sombrilla est en la posici n deseada gira la perilla 180 en el sentido de las manecillas del...

Страница 47: ...erilla de la parte superior de la sombrilla G gir ndola en sentido contrario a las manecillas del reloj y luego desliza la manija hacia abajo para ajustar el ngulo de la sombrilla Cuando la sombrilla...

Страница 48: ...se muestra en la figura 4 Ajusta la perilla que est en la parte superior de la sombrilla G gir ndola en sentido contrario a las manecillas del reloj como se muestra en la figura 5 despu s de cerrar l...

Страница 49: ...ayudar a prevenir la aparici n de moho al quitar las part culas de polvo que puedan acumularse No limpiar con materiales abrasivos blanqueador o solventes Almacena la sombrilla en un lugar seco y prot...

Страница 50: ...iezas faltantes Antes de regresar a la tienda llama al servicio al cliente de Hampton Bay de lunes a viernes de 8 a m a 6 p m hora est ndar del Este 1 855 HD HAMPTON HAMPTONBAY COM Conserva este manua...

Отзывы: