background image

 3 

HAMPTONBAY.COM 


Please 

contact 

1-855-HD-HAMPTON for further assistance. 

Pre-installation 


PLANNING INSTALLATION 

Read all instructions before assembly and installation. 
 
To avoid damaging this product, assemble it on a soft, non-abrasive surface such as carpet or cardboard. Inspect each part for defects that 
may have occurred during shipping. 
 
Keep your receipt and these instructions for proof of purchase. 


NOTE: 

This light fixture requires the use of one 120V, 60HZ, 

100-Watt max, medium-base type A 3-way bulb (not included). 
Do not exceed the recommended wattage. 

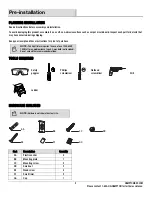
TOOLS REQUIRED 


Safety 
goggles 


Phillips 
screwdriver 


Flathead 
screwdriver 


Drill 


Ladder 


HARDWARE INCLUDED 


NOTE: 

Hardware not shown to actual size.


Part 

Description 

Quantity 

AA Plastic 

anchor 

BB Mounting 

plate 

CC Mounting 

screw 

DD Small 

nut 

EE Wood 

screw 

FF Small 

finial 

GG Cap 

AA

BB

GG

DD

CC

EE

FF

Содержание HDP30115

Страница 1: ...s online to see our full line of products available for your home improvement needs Thank you for choosing Hampton Bay Item 1002 453 587 1002 453 588 Model HDP30115 HDP30115 DISP USE AND CARE GUIDE BI...

Страница 2: ...remedy is the repair or replacement of the product at the manufacturer s discretion provided that the product has not been damaged through misuse abuse accident modifications alterations neglect or mi...

Страница 3: ...hipping Keep your receipt and these instructions for proof of purchase NOTE This light fixture requires the use of one 120V 60HZ 100 Watt max medium base type A 3 way bulb not included Do not exceed t...

Страница 4: ...4 Pre installation continued PACKAGE CONTENTS Part Description Quantity A Finial 1 B Shade 1 C Harp 1 D Socket cover 1 E Switch 1 F Backplate 1 G Cord cover 1 A B C D E F G...

Страница 5: ...HAMPTON for further assistance Assembly 1 Assembling the cord cover Carefully unpack the lamp and lay out all parts on a clean surface Insert the cord cover G into the hole in the bottom of the backp...

Страница 6: ...ling into dry wall drill pilot holes on the marked spots and insert plastic anchors AA If installing to wood studs skip this step Attach the mounting plate BB to the wall using the screws EE Raise the...

Страница 7: ...ry cloth Do not use any cleaners with chemicals solvents or harsh abrasives Troubleshooting Problem Possible Cause Solution The bulb will not light The bulb is burned out Replace the light bulb The po...

Страница 8: ...problems missing parts Before returning to the store call Hampton Bay Customer Service 8 a m 7 p m EST Monday Friday 9 a m 6 p m EST Saturday 1 855 HD HAMPTON HAMPTONBAY COM Retain this manual for fu...

Отзывы: