Bryant
in
Ceiling
Fan
Owner’s Manual
BryantVentilador de Techo de 1.17mManual del Propietario
46
823 338
Страница 1: ...Bryant in Ceiling Fan Owner s Manual Bryant Ventilador de Techo de 1 17m Manual del Propietario 46 823 338 ...
Страница 2: ...4 ...
Страница 3: ...ited States this warranty does not cover any changes in brass finish including rusting pitting corroding tarnishing or peeling Brass finishes of this type give their longest useful life when protected from varying weather conditions A certain amount of wobble is normal and should not be considered a defect Servicing performed by unauthorized persons shall render the warranty invalid There is no ot...
Страница 4: ...Fan Hanging Your Fan Making the Electrical Connections Finishing the Installation Attching the Fan Blades Installing the Light Kit Installing without the Light Kit Operating Your Transmitter Care of Your Fan Troubleshooting Specifications 1 2 3 4 5 6 7 8 9 10 11 12 13 ...
Страница 5: ... a minimum of 7 feet clearance from the trailing edge of the blades to the floor 7 Do not operate reversing switch while fan blades are in motion Fan must be turned off and blades stopped before reversing blade direction 8 Avoid placing objects in the path of the blades 9 To avoid personal injury or damage to the fan and other items be cautious when working around or cleaning the fan 10 Do not use...
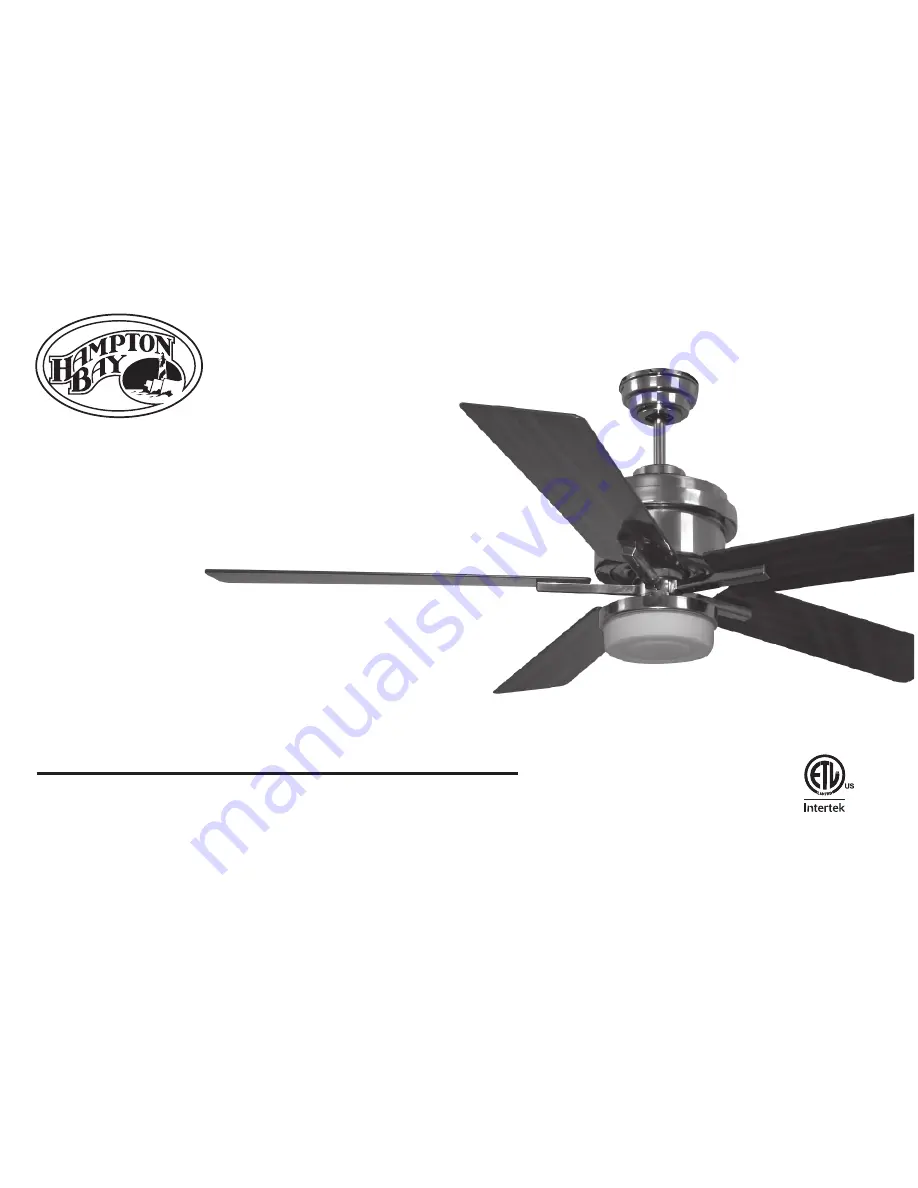
Страница 6: ... 4 Canopy cover 1 5 Ball downrod assembly 1 6 Collar cover 1 7 Fan motor assembly 1 8 Set of blades brackets 5 Set of blades 5 MDF blades WARNING DO NOT INSTALL OR USE FAN IF ANY PART IS DAMAGED OR MISSING CALL TOLL FREE 888 886 1579 16 Loose parts bag containing a Blade attachment hardware 16 screws and paper washers b Mounting hardware 3 plastic wire connectors c Set of blade bracket hardware 11...
Страница 7: ...ly support the moving weight of the fan at least 40 lbs Do not use plastic outlet boxes Figures 1 2 and 3 are examples of different ways to mount the outlet box Installing Your Fan 3 Note You may need a longer downrod to maintain proper blade clearance when installing on a steep sloped ceiling To hang your fan where there is an existing fixture but no ceiling joist you may need an installation han...
Страница 8: ...et screws on top of the fan motor firmly Figure 6 Step 7 Place the downrod ball into the hanger bracket socket IF YOU WANT TO CHANGE THE DOWNROD NOTE Your fan comes with a 4 5 downrod attached to the hanger ball Longer downrods are available at Hamton Bay Retailer Step 1 Remove the hanger ball from the 4 5 downrod by loosening the set screw at the top of the downrod which holds the hanger ball to ...
Страница 9: ...he fan to black wire marked TO MOTOR L Connect the white wire from the fan to thewhite wire marked TO MOTOR N from the receiver Connect the blue wire from the fan to the blue wire marked For Light from the receiver Secure the wire connections with the plastic wire nuts provided Figure 9 Step 3 Receiver to House Supply Wires Electrical Connections Connect the black hot wire from the ceiling to the ...
Страница 10: ... canopy by using previous removed screw Step5 Place the canopy over the canopy and rotate canopy cover clockwise until locked into right position Figure 10 6 Finishing the Installation WARNING MAKE SURE TAB AT BOTTOM OF HANGER BRACKET IS HANGER PROPERLY SEATED IN GROOVE OF HANGER BALL BEFORE ATTACHING CANOPY TO BRACKET FAILURE TO PROPERLY SEAT TAB IN GROOVE COULD CAUSE DAMAGE TO ELECTRICAL WIRING ...
Страница 11: ...ocedure should correct most fan wobble issues Check after each step Step 1 Check that all blades and blade bracket screws are secure Please refer to the introduction provide in the blade balancing kit which is individually packed Step 2 Most fan wobble problems are caused when blade levels are unequal Check this level by selecting a point on the ceiling above the tip of one of the blades Measure t...
Страница 12: ... Restore power and your Light Kit is ready for operations Figure 16 Connection plugs Halogen Bulb Switch Housing Light Kit Fitter Figure 15 Light Kit Fitter Glass Shade NOTE Light bulb have no warranty can be purchased at local home improvement store or from our service center REMEMBER to disconnect the power The fan blades must already be attached to the fan Your fan and light kit though pre wire...
Страница 13: ...previouly remove screws Figure 18 Position the switch cup on the switch box Included in REMEMBER to disconnect the power The fan blades must already be attached to the fan Your fan and light kit though pre wired have been disassembled at the factory to ease in shipping Please follow these steps to complete the installation of your fan and light TO REDUCE THE RISK OF FIRE DO NOT EXCEED MAXIMUM WATT...
Страница 14: ...c The Reverse switch is located on top of the motor assembly Slide the switch to the Left for warm weather operation Slide the switch to the Right for cool weather operation NOTE Wait for fan to stop before changing the setting of the slide switch Warm weather Forward A downward air flow creates a cooling effect as shown in Figure 21 This allows you to set your air conditioner on a higher setting ...
Страница 15: ...ears Use only a soft brush or lint free cloth to avoid scratching the finish The plating is sealed with a lacquer to minimize discoloration or tarnishing Do not use water when cleaning This could damage the motor or the wood or possibly cause an electrical shock 3 You can apply a light coat of furniture polish to the wood blades for additional protection and enhanced beauty Cover small scratches w...
Страница 16: ... bracket to the motor hub is tight 3 Make sure wire nut connections are not rubbing against each other or the interior wall of the switch housing CAUTION Make sure main power is off 4 Allow a 24 hour breaking in period Most noise associated with a new fan disappear during this time 5 If using an optional light kit make sure the screws securing the glassware are tight Check that light bulb is also ...
Страница 17: ...c Specifications 13 120 120 120 0 304 0 389 0 443 15 6 30 8 51 8 92 135 183 1670 26 2457 28 3311 34 kgs 7 28 kgs 7 9 1 50 Low Med High 46 ...