7
WWW.HAMPTONBAY.COM
Please contact 1-855-HD-HAMPTON for further assistance.
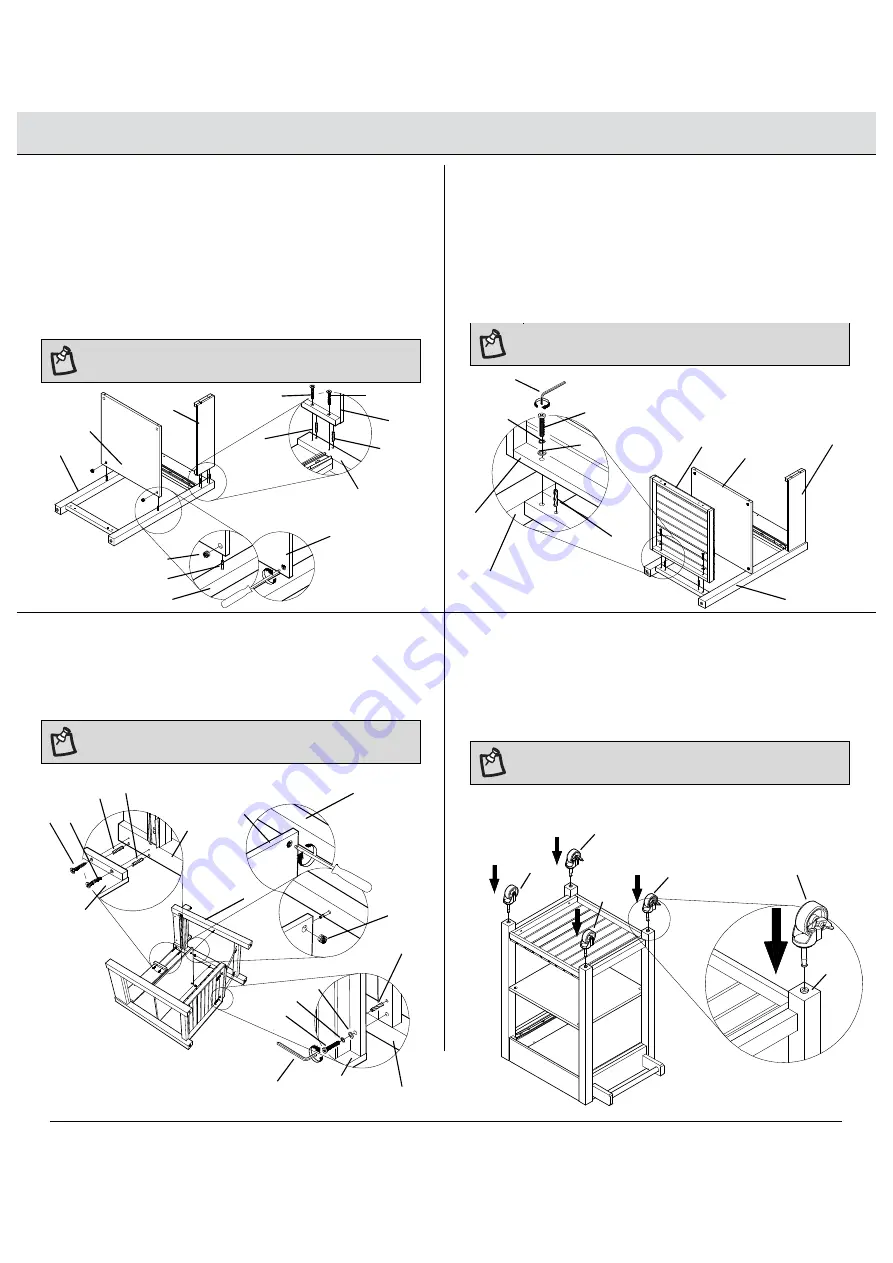
Assembly (continued)
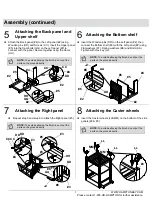
5
Attaching the Back panel and
Upper shelf
6
Attaching the Bottom shelf
Attach the Back panel (#4) to the Left panel (#2) using
Wooden pins (DD) and Screws (CC). Insert the Upper panel
(#5) into the Cam bolts (GG) on the Left panel (#2) to
connect with the panel. Secure together using the Cams
(HH).
NOTE:
To avoid destroying the finish, do not put the
parts on the ground directly.
Insert the Wooden pins (DD) on the Left panel (#2), then
connect the Bottom shelf (#6) with the Left panel (#2) using
Flat washers (FF), Spring washers (EE) and Bolts (AA).
Tighten with Hex key (JJ).
NOTE:
To avoid destroying the finish, do not put the
parts on the ground directly.
7
Attaching the Right panel
8
Attaching the Caster wheels
Repeat step 5 and step 6 to attach the Right panel (#3).
NOTE:
To avoid destroying the finish, do not put the
parts on the ground directly.
Insert the Caster wheels (LL&MM) on the bottom of the side
panels (#2 & #3).
NOTE:
To avoid destroying the finish, do not put the
parts on the ground directly.
#5
#2
CC
#5
#2
CC
DD
DD
#4
HH
#4
#2
EE
#2
DD
#6
#2
FF
AA
JJ
#4
#5
#6
EE
#3
#6
#4
FF
AA
JJ
#3
DD
HH
CC
DD
CC
#3
#5
#3
DD
LL
LL
MM
MM
LL
#3
GG


