background image

Woodstock Multifuel Stove

7

INSTALLATION

GENERAL PRECAUTIONS

Note - All installations must conform to the
appropriate building regulations. 

Any Manufacturer's Instructions must not be
taken as overriding statutory requirements.

During installation ensure that adequate
precautions are taken to avoid unnecessary risk to
yourself or any householder. In particular the
danger from the caustic nature of the fire cement
should be avoided by using these accepted
methods:

•Wear gloves when handling fire cement. 
•Wear goggles when chiselling or looking up   

chimneys.

Make sure that Building Regulations are adhered to
during installation along with any local by-laws.
In the case of heating systems make sure that the
pipe work is correctly bonded to ensure electrical
earthing.

HANDLING

By the time you read this you will appreciate the
weight of the appliance. The Safety and handling
guidelines as set out on page 4 of this manual
should be followed.

To make movement easier internal fittings, grates,
firebox liners, flue outlets, hot plate, throat plate,
etc., can be removed. 

Care should be taken to make sure that the hinges
are not damaged during installation.

HEARTH

The fire should be installed to stand on a
constructional hearth of non-combustible materials
not less than 125mm (5'') thick conforming to
Building Regulations. Dimensions of the hearth
should project at least 300mm (12'') forward of the
front of the appliance and 150mm (6'') at the sides.
The surface of the hearth should be free of
combustible materials. In most buildings with solid
concrete floors the requirement will be met by the
floor itself, but mark the perimeter of the hearth to

ensure floor coverings are kept well away or use
different levels to mark the hearth perimeter.

COMBUSTIBLE MATERIALS

A gap of at least 450mm (18'') should be allowed
between the appliance and any combustible
materials including furnishings. Adjacent walls
should be of suitable non-combustible
construction, preferably brickwork. In large
fireplaces take care that any supporting beam is
protected by a 13mm (0.5'') sheet of
Masterboard/Supalux spaced 13mm (0.5'') off the
surface with strips of non-combustible material

- not wood.

Make sure that there is a gap between an
uninsulated flue system and any combustible
material. This gap must be at least 3 x the outside
diameter of the flue pipe, or 1.5 x the flue diameter
to non combustible surfaces. See illustration p11.

AIR FOR COMBUSTION

There must always be a permanent means of
providing air for combustion into the room in
which the fire is installed. A permanent vent with a
total free area of at least 550mm

2

for every kW

rated output above 5kw should be connected
directly to the outside air or to an adjacent room
which itself has a permanent vent of the same size
direct to the outside air. The fitting of an extractor
fan to either of these rooms is not recommended.

Содержание Woodstock

Страница 1: ...ort Dorset DT6 3BE England Great Britain Tel 44 01308 427234 Fax 44 01308 427441 Hamlet Woodstock Operating Installation Manual PLEASE RETAIN THESE INSTRUCTIONS FOR FUTURE REFERENCE Hamlet Woodstock Stove Rev 1 2005 Part No AFS999 ...

Страница 2: ...is why we are so confident in the reliability of our product Should you have any questions about our Hamlet Stoves that are not covered in this manual please contact the local dealer in your area or call our technical support department on 01308 427234 2 Woodstock Multifuel Stove COPYRIGHT 2005 Arada Ltd This booklet has copyright may not be copied in whole or part or used for any purpose other th...

Страница 3: ... the Flue Outlet and Hotplate 9 Flues Chimneys 9 11 Installation Checklist 12 Page OPERATING INSTRUCTIONS Air Inlet Controls 13 Multi Purpose Operating Tool 13 Fire Door Glass 14 Adjusting the Door Hinges 14 Fuels 15 Lighting The Fire 15 Extended Burning 16 Over Firing 17 Annual Maintenance 17 Part List 18 19 GUARANTEE 20 SERVICE RECORD 21 FINAL FACTORY CHECK LIST 22 Woodstock Multifuel Stove 3 CO...

Страница 4: ... most important consideration when installing your fire If not properly installed and operated a house fire may result Installation must comply with the Building Regulations and conform to all relevant fire safety standards Hamlet Stoves are produced in a variety of appliances ranging from the traditional to the modern in style and appearance all bristling with High Tech features Model types inclu...

Страница 5: ... AFS1185 The Serial Number of your fire can be found stamped into the casing centrally just below the bottom edge of the fire door aperture Inside the appliance you should find the following 1 Instructions 1 AFS999 9 Fire door handle 1 AFS205 4 Hot plate 1 5 AFS009 5 Hot plate machined 1 6 AFS1183 6 Liner Set 1 AFS1184 10 Box stove long legs fixings 4 AFS1189 11 Wood burning tray 1 AFS1188 ...

Страница 6: ...0 Depth mm 652 Height to centre of rear flue mm 515 Depth from back to centre of flue mm 5 Rear 122 5mm 6 Front 412mm Flue diameter mm 5 125mm Weight Kg Unpacked 53Kg Packed 55Kg Room Min Max Room heater only output kW 6 5 kW 1 5 kW Room Heater with domestic hot water with add in boiler type Type 7 Measured from back leg to tip of handle ...

Страница 7: ... of the hearth should project at least 300mm 12 forward of the front of the appliance and 150mm 6 at the sides The surface of the hearth should be free of combustible materials In most buildings with solid concrete floors the requirement will be met by the floor itself but mark the perimeter of the hearth to ensure floor coverings are kept well away or use different levels to mark the hearth perim...

Страница 8: ...n the rear liners The shorter tabs against the vertical face See Fig 3 Note Neither the rear firebox liners nor the side firebox liners are handed both faces are suitable for direct contact with the fire Cracking of lining panels does not effect efficiency Fig 1 Liners setup for the stove Fig 2 Inserting throat plate Fig 3 Liners and throat plate in the stove REMOVAL OF THE THROAT PLATE Blocked ch...

Страница 9: ...ght to safely take the products of combustion fumes from the stove outlet to the outside air To ensure a good updraught it is important that the flue gases are kept warm and that the flue size suits the stove The termination of the outlet at the top of the flue also needs to comply with the Building Regulations The minimum effective height of the flue must be at least 4 5 metres from the top of th...

Страница 10: ... to the flue in the chimney and that suitable access is provided into the flue for regular inspection and sweeping of the flueways The installer should comply with the Building Regulation requirements in respect of providing a Notice Plate giving details on the chimney flue lining hearth and fireplace installation Chimneys should be as straight as possible Horizontal runs should be avoided except ...

Страница 11: ...O THE CHIMNEY MANUFACTURERS INSTRUCTIONS IN COMPLIANCE WITH BUILDING REGULATIONS AND BS7566 PTS 1 4 PLAN VIEW OF REGISTER PLATE AND CLEARANCES FOR NON INSULATED FLUES A is minimum clearance for non insulated flue 1 5 x D to a non combustible surface material or 3 x D to combustible surface material ...

Страница 12: ...t gas appliances only c If clay or concrete flue liners used confirm that they are correctly jointed with socket end uppermost and state jointing materials used d If an existing chimney has been refurbished with a new liner type or make of liner fitted e Details of flue outlet terminal and diagram reference Outlet Details Complies with f Number and angle of bends g Provision for cleaning and recom...

Страница 13: ... is established AIRWASH SYSTEM The air wash has an internal sliding plate with slots housed in a cover plate and is located above the fire door Sliding the control knob to the right as far as it will go achieves the fully open position Sliding it to the left will shut off the air inlet slots as shown below Fig 6 Fully Closed Fig 7 Fully Open DISASSEMBLE AIRWASH The Woodstock air wash may be disass...

Страница 14: ...n contact with the glass Fig 10 fitting new glass Replace the two lower retaining clips and nuts Replace the upper airwash cover and nuts Do not over tighten the nuts as damage may occur to the glass fig 11 Fig 11 tightening nuts ADJUSTING THE DOOR HINGES Once the appliance has been under fire for a period of time the fire door may appear to have moved out of alignment with relation to the door ap...

Страница 15: ... chimney is sound and has been swept and is free from obstruction Adequate provision for combustion air has been made i e a permanent vent of at least 550mm per kW of rated output above 5 kW is fitted in the room in which the appliance is installed That Building Regulations and any local by laws have been followed during installation see installation instructions All firebox liner panels are in pl...

Страница 16: ...ce Check for flue or chimney blockage and clean if required Seek expert advice from your registered installer Do not attempt to re light the fire until the cause of the fume emission has been identified and corrected ASH REMOVAL Wood burner only The appliance will require ash to be removed periodically but an ash bed of approximately 20mm 3 4 should be maintained Ash may be removed with a small sh...

Страница 17: ...east twice per burning season It is important that the flue ways flue pipe and chimney be cleaned prior to lighting the fire after a prolonged shut down period DOOR GLASS The door glass should remain clear during normal daytimeburning Howeverundercertainconditions such as burning at a low rate with damp wood or overnight burning the glass may become somewhat blackened To remedy this operate the ap...

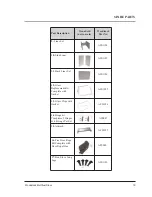
Страница 18: ...escription Visual Aid not to scale Woodstock Part No 6 Fire Door Locking Assembly AFS204 1 Main Door Assembly Complete with Handle Glass Gaskets Clips and Seal AFS1119 4 Hot Plate 5 AFS009 5 Hot Plate 6 Machined AFS1183 7 Wood Burning Base Tray AFS1188 8 Replacement Instruction Manual AFS999 ...

Страница 19: ... Side Liner 11 Back Liner Set 12 Glass Replacement Kit Complete with Gasket 13 Glass Clips with Gasket 14 Hinge kit Comprises 2 Hinges 4 Fixings Per Set 15 Airwash Part Description Visual Aid not to scale Woodstock Part No 16 Fire Door Rope Kit Complete with Door Rope Glue AFS048 17 Box Stove Long Legs AFS1189 ...

Страница 20: ...o local Building Regulations and fire codes The Guarantee is conditional upon the appliance being serviced and checked annually by a qualified heating engineer The Manufacturers decision shall be final If your appliance proves to be defective as a result of faulty materials or workmanship during guarantee we will repair or replace it FREE OF CHARGE as long as the fire has been installed according ...

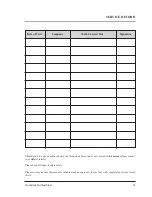
Страница 21: ...nual please contact your Hamlet retailer Please keep all repair receipts safely Please ensure you have this manual available when an engineer visits as they will complete the service record chart Woodstock Multifuel Stove 21 SERVICE RECORD Date of Visit Company Work Carried Out Signature ...

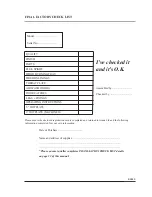
Страница 22: ...6 HOTPLATE MACHINED Model Serial No I ve checked it and it s O K Assembled by Checked by BK049 Date of Purchase Name and address of supplier Please ensure installer completes INSTALLATION CHECK LIST details on page 12 of this manual Please ensure the enclosed registration card is completed and returned to Arada Ltd and the following information completed for your own information ...

Отзывы: