19
17. Go to
General
; click
Print Test Page
to verify the configuration.
18. Done.
Note:
If you want to install more print servers, start setup wizard from your Windows Start menu:
start
->
All Programs
->
Network Print Server
->
PSWizard
and repeat the installation
procedure.
Note:
If it can’t still print normal, please select the “Enable bidirectional support” and try
again.
Using PSAdmin
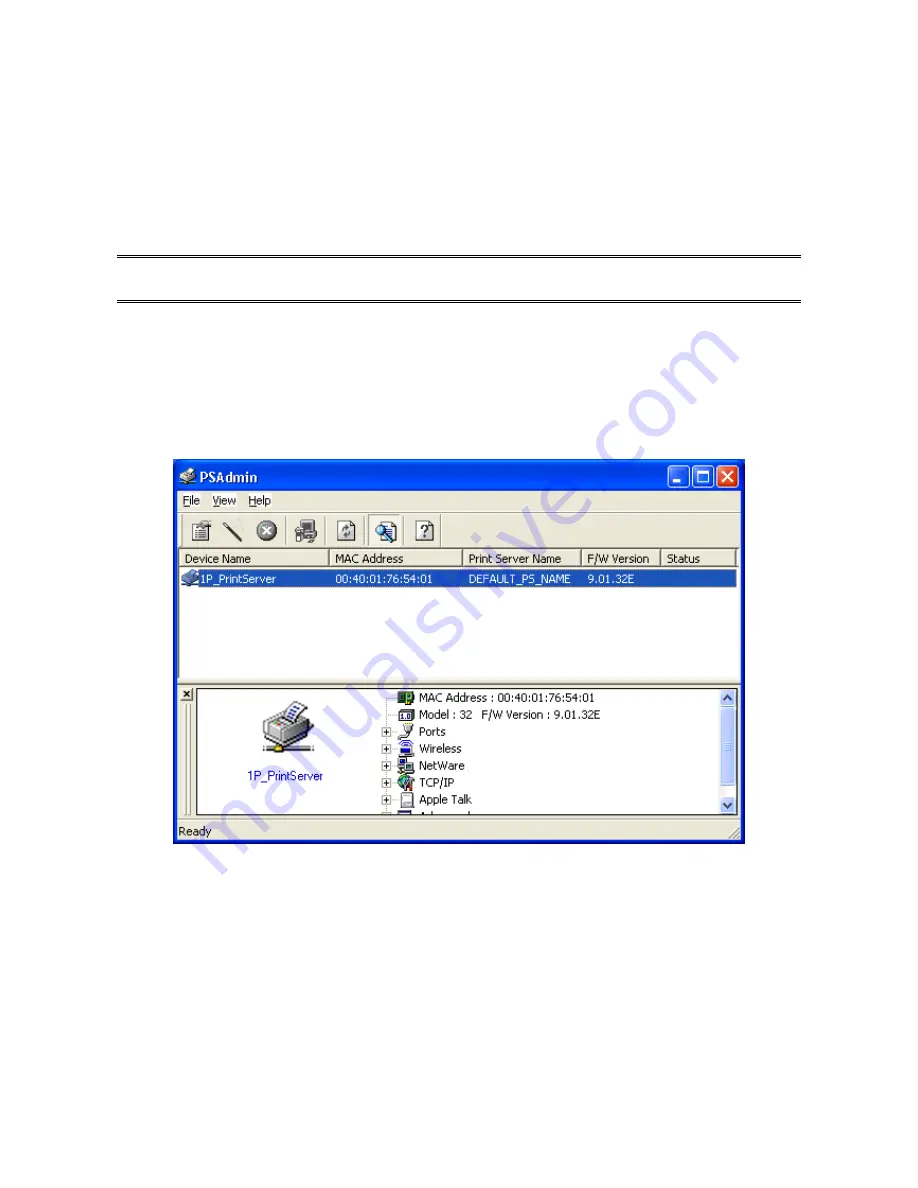
After the software of setup CD is successfully installed, starts PSAdmin utility from your
Windows Start menu:
start
->
All Programs
->
Network Print Server
->
PSAdmin
. The
screen will then appear as follow picture.
All print server(s) feature Novell NetWare function on the LAN will be displayed along with
their respective device name, MAC Address, print server name, firmware version, and
status. The terms are defined as follows:
Device Name:
The name of the print server hardware used for identification purposes.
MAC Address:
The Ethernet address of the print server.
Print server Name:
The print server to which the device is attached.
Version:
The firmware version of the print server.
Status:
To come up a Printer’s status presently.
Содержание HPS01UU2
Страница 1: ...USB PRINT SERVER NETWORK ADAPTER FOR USB PRINTERS User Manual HPS01UU2 www hamletcom com...
Страница 12: ...12 5 From the Select A Print Sever screen select the print server that you want to configure and click Next...
Страница 61: ...61 12 In the Printer field choose Postscript Printer 13 Choose the model of printer and click Forward 14 Done...
Страница 72: ...72 4 Now you have to install the printer s driver 5 Choose it from the Add Printer Wizard...
Страница 73: ...73 6 Install printer successfully 7 Now you can find your printer s icon and you can use the SMB printing mode...


