background image

3

Warranty Information  ...................... 3

Important Safeguards ...................... 4

Assistance and Service 
Information ........................................ 5

Parts and Features............................ 6

How to Assemble Your Mixer............7

How to Use Your Mixer .................... 9

Stand Mixer Tips  ............................ 10

How to Clean Your Mixer .............. 12

Troubleshooting .............................. 12

Recipes ...................................... 13-28

Appetizers .................................... 13 

Entrees.......................................... 15

Cakes and Frostings.................... 17

Pies and Other Desserts ............ 21

Breakfast Favorites...................... 25

Candies ........................................ 26

Dinner Rolls .................................. 27

Table of Contents 

Warranty Information

Standard Three Year Warranty

Congratulations! You now own one of the finest stand mixers. We’re so confident 
in the quality and craftsmanship of your new stand mixer that we’re backing your pur-
chase with a No-Hassle 3-Year Replacement Warranty. If your stand mixer malfunctions
within 3 years of purchase, we will deliver a brand new replacement mixer to your door
and remove the old unit at no cost to you. Here’s how it works:

Warranty To 

fulfill Hamilton

Hamilton 

Beach

®

Term

the warranty:

Beach

®

will

will not pay for

Three years from
date of original
purchase for
stand mixers
operated in the
continental
United States,
Alaska, Hawaii
and Canada.

This warranty
applies only to
the original 
consumer 
purchaser.

1. Follow the instructions 

in this Manual. Refer to

Tips & Troubleshooting

sections if you have any
problems operating the
unit. If you have any
questions, call one of
the Customer Service
numbers on page 5.

2. Keep your proof of pur-

chase. If the unit mal-
functions within 3 years
of purchase, call one of
the Customer Service
numbers on page 5.

1. Send a pre-paid

shipping label
so you can send
us the unit.

2. Ship a brand

new replace-
ment unit to
your address.

Product failures arising
from abuse, misuse,
neglect, use for com-
mercial purposes, or use
contrary to this Manual.

THIS WARRANTY IS IN
LIEU OF ANY OTHER
WARRANTY, EXPRESS
OR IMPLIED, WRITTEN
OR ORAL, INCLUDING
ANY WARRANTY OF
MERCHANTABILITY OR
FITNESS FOR A PAR-
TICULAR PURPOSE.
ANY LIABILITY IS
EXPRESSLY LIMITED
TO THE PURCHASE
PRICE PAID. ALL
CLAIMS FOR SPECIAL,
INCIDENTAL OR 
CONSEQUENTIAL 
DAMAGES ARE
EXPRESSLY EXCLUDED.

840127800 ENv01.qxd  6/29/04  9:30 AM  Page 3

Содержание Eclectrics 63225

Страница 1: ...A L L M E TA L S TA N D M I X E R RECIPES AND USER GUIDE USA 1 800 851 8900 Canada 1 800 267 2826 840127800 840127800 ENv01 qxd 6 29 04 9 30 AM Page 1 ...

Страница 2: ...ed the built to last metal construction of the past with the styling of today to bring lasting quality and style to your kitchen As you use your all metal appliance think about the history that came before it Enjoy the confidence you have in a product backed by years of experience and a 3 year warranty But most of all fill your home with the delicious aroma of homemade recipes that your appliance ...

Страница 3: ...ot pay for Three years from date of original purchase for stand mixers operated in the continental United States Alaska Hawaii and Canada This warranty applies only to the original consumer purchaser 1 Follow the instructions in this Manual Refer to Tips Troubleshooting sections if you have any problems operating the unit If you have any questions call one of the Customer Service numbers on page 5...

Страница 4: ...To discon nect turn control to OFF then remove plug from wall outlet 13 Do not use appliance for other than intended purpose SAVE THESE INSTRUCTIONS This appliance is intended for household use only This appliance is equipped with a grounded type 3 wire cord 3 prong plug This type of plug will only fit into an electrical outlet made for a 3 prong plug This is a safety feature intended to help redu...

Страница 5: ... Turn the mixer off for 10 to 15 sec onds then turn the mixer back on If the problem is not due to one of the items mentioned above see Customer Service Information DO NOT return the mixer to the retailer as they do not provide service If you have a question about your mixer call our toll free customer service number Before calling please note the model type and series numbers and fill in that inf...

Страница 6: ...mation 7 Mixer Release Button This button locks the Mixer Head down to ensure thorough mixing When the Mixer Head is raised it locks in the upright position Hold the Mixer Head when lowering it into the bowl Press up on the button to release the Mixer Head 8 Setting Control Select a setting from 2 to 12 The setting of the mixer increases with the numbers 840127800 ENv01 qxd 6 29 04 9 30 AM Page 6 ...

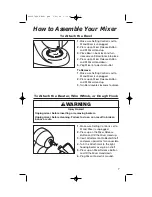
Страница 7: ...l counterclockwise to unlock To Attach the Bowl wWARNING Injury Hazard Unplug mixer before inserting or removing beaters Unplug mixer before cleaning Failure to do so can result in broken bones or cuts 1 Make sure Setting Control is set to O and Mixer is unplugged 2 Press up on the Mixer Release Button and tilt the Mixer Head up 3 Insert Attachment onto Beater Shaft and press upward as far as poss...

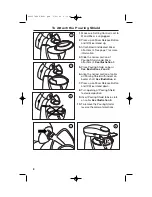
Страница 8: ...ion 1 5 Place Pouring Shield on bowl See Illustrations 2 and 3 6 Align the narrow section of collar on Pouring Shield with indent on beater shaft See Illustration 4 7 Press up on Mixer Release Button and tilt Mixer Head down 8 Turn opening of Pouring Shield to desired position 9 Insert Pouring Shield tabs in slots on collar See Illustration 5 10 To remove the Pouring Shield reverse the order of di...

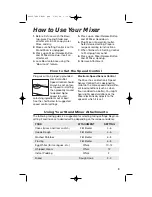
Страница 9: ...5 Press up on Mixer Release Button and tilt Mixer Head down 6 Plug Mixer into electrical outlet Select desired setting Prepare recipe according to instructions 7 When finished turn Setting Control to O Unplug from outlet 8 Press up on Mixer Release Button and tilt Mixer Head up 9 Remove Attachment How to Use Your Mixer How to Set the Speed Control Plug mixer into a properly grounded electrical out...

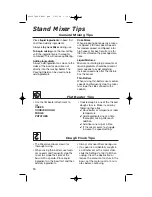
Страница 10: ...at a time If the mixer seems to struggle increase the speed setting General Mixing Tips Place liquid ingredients in bowl first and then add dry ingredients Always stay near Mixer during use To begin mixing use the low setting until the ingredients are thoroughly combined This will reduce spattering Adding Ingredients Always add ingredients as close to the sides of the bowl as possible not directly...

Страница 11: ...all over when whisk is removed Almost Stiff Sharp peaks form when whisk is removed but whites are still soft Stiff but not Dry Sharp stiff peaks form when whisk is removed Whites are uniform in color and glisten Stiff and Dry Sharp stiff peaks form when whisk is removed Whites are speckled and dull in appearance Whipped Cream Pour cold whipping cream into chilled bowl Attach bowl and wire whip To ...

Страница 12: ...th a damp cloth How to Clean Your Mixer Troubleshooting PROBLEM Food is not mixed Food splatters during mixing Mixer walks on counter during mixing Things TO CHECK Place liquid ingredients in bowl before adding dry ingredients Stop Mixer and scrape sides of bowl Increase Control Setting speed Use the Pouring Shield to reduce splatters during mixing Reduce Control Setting speed Reduce quantity of i...

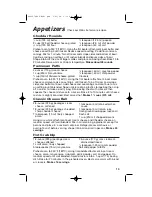
Страница 13: ...st served hot Makes 11 2 cups 375 ml Classic Cheese Ball 2 8 ounce 225 g packages cream cheese softened 1 8 ounce 225 g package shredded sharp cheddar cheese 1 tablespoon 15 ml finely chopped onion Using wire whisk attachment beat cream cheese and Cheddar cheese on medium speed until well blended Mix in all remaining ingredients except for pecans and place in a covered container Refrigerate severa...

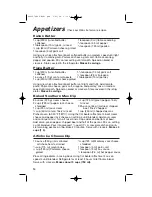
Страница 14: ...ur cream 1 4 cup 60 ml onion finely minced Preheat oven to 350ºF 180ºC Using the flat beater attachment beat cream cheese and pepper jack cheese on setting 4 until blended Add sour cream and continue to mix Turn off mixer and scrape sides and bottom of bowl Add onion green pepper chipped beef and half of the pecans Mix on setting 4 until blended Pour into greased 11 2 quart 11 2 L casserole dish a...

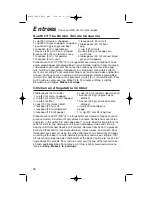
Страница 15: ...ting 4 until well mixed about 1 minute Remove mixture from the bowl and place in a 9x13 inch 33x23x5 cm casserole dish Shape into a flattened oval or egg shape Bake 50 to 60 minutes or until internal temperature is 160ºF 71ºC Makes 6 to 8 servings Parmesan Shrimp Puff 1 tablespoon 15 ml butter 1 4 cup 60 ml finely chopped onion 1 teaspoon 5 ml garlic 1 tablespoon 15 ml flour 1 2 cup 125 ml beer or...

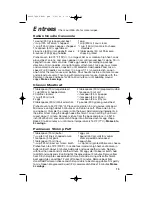
Страница 16: ...3 cup 80 ml onion chopped 1 3 cup 80 ml celery finely chopped 1 3 cup 80 ml flour 3 cups 750 ml chicken broth 1 2 teaspoon 2 5 ml salt 1 2 teaspoon 2 5 ml dried basil 1 4 teaspoon 1 25 ml pepper Preheat oven to 400ºF 200ºC In a large skillet over medium high heat sauté onion and celery in butter until soft about 5 minutes Sprinkle flour over onion and celery in the skillet Stir and cook about 1 mi...

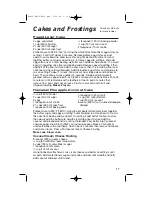
Страница 17: ...with fruit and whipped topping Makes 2 layers Hawaiian Pineapple Coconut Cake 1 2 cup 125 ml butter 2 cups 500 ml sugar 2 eggs 1 teaspoon 5 ml vanilla 21 3 cups 580 ml cake flour 1 teaspoon 5 ml baking soda Preheat oven to 350ºF 180ºC Using the flat beater attachment beat together the butter sugar and eggs on setting 4 until blended In a small bowl stir to mix the cake flour baking soda and salt O...

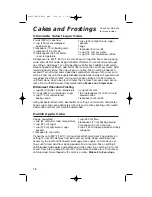
Страница 18: ...eater attachment beat butter on setting 4 until smooth Add confec tioners sugar and cocoa alternately with milk and continue beating until smooth Add vanilla and beat until smooth and blended Danish Apple Cake 2 eggs separated 1 4 cup 60 ml butter room temperature 1 2 cup 125 ml sugar 1 2 cup 125 ml light brown sugar packed 1 teaspoon 5 ml vanilla Preheat oven to 325ºF 160ºC Using whisk attachment...

Страница 19: ...prepared pans Bake for 25 to 30 minutes or a toothpick insert ed into the center of the cake comes out clean Cool in pans on wire racks for 10 minutes Invert onto wire racks to cool completely When cool frost with Lemon Butter Frosting Makes one 3 layer cake Lemon Butter Frosting 6 cups 1 500 ml confectioners sugar 1 cup 250 ml butter softened 1 4 cup 60 ml fresh lemon juice Using flat paddle atta...

Страница 20: ...king powder 2 teaspoons 10 ml baking soda 1 2 teaspoon 2 5 ml salt 2 teaspoons 10 ml ground cinnamon 1 teaspoon 5 ml ground nutmeg 1 2 teaspoon 2 5 ml ground cloves 1 4 cup 60 ml vegetable oil 11 2 375 ml cups sugar 1 2 cup 125 ml brown sugar 2 teaspoons 10 ml vanilla Preheat oven 350ºF 180ºC Grease and flour a 13x9x2 inch 33x25x5 cm pan set aside In a medium bowl mix together flour baking powder ...

Страница 21: ...akes 16 servings Fluffy Sweet Potato Pie 2 eggs separated 15 ounce 425 g can sweet potatoes drained OR 1 cup 250 ml mashed 3 4 cup 175 ml light brown sugar packed 1 tablespoon 15 ml flour 1 4 teaspoon 1 25 ml salt Preheat oven to 375ºF 190ºC Using whisk attachment on setting 12 beat egg whites until stiff but not dry Set aside Using flat beater and the same bowl not necessary to wash beat egg yolk...

Страница 22: ...ar for the liqueur and coffee Best if made a day before serving In a medium saucepan combine 1 2 cup 125 ml whipping cream 1 2 cup 125 ml sugar and eggs Cook and whisk constantly over medium high heat until thick ened about 6 minutes Pour custard into a small bowl and set in freezer to cool Using whisk attachment beat 1 cup 250 ml whipping cream on setting 12 until stiff Set aside Using same whisk...

Страница 23: ...mixer and fold in 1 2 of the whipped topping Line the bottom of a 13x9x2 inch 33x25x5 cm dish with vanilla wafers Arrange sliced bananas evenly over wafers Spread with pudding mixture Top with remaining whipped topping Chill Makes 8 servings Light and Tart Lemon Pie 2 eggs separated 3 tablespoons 45 ml butter 1 cup 250 ml sugar 3 tablespoons 45 ml flour Preheat oven to 350ºF 180ºC Using whisk atta...

Страница 24: ...nd beat at a medium setting until thor oughly mixed Stir in chocolate chips on low setting Drop tablespoons of dough on ungreased baking sheets Bake 7 to 9 minutes Do not overcook Makes 36 cookies Soft Peanut Butter Cookies 1 2 cup 125 ml vegetable shorting 1 2 cup 125 ml peanut butter 11 4 cup 310 ml light brown sugar 1 egg Preheat oven to 275ºF 140ºC Using the flat beater attachment beat shorten...

Страница 25: ... bundt ban with butter Using the flat paddle attachment cream butter on medium speed until smooth Add sugar baking powder baking soda and salt Beat on medium speed for 3 minutes With mixer on low speed add in eggs 1 at a time until well blended mix in vanilla and sour cream Gradually add flour Continue to mix until well blended Spread about 2 cups 500 ml of batter into the bottom of prepared pan S...

Страница 26: ...cookie sheet Pipe out small mounds of meringue slightly less than one tablespoon Place in oven and bake for 15 minutes Turn off oven but leave meringues in oven another hour Remove and let cool Makes about 6 dozen meringues Candies Check our Web site for more recipes Breakfast Favorites Check our Web site for more recipes 2 3 cup 150 ml unsweetened baking cocoa 31 2 cups 875 ml confectioners sugar...

Страница 27: ...onto lightly floured surface Divide the dough into 4 equal portions then divide each portion into 4 golf ball sized balls Place the 16 balls in a greased 9x13 inch 33x23x5 cm baking pan Let rise in a warm place about 30 minutes Bake 25 to 30 min utes Makes 16 rolls Soft Yeast Biscuit Rolls 25 ounce 8 g package active dry yeast 1 4 cup 60 ml warm water 100 to 110ºF 38 to 43ºC 4 cups 1 L flour 3 tab...

Страница 28: ...LTON BEACH PROCTOR SILEX INC PROCTOR SILEX CANADA INC 263 Yadkin Road Southern Pines North Carolina 28387 Picton Ontario K0K 2T0 6 04 840127800 hamiltonbeach com 840127800 ENv01 qxd 6 29 04 9 31 AM Page 28 ...

Отзывы: