background image

4

1.

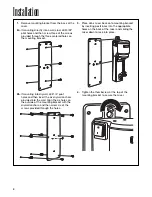
Remove mounting bracket from the back of the 
mixer.

2a.

If mounting directly into a wall stud, drill 5/32"
pilot holes and then screw three of the screws
provided through the three centered holes on
the mounting bracket.

2b.

If mounting into drywall, drill 1/4" pilot 
holes and then insert the six drywall anchors
provided into the wall. Align the six holes on
the outside of the mounting bracket with the
drywall anchors, and then screw six of the
screws provided through the holes.

3.

Place drink mixer back onto mounting bracket 
by inserting posts back into the appropriate
holes on the back of the mixer and sliding the
mixer down to lock into place. 

4.

Tighten the thumbscrew at the top of the 
mounting bracket to secure the mixer.

Installation

Содержание HMD300-UK

Страница 1: ...840206801 1 12 Drink Mixer Operation Manual Page 2 READ BEFORE USE...

Страница 2: ...lfunctions or is damaged in any manner For assistance or replacement parts call our Technical Service number 866 285 1087 or 910 693 4277 8 00 a m 5 00 p m EST Monday Friday www commercial hamiltonbea...

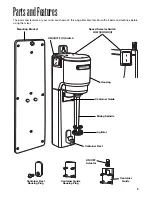
Страница 3: ...e familiar with all parts and features before using the mixer Speed Selector Switch LOW I HIGH II Agitator Container Rest Mounting Bracket ON I OFF O Switch Mixing Spindle Container Guide Housing ON O...

Страница 4: ...and then insert the six drywall anchors provided into the wall Align the six holes on the outside of the mounting bracket with the drywall anchors and then screw six of the screws provided through th...

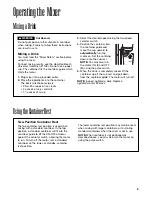
Страница 5: ...Place the ingredients into the container The basic milkshake recipe is 3 No 24 scoops of ice cream 4 ounces of very cold milk 11 2 ounces of syrup MixingaDrink Operatingthe Mixer UsingtheContainerRes...

Страница 6: ...nd ON OFF actuator 1 Unplug mixer 2 Pull container guide straight out 3 To remove the plastic ON OFF actuator press the retainer clip and slide it out of the container guide 4 To replace make sure mix...

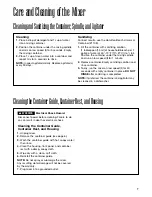
Страница 7: ...tainer Empty sanitizing solution and rinse container 3 To dry run the mixer on low speed I for 30 seconds with empty container in place DO NOT RINSE after sanitizing is completed NOTE If preferred the...

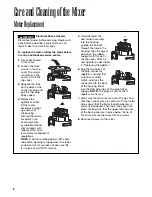
Страница 8: ...the lip of the cover Secure the cover with the screws 8 Reconnect power to the mixer MotorReplacement 1 Disconnect power to the mixer 2 Loosen the three screws in the top cover the screws will remain...

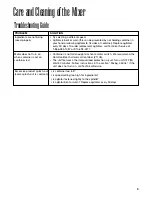
Страница 9: ...r Replace agitators every 90 days To order replacement agitators call Technical Service at 1 866 285 1087 or 910 693 4277 Container is not tall enough to activate motor switch We recommend the Hamilto...

Страница 10: ...Hz This warranty extends only to the original purchaser Keep the original sales receipt as proof of purchase is required to make a warranty claim or the warranty term will be based on the date of man...

Страница 11: ...261 Yadkin Road Southern Pines NC 28387 840206801 1 12 www commercial hamiltonbeach com...

Отзывы: