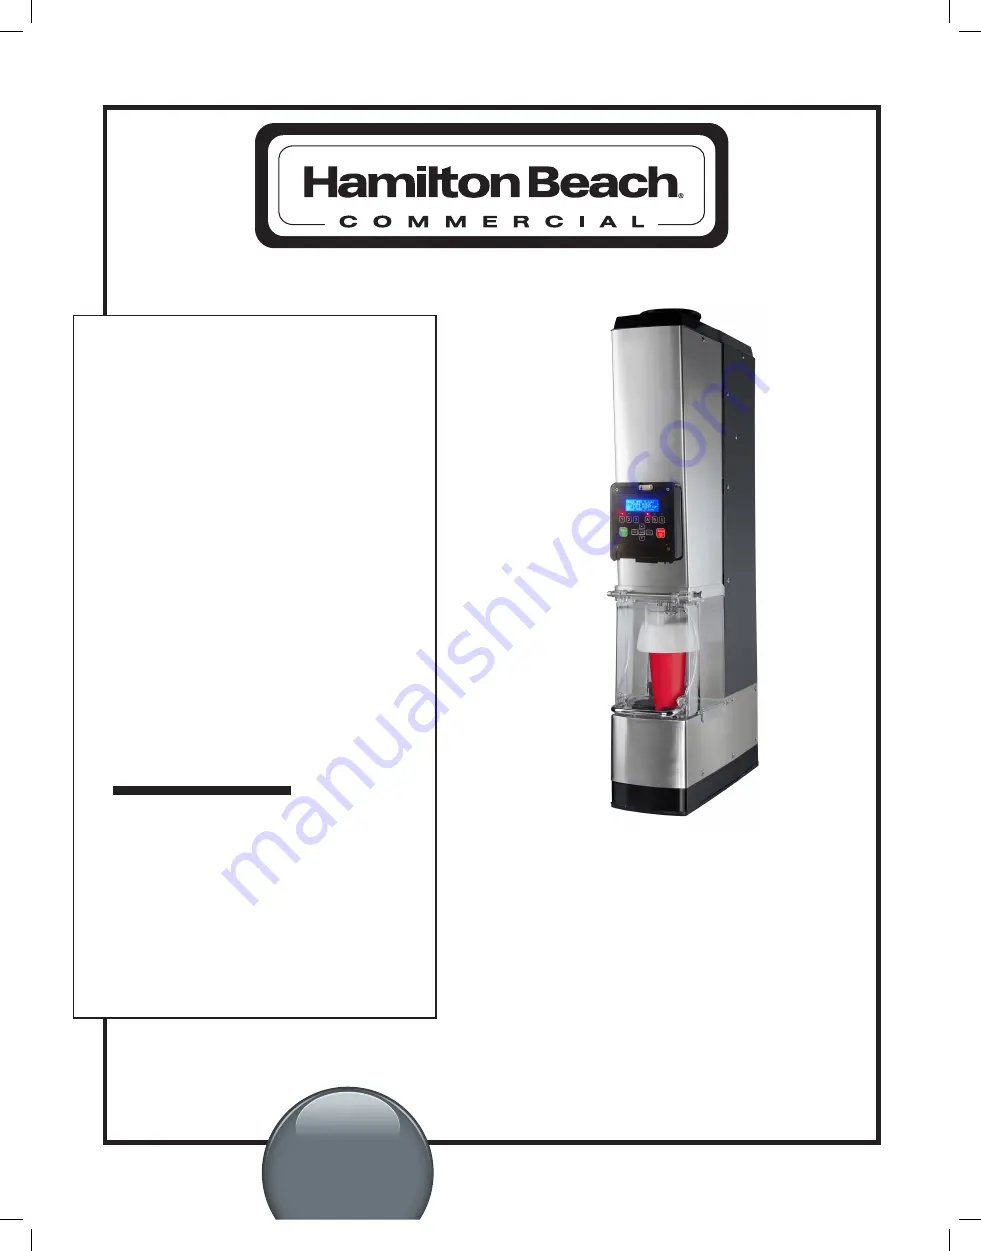
Automatic Ice Cream
Treat Blending
Machine
Good Thinking
®
For more visit www.hamiltonbeachcommercial.com
840351100
08/20
FOR COMMERCIAL
USE ONLY
AUTOMATIC ICE
CREAM TREAT
BLENDING
MACHINE
Operation Manual –
Page 2
READ BEFORE USE.
Страница 1: ...Cream Treat BlendingMachine Good Thinking For more visit www hamiltonbeachcommercial com 840351100 08 20 FOR COMMERCIAL USE ONLY AUTOMATIC ICE CREAM TREAT BLENDING MACHINE Operation Manual Page 2 REA...
Страница 2: ...or immerse the cord plug or equipment in water 10 Do not operate any equipment with a damaged cord or plug or after the equipment malfunctions or is damaged in any manner Refer to Technical Services f...
Страница 3: ...bscrew Drain Grate 2 Spare Cotter Pins Set Spare Thumb Screw Set Cup Holder 2 Blender Shaft Retaining Key Black Drain Pipe Water Tubing Agitator 2 Recommended Parts Not included Top Shield Parts to un...
Страница 4: ...ntertop Review the following questions before securing the machine and fabricating a drain pipe 1 Will the water line reach the machine 2 Can a rigid 3 4 PVC drain pipe 1 05 2 7 cm outside diameter be...
Страница 5: ...ootprint of the machine is approximately 7 3 4 x 21 1 4 19 7 cm x 54 0 cm 3 Install the factory supplied black ABS drain pipe into the machine by sliding it into the rear of the machine and into the s...
Страница 6: ...place 9 Install a water filter into the water tubing making sure the flow direction marker is towards the machine Note when installing filter be sure to use clean sharp cuts on the tubing to avoid deb...
Страница 7: ...Press Stop if the wrong selection is made 5 When blending is finished remove the cup by pulling it up and out of the mixing chamber 6 Close Door 7 Machine automatically rinses between each cycle Blend...
Страница 8: ...nks or shakes served per machine This cycle counter cannot be reset CYCLES _ _ _ _ This is the total number of blend or mix cycles that your machine has performed since the last time the temporary cyc...
Страница 9: ...9 NOTES...
Страница 10: ...aning Instructions 1 Press Flush to rinse the blending components which will take about 25 seconds 2 Press Menu and the prompt will be to Lower Shield Press Start to lower the shield cover 3 Turn off...
Страница 11: ...gitator NOTE The shaft retainer key has to be placed using the flat areas of the shaft as a guide 6 Remove the cup holder by gripping its longer sides with both hands and pulling them straight up The...
Страница 12: ...any leftover food bits For stubborn foods use hot soapy water with a soft bristled brush to gently remove foods 11 Immerse the top shield agitator cup holder and shield cover in a cleaning solution a...
Страница 13: ...Align dimples on cup holder to flat side on motor shaft 16 With cup rest in position over shaft press down firmly to snap into position snap Dimples on Cup Rest If you do not feel the cup rest snap in...
Страница 14: ...Gently lift the top shield 20 Install the agitator onto the motor shaft rotating the agitator counterclockwise until it is just snug Do not over tighten The agitator will self tighten as it blends 21...
Страница 15: ...pressure on the water line by turning the water valve off to the machine and then select the Rinse cycle At the rear of the machine tug slightly on the tubing arrow 2 and at the same time push the co...
Страница 16: ...4421 Waterfront Drive Glen Allen VA 23060 840351100 09 20 Model BIC3000WT Type GM44 www hamiltonbeachcommercial com...