26
Subject to change without notice
O p e r a t i o n o f t h e H M P 2 0 2 0 / H M P 2 0 3 0
4.3 Adjustment of output voltage
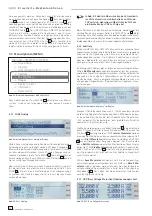
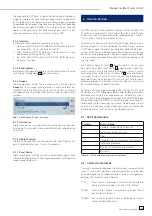
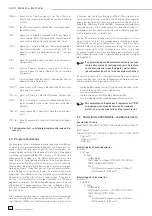
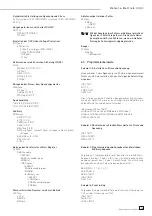
First press the button VOLTAGE before the voltage of a chan-
nel can be adjusted by pressing the button CH1
7
, CH 2
10
or
CH3
13
. If the button VOLTAGE
6
is activated it will light up
white, the colour of the selected channel will change to blue.
The white LEDs of the arrow buttons
3
will also light up if either
the button VOLTAGE
6
or the button CURRENT
5
is activated.
The value of the output voltage can be set either by using the
turning knob or the arrow buttons.
When using the knob
4
fi rst press VOLTAGE
6
and select
the decimal position to be adjusted with the arrow buttons
3
.
Turning the knob cw, the voltage will be increased, turning
it ccw, it will be decreased. After the adjustment is comple-
ted it will be stored by pressing VOLTAGE
6
again, other-
wise the instrument will exit this mode automatically after
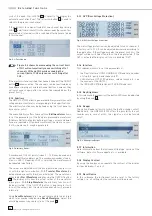
5 sec. without storing the input. The following picture shows the
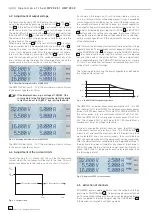
maximum values which can be set for each channel.
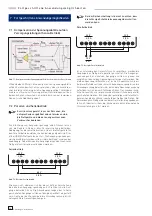
Fig. 4.1: Available maximum values of HMP2030
The HMP2030 delivers 0 ... 32 V, the available current conforms
to the power hyperbola shown.
If the display shows, e.g., a voltage of 10,028 V (the
cursor points to the 3rd digit from the right), the digits
to right can be set to 10,000 V by pressing the knob.
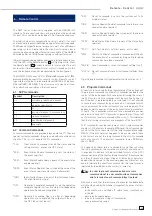
Fig. 4.2: Available maximum values of HMP2020
The HMP2020 delivers 0 ... 32 V, the available current conforms
to the power hyperbola shown.
4.4 Adjustment of the current limits
Current limiting to I
max
means that this will be the maximum
current which the instrument will deliver to the load. This will
prevent any damage to the load in case of a short-circuit etc.
U
out
U
max
CV (Constant voltage)
CC (Constant Current)
I
max
I
out
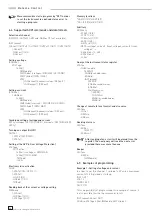
Fig. 4.3: Current limits
As shown on this diagram, V
out
will remain stable as long as
I
out
<
I
max
; this constitutes voltage regulation. If Imax is exceeded
current regulation will take over, i.e., even if the load increases
the current will remain limited to Imax. In current regulation
the output voltage will hence decrease below the value set. If a
channel is activated by pressing the VOLTAGE
6
and OUTPUT
16
buttons and if its settings are changed, the channel LED will
change from green (indicating voltage regulation to red (indi-
cating current regulation) if the adjustments cause a change
of regulation mode.
After turn-on the instrument will automatically enter the voltage
regulation mode. The maximum current depends on the setting
of the CURRENT button
5
. After pressing the CURRENT button
5
, the channel can be selected. The current limit is adjusted
either by the knob or the arrow buttons. After an adjustment
was completed press the CURRENT button again for storing
it; if this is not done the instrument will automatically exit this
mode after 5 s without storage.
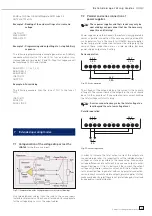
The following picture shows the power hyperbola as defi ned by
the voltage and current set.
(5)
(2,5)
(0)
Fig. 4.4: (HM2030) HM2020 power hyperbola
5
0
10
I
V
16
32
0
The HMP2020 can deliver a maximum power product V
·
I = 160 W
per channel (CH1), the HMP2030 can deliver a maximum power
product of 80 W per channel (CH1 and CH3). With the HMP2020
this corresponds, e.g., to a maximum current of 6.67 A at 24 V.
With the HMP2030 this corresponds to a maximum of 3.33 A at
24 V. The channels CH2 of both types (5.5 V / 5 A) can deliver a
maximum of 5 A at all voltages available.
In order to even better protect sensitive loads, the HMP series
instruments feature an electronic fuse. The FUSE button
8
allows to set and reset the electronic fuse. If the electronic fuse
was selected for one or several channels, the associated fuse
LED will light up white until the adjustment will be completed.
After the adjustment was completed the setting will be stored. If
the electronic fuse was activated for any channel, the channel’s
LED will change to blue; after the fuse was reset it will return to
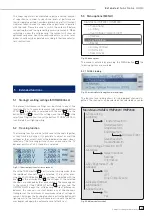
green. FUSE status is displayed for each selected channel (see
the following picture).
Fig. 4.5: Display of FUSE for each channel
4.5 Activation of channels
All HAMEG power supplies allow to turn the outputs on/off by
pressing an OUPUT button
16
. The power supply remains turned
on. Thus the output voltages and currents can be adjusted before
they are applied to the loads by pressing the OUPUT button
16
.
If the button is activated it will light up white.

