2
G
Quick Guide
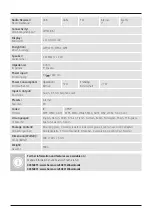
Controls and Displays
A
1. Display
2. [POWER] ( ) button
3. [INFO] button
4. [MODE] button
5. [PRESET] button (in internet mode)
6. [MENU] button
7. [VOL] button
8. [BACK] button
9. [TIMER] button
10. [SCROLL/SELECT] rotary push button
11. Mounting plate
12. Headphone jack
13. AUX input
14. DC 9 V connection
Note
** The rotary controllers have a dual function. You can adjust the volume, or navigate through the menu structure by
turning the rotary controller. You can switch the device to standby mode by pressing the volume controller, or you
can confirm a selection by pressing the navigation controller.
Important note – Operating instructions:
•
This is a quick guide to provide you with the most important basic information, such as safety warnings and how to
get started using the product.
•
For the sake of protecting the environment and saving resources, Hama dispenses with printed operating instructions
and provides them only in the form of PDF files / eManuals on www.hama.com.
•
Use the search function with the item number of your product to easily find the product documentation.
•
Save the operating instructions to your computer’s hard drive for future reference, or print it out if necessary.
Installation
B
Attach the included mounting plate to the bottom of your
wall cupboards using all 4 wood screws.
Choose a suitable position for this purpose because the radio
must not be exposed to heat sources or moisture (not above
or near a stove/dishwasher/sink).
C
Screw the four M6 X 13 screws into the appropriate holes
on the top of the radio. The screws must protrude about 3.5
mm and may not be screwed in all the way.
D E
Mount the radio on the mounting plate so that the 4
screws click firmly into place in all 4 mounting rails.


