Hall Technologies November 10, 2022
Page 8 of 11
Firmware Update
1.
Install the application: XUpgradeTool_000-1.0.4-Setup.exe
2.
Use the USB cable to connect the HT-Satellite-BT to the PC
3.
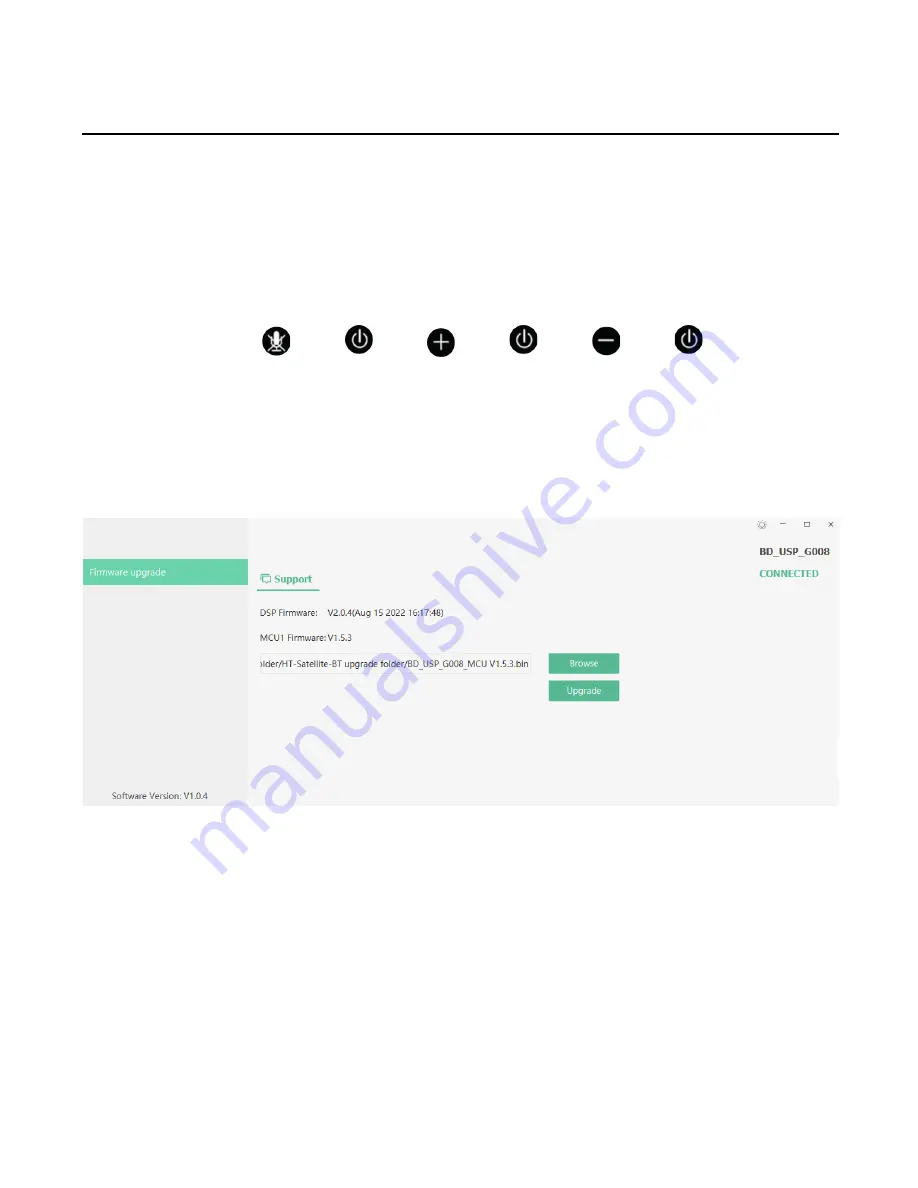
Power on the HT-Satellite-BT and press the following buttons in the order shown to put the
HT-Satellite-BT into factory mode:
“Mute” > “Power” > “+” > “Power” > “-“ > “Power”
4.
The LED will quickly flash.
5.
Run the application. It will automatically connect to the HT-Satellite-BT. (The application may
be hidden behind other applications – make full screen to keep in view.)
6.
Once connected, press the “Browse” button to select the “BD_USP_G008_MCU V1.5.3.bin”,
and then press the “Upgrade” button.
7.
After the upgrade is finished, press the Power button to manually restore the HT-Satellite-BT
in normal use mode.
8.
If you would like to check the version of the HT-Satellite-BT, press the button combination
found in Step 3 to put the HT-Satellite-BT into factory mode and the application will show it
as connected and will display the firmware version. (
Perform Step 7 after checking the
firmware to put it back into normal use mode
.)


