


-13-
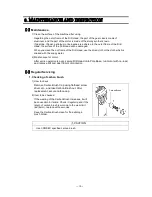
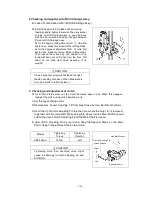
2.Checking and adjustment of Drill Carriage Assy.
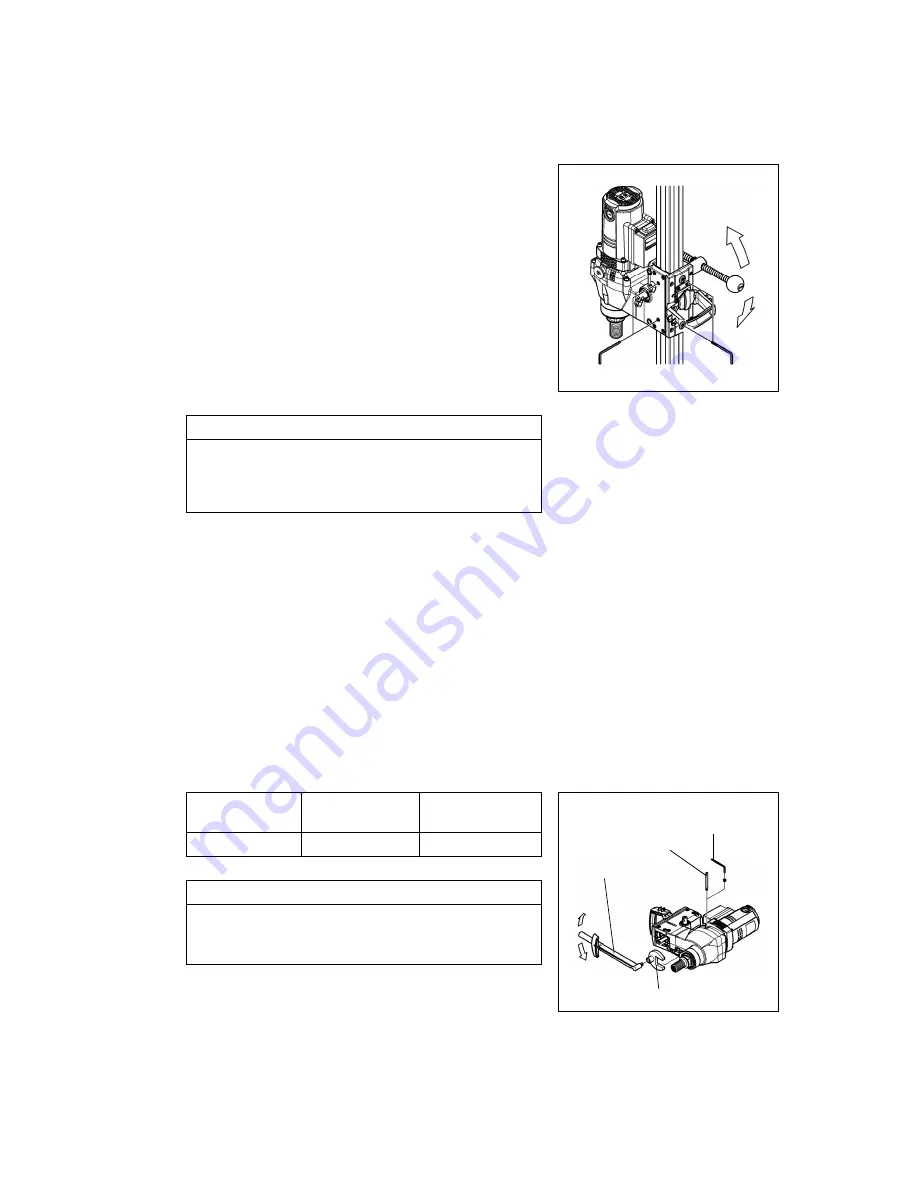
(In case of combination with □49 Drill Carriage Assy.)
◎
Set Drill Head onto Pole Base. While moving
feeding handle, tighten 4 pieces of hex. socket set
screws on Drill Carriage Assy. in good balance
with hex. bar wrench and adjust the gap between
Pole and Drill Carriage Assy.
As for the degree of adjustment from
①
side,first
tighten hex. socket set screw till the rattling stops.
As for the degree of adjustment from
②
side, first
tighten hex. socket set screw till the rattling stops.
Then loosen them back by one quarter of one
turning.(When core drill is fixed on the floor, drill
head do not slide (fall) down because of its
weight.)
CAUTION
If hex. socket set screw are fastened too tight,
feeding handle gets heavy. When slide plate is
worn and starts to rattle, replace it.
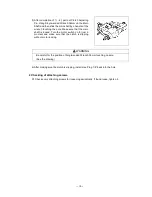
3. Checking and adjustment of clutch
◎
As Friction Plates wear out, the clutch becomes easy to slip. When this happens,
readjust the clutch using clutch adjusting tools.
1) Set the
speed
change at HI.
2) Remove Hex.
Socket
Cap Plug 1/8” from Gear Case by Hex. Bar Wrench (5mm).
3) Insert the tip of
Clutch
Adjusting Pin into the hole, where the plug 1/8” is removed,
in parallel with the main shaft. While doing this, slowly turn the Main Shaft by hand
and further insert Clutch Adjusting Pin till the Main Shaft is locked.
4) Hold Clutch Adjusting Pin by your hand, hang the Spanner 36mm on the Main
Shaft. Using Torque Wrench, fasten the clutch.
Model
Tightening
Torque
Tightening
Direction
SPZ-252U
2
i
72N
・
m
Left
CAUTION
Tightening more than specified value might
cause the damage to clutch adjusting pin and
Drill Motor.
①
②
Clutch Adjusting Pin
Torque Wrench
Hex. Bar Wrench
Spanner 36mm
Left
Right
Содержание SPZ-252U2i
Страница 19: ...17 MEMO...


