background image

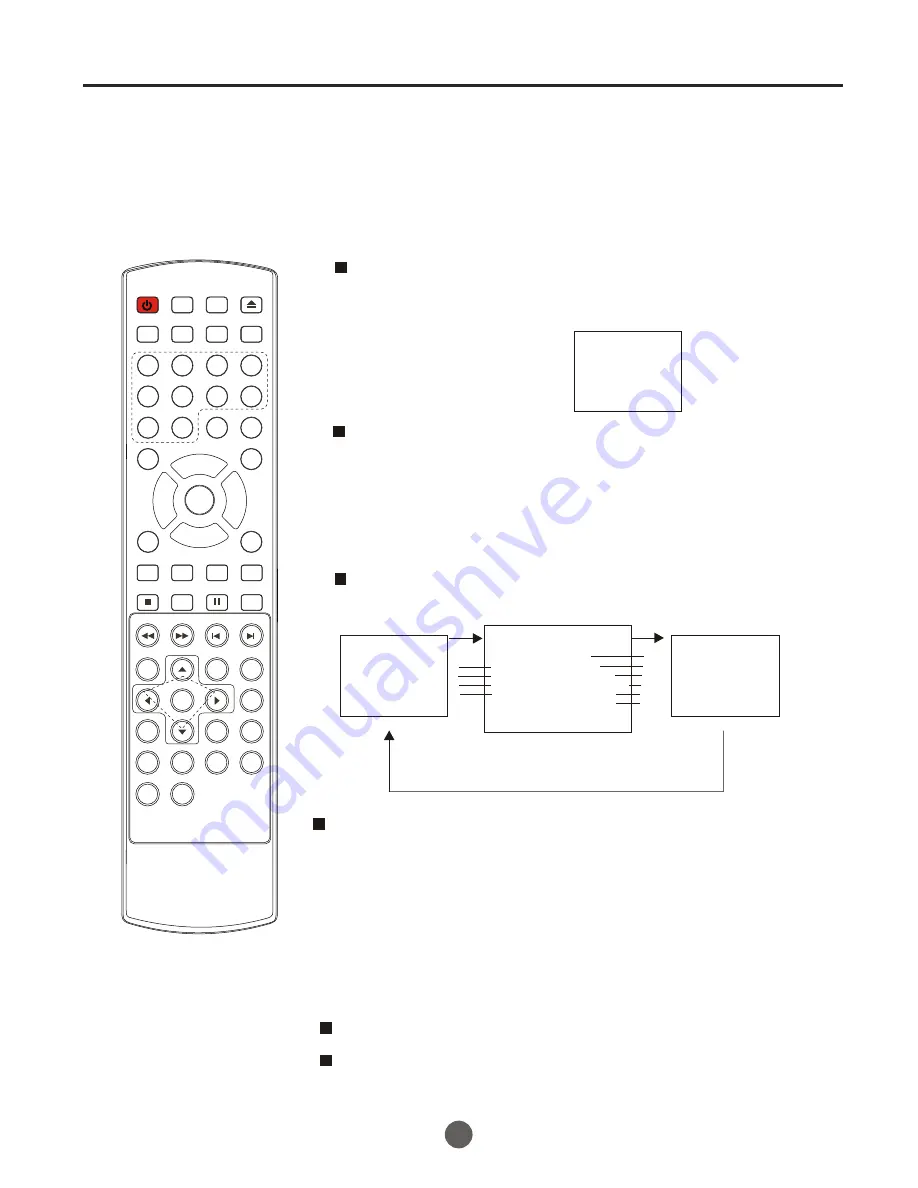
You can display the currently selected channel number or 
other information such as the audio mode on the screen 
for checking.

In the analog mode, the currently selected channel
number and the audio mode are displayed.

Display the channel number and the audio mode.


 Press 

INFO 

button


on the remote control.

    The currently selected channel number and the audio 
    mode are displayed at the top right of the screen.


 To clear the display, press 

INFO 

button again.


In the digital mode, the detailed information for the
currently selected channel such as the program
GUIDE is displayed.
  
 Display the detailed information for the channel.
    

 Every time you press 

INFO 

button, the display mode

will be switched as below.

 The following information is displayed in the INFO mode.

(1) Channel title             (6) Resolution
(2) (7) 

Zoom

(3) Closed caption        (8) Audio language
(4) Channel title             (9) Program air  time 
(5) Channel number      (10) Program content

Program content      

Screen information

                13

       ATV-AIR

NO SIGNAL

14.1

DTV-AIR

17

NOTES:

 When the program guide is displayed in more than 6 lines, use 

VOL+/- 

button


and scroll for reading.

 "No description provided" is displayed when the program guide is not 

provided.

                               11-1
MBC DTV       [1920*1080]
NO PROGRAM INFO         16:9
NO CC INFORMATION UNKNOWN
NO RATING            07:19-09:56
NO  PROGRAM INFORMATION
IS AVAILABLE

1

2

3

4

5

6
7

8

9

10

POWER

TV/DVD OPEN/CLOSE

Q.VIEW

INFO

MUTE

1

2

3

4

5

6

7

8

9

9

0

0

CC

P.MODE

CH+

CH-

VOL

_


MENU

OK

STOP

SETUP

PAUSE/STEP

REV

FWD 

PREV

NEXT

D.MENU

REPEAT

A-B

PLAY/ENTER

SLOW

ANGLE

TITLE/PBC SEARCH

AUDIO

CLR

D.CALL

TV/AV

PROGRAM

ZOOM

10+

VOL
  +

SUBTITLE

-

TV/DTV

DTV Audio

SLEEP

CH.LIST

FAV.LIST

SIZE

GUIDE

Содержание NX-565

Страница 1: ...VD COMBO POWER TV DVD OPEN CLOSE Q VIEW INFO MUTE 1 2 3 4 5 6 7 8 9 9 0 0 CC P MODE CH CH VOL _ MENU OK STOP SETUP PAUSE STEP REV FWD PREV NEXT D MENU REPEAT A B PLAY ENTER SLOW ANGLE TITLE PBC SEARCH AUDIO EXIT D CALL TV AV PROGRAM ZOOM 10 ARC VOL SUBTITLE TV DTV SAP S MODE GUIDE CH LIST FAV LIST NX 565 ...

Страница 2: ...EFEATED DO NOT STARE INTO BEAM LOCATION INSIDE NEAR THE DECK MECHANISM CONTENTS Before Operation Basic operation Important Safety Instructions Installation Preparation of the remote control Part Front panel of the TV set Rear panel of the TV set Using the remote control Antenna connections Cable TV connections Connections for other equipment Setting the language and blue screen Channel menu Channe...

Страница 3: ...ot block any ventilation openings Install in accordance with the manufacturer s instructions 8 Do not install near any heat sources such as radiators heat registers stoves or other apparatus including amplifiers that produce heat 9 Do not defeat the safety purpose of the polarized or grounding type plug Apolarized plug has two blades with one wider than the other Agrounding type plug has two blade...

Страница 4: ...grounding conductors location of antenna discharge unit connection to grounding electrodes and requirements for the grounding electrode 21 SERVICING Do not attempt to service this unit yourself as opening or removing covers may expose you to dangerous voltage or other hazards Refer all servicing to qualified service personnel 22 DAMAGE REQUIRING SERVICE Unplug this unit from the wall outlet and re...

Страница 5: ... to do so may cause an electric shock and serious personal injury Read the owner s manual of the other equipment carefully and follow the instructions when making any connections 28 SOUND VOLUME Reduce the volume to the minimum level before you turn on the product Otherwise sudden high volume sound may cause hearing or speaker damage 29 SOUND DISTORTION Do not allow the product output distorted so...

Страница 6: ... Insert two size AA batteries matching the polarities of the battery to the marks inside the battery compartment 5 Antenna connection 300 twin lead cable Antenna adapter 75 coaxial cable Plug AC power socket Aerial input 75 standard coaxial type Note It is recommended that a 75 ohm coaxial antenna is used to avoid interference To avoid interference from electrical signals do not bind the antenna c...

Страница 7: ......

Страница 8: ... not operate using some systems Enter Playback Selection Chapter Track Chapter Track Playback Confirm Menu Selection Mode Change Mode DVD INFORMATION Zoom Function Open close DVD Tray The function is not available On Screen Display Volume Channel DVD STOP DVD SETU DVD CAPTION SUBTITLE DVD NEXT DVD DVD REPEAT DVD ANGLE DVD AUDIO DVD PREVIOUS Buttons on the remote control UP DOWN LEFT RIGHT POWER TV...

Страница 9: ...8 You can connect the DVD VCR and stereo system to the output to enjoy a higher quality of picture and sound effect ANT IN DC IN The other video and audio equipment Connections ...

Страница 10: ...in lead wires RF IN jack RF IN jack RF IN jack Combiner RF IN jack Combiner Connect the 75 ohm cable from the combination VHF UHF antenna to the RF IN jack Connect the UHF 300 ohm twin lead wire to the combiner not supplied Connect the VHF 300 ohm twin lead wire to the 300 75 ohm matching transformer Attach thetransformer to the combiner then attach the combiner to the RF IN jack Connect the VHF 7...

Страница 11: ...S TO UNSCRAMBLED BASIC CABLE TV SERVICE WITH SCRAMBLED PREMIUM CHANNELS Incoming 75 ohm cable TV cable 75 ohm cable to unit RF IN jack RF IN jack A Splitter B Incoming 75 ohm cable TV cable A B switch 75 ohm cable to unit Converter descrambler RF IN jack Converter descrambler This unit has an extended tuning range and can tune most cable channels without using a Cable TV Converter box Some cable c...

Страница 12: ...r connect the camcorder to the unit as shown To connect the TV to a Video Game The TV can also be used as a display device for many video games However due to the wide variety of formats they have not all been included in the suggested connection diagram Y oul need to consult each component s Owner s Manual for additional information Audio Video cord not supplied To Audio Video OUT AV 1 Camcorder ...

Страница 13: ...ENU and then press VOL button to select FUNCTION menu then press CH button to enter 2 Press CH button to select the BLUE SCREEN option then press VOL to select OFF or ON 3 Press MENU until the MENU screen disappears 12 LANGUAGE ENGLISH BLUE SCREEN ON NTSC CAPTION C C1 DTV CAPTION PARENTAL LOCK FUNCTION LANGUAGE ENGLISH BLUE SCREEN ON NTSC CAPTION C C1 DTV CAPTION PARENTAL LOCK FUNCTION POWER TV DV...

Страница 14: ...tion 3 Press VOL button to select AIR CABLE When scanning is completed the memorized smallest channel will be displayed When you press the MENU button while scanning the scanning is interrupted and the lowest memorized channel is displayed When you press VOL on the remote control scanning the channels in both analog and digital modes will automatically start Channel menu 4 Press CH button to selec...

Страница 15: ...sing button to select the number of the channel to be recovered 2 Do the above steps again 3 Press VOL button to set SKIP as Off 14 NOTE When tuning DTV channels and no signal is present the SKIP over option will be available POWER TV DVD OPEN CLOSE Q VIEW INFO MUTE 1 2 3 4 5 6 7 8 9 9 0 0 CC P MODE CH CH VOL _ MENU OK STOP SETUP PAUSE STEP REV FWD PREV NEXT D MENU REPEAT A B PLAY ENTER SLOW ANGLE...

Страница 16: ...ill not change becauseit is not available 1 9 Press 1 9 asneeded Example to select channel 2 press 2 10 99 Press the 2 digits in order Example to select channel 32 press 3 then 2 100 125 Press the 3 digits in order Example to select channel 321 press 3 then press the2 digits of remain in order 1 Using CH button Using CH button on the remote control change the channel Same operation is available wi...

Страница 17: ...nds later when CC is ON SWITCHING AUDIO This section describes how to switch the audio language in the digital mode 2 Switch the audio language When you press SAP button on the remote control the currently selected language and the number of received languages will be displayed on the screen Every time you press SAP button on the remote control the language will be switched Languages you can switc...

Страница 18: ...w The following information is displayed in the INFO mode 1 Channel title 6 Resolution 2 7 Zoom 3 Closed caption 8 Audio language 4 Channel title 9 Program air time 5 Channel number 10 Program content Program content Screen information 13 ATV AIR NO SIGNAL 14 1 DTV AIR 17 NOTES When the program guide is displayed in more than 6 lines use VOL button and scroll for reading No description provided is...

Страница 19: ...ect the darker areas of the picture Color This will adjust the saturation level of the colors to suit your personal preference Sharpness This will adjust the sharpness of fine details in the picture Tint Allows you to select the color mix Tint of the picture CONTRAST 80 BRIGHTNESS 80 SHARPNESS 50 COLOR 50 TINT 00 VIDEO POWER TV DVD OPEN CLOSE Q VIEW INFO MUTE 1 2 3 4 5 6 7 8 9 9 0 0 CC P MODE CH C...

Страница 20: ...Volume This will adjust the sound output level AUDIO VOLUME 80 BALANCE 00 Balance This will adjust the sound output balance _ POWER TV DVD OPEN CLOSE Q VIEW INFO MUTE 1 2 3 4 5 6 7 8 9 9 0 0 CC P MODE CH CH VOL _ MENU OK STOP SETUP PAUSE STEP REV FWD PREV NEXT D MENU REPEAT A B PLAY ENTER SLOW ANGLE TITLE PBC SEARCH AUDIO CLR D CALL TV AV PROGRAM ZOOM 10 VOL SUBTITLE TV DTV DTV Audio SLEEP CH LIST...

Страница 21: ...enter the submenu 3 Press CH button to select TIME then press CH button to select AM press VOL button to set the value AM PM 4 Press MENU until the MENU screen disappears 20 TIME AM TIMER ON AM TIMER OFF AM DAYLIGHT SAVING ON TIME ZONE CENTRAL TIME POWER TV DVD OPEN CLOSE Q VIEW INFO MUTE 1 2 3 4 5 6 7 8 9 9 0 0 CC P MODE CH CH VOL _ MENU OK STOP SETUP PAUSE STEP REV FWD PREV NEXT D MENU REPEAT A ...

Страница 22: ...lue 4 Press MENU until the MENU screen disappears 2 Press VOL button to select TIME option then press CH button to enter the submenu 3 Press CH button to select TIME OFF then press CH button to select AM press VOL button to set the value 4 Press MENU until the MENU screen disappears TIME AM TIMER ON AM TIMER OFF AM DAYLIGHT SAVING ON TIME ZONE CENTRAL TIME TIME AM TIMER ON AM TIMER OFF AM DAYLIGHT...

Страница 23: ...iew the captioning CAPTION The term for the words that scroll across the bottom of the TV screen usually the audio portion of the program provided for the hearing impaired TEXT The term for the words that appear in a large black frame and almost cover the entire screen usually messages provided by the broadcaster 22 LANGUAGE ENGLISH BLUE SCREEN ON NTSC CAPTION C C1 DTV CAPTION PARENTAL LOCK FUNCTI...

Страница 24: ...h the initial password 0000 5 After inputting password accurately Press CH to select the desired item To avoid forgetting the password write it down and keep it in a safe place to TV RATING and MOVIE RATING PLEASE ENTER PASSWORD 23 Function menu LANGUAGE ENGLISH BLUE SCREEN ON NTSC CAPTION C C1 DTV CAPTION PARENTAL LOCK FUNCTION PARENTAL LOCK MPAARATING PARENTAL GUIDE CA ENG RATING CA FREN RATING ...

Страница 25: ...e password 4 digits using the number buttons 0 9 4 Press CH to select CHANGE PASSWORD then press VOL to enter the submenu NEW PASSWORD 0000 6 Enter again the new password Function menu LANGUAGE ENGLISH BLUE SCREEN ON NTSC CAPTION C C1 DTV CAPTION PARENTAL LOCK FUNCTION PARENTAL LOCK MPAARATING PARENTAL GUIDE CA ENG RATING CA FREN RATING DIGITAL RATING PARENTAL LOCK ON CHANGE PASSWORD POWER TV DVD ...

Страница 26: ...TV PG TV 14 TV MA D Dialogue sexual dialogue applies to TV PG TV 14 L Language adult language applies toTV PG TV 14 TV MA S Sex sexual situations applies toTV PG TV 14 TV MA V Violence appliesto TV PG TV 14 TV MA TO SET PARENTAL GUIDE 1 Enter the PARENTAL LOCK menu 2 Press CH button to select PARENTAL GUIDE press VOL button to enter the submenu 4 When you are satisfied with your choice press MENU ...

Страница 27: ...e 17 and under admitted X Adult only If you set PG 13 G and PG movies will be available PG 13 R NC 17 and X will be blocked 4 Press VOL button to select delete or Function menu MPAA RATING N A G PG PG 13 R NC 17 X PARENTAL LOCK MPAARATING PARENTAL GUIDE CA ENG RATING CA FREN RATING DIGITAL RATING PARENTAL LOCK ON CHANGE PASSWORD POWER TV DVD OPEN CLOSE Q VIEW INFO MUTE 1 2 3 4 5 6 7 8 9 9 0 0 CC P...

Страница 28: ...hen selecting closed captions the captioning will be delayed approximately 10 seconds If no caption signal is received no captions will appear but the television will remain in the caption mode Misspellings or unusual characters may occasionally appear during closed captioning This is normal with closed captioning especially with live programs This is becauseduring live programs captions are also ...

Страница 29: ...ICE2 SERVICE3 SERVICE4 SERVICE5 SERVICE6 In DTV mode 28 LANGUAGE ENGLISH BLUE SCREEN ON NTSC CAPTION C C1 DTV CAPTION PARENTAL LOCK FUNCTION DTV CAPTION CLOSED CAPTION OFF STYLE AUTO SIZE AUTO TEXT COLOR AUTO TEXT OPACITY AUTO BG COLOR AUTO BG OPACITY AUTO EDGE TYPE AUTO EDGE COLOR GREEN RESET POWER TV DVD OPEN CLOSE Q VIEW INFO MUTE 1 2 3 4 5 6 7 8 9 9 0 0 CC P MODE CH CH VOL _ MENU OK STOP SETUP...

Страница 30: ...button to set the desired service LANGUAGE ENGLISH BLUE SCREEN ON NTSC CAPTION C C1 DTV CAPTION PARENTAL LOCK FUNCTION DTV CAPTION CLOSED CAPTION OFF STYLE AUTO SIZE AUTO TEXT COLOR AUTO TEXT OPACITY AUTO BG COLOR AUTO BG OPACITY AUTO EDGE TYPE AUTO EDGE COLOR GREEN RESET POWER TV DVD OPEN CLOSE Q VIEW INFO MUTE 1 2 3 4 5 6 7 8 9 9 0 0 CC P MODE CH CH VOL _ MENU OK STOP SETUP PAUSE STEP REV FWD PR...

Страница 31: ...x of caption display according to your own preference Select a color and one of the opacity options Text Opacity Specify the opacity for the text color BG Background Color Select a background color BG Background Opacity Select the opacity for the background color EDGE TYPE Specify the opacity for the text color EDGE COLOR Select a background color 30 DTV caption menu POWER TV DVD OPEN CLOSE Q VIEW...

Страница 32: ...ted signals SETTING THE TIME ZONE This function allows you to select your local time zone Broadcasted time information will correct the clock display for your local time 4 Press VOL button to select your viewing area time zone NEWFOUNDLAND ATLANTIC EASTERN CENTRAL MOUNTAIN PACIFIC ALASKA HAWAII or SAMOA 1 Press MENU The main menu screen will appear 2 Press VOL button to select TIME option then pre...

Страница 33: ... the remote control when a channel is highlighted and then you can add or delete the channel to from the Favorite List FAV LIST butt Press the FAV LIST button open the favorite channel list press CH button to select the channel and press OK button to confirm VOL button to select to add or delete Press the FAVORITE CHANNELS GUIDE FAVORITE CHANNELS LIST 32 Other Functions 1 2 3 4 5 6 7 8 POWER TV DV...

Страница 34: ...the following sleep timer options 5 MINUTE 10 MINUTE 15 MINUTE 30 MINUTE 45 MINUTE 60 MINUTE 90 MINUTE 120 MINUTE 180 MINUTE 240MINUTE OFF To confirm the sleep timer setting press SLEEP and the remaining time will be displayed for a few seconds T o cancel the sleep timer Press repeatedly until the display turns to OFF SLEEP OFF PICTURE MODE MILD Press the P MODE button to switch desired picture qu...

Страница 35: ...ayback to resume play back from the location where playback is stopped or from the beginning of the disc 3 Press STOP twice to stop completely Stop playback Previous and Next Fast forward and Fast reverse 1 Press FWD to fast forward through the disc Each time the FWD button is pressed the fast forward motion speed changes 2 Press PLAY ENTER to resume normal playback 3 Press REV to fast reverse thr...

Страница 36: ...rded in multi angle you can view the scene from different angles for example front side whole view and exterior scene Press this key to change the mode of audio such as Audio 1 2 AC 3 2 CH English Audio 2 2 AC 3 5 1 CH English Press this button to cycle between Mono Left Mono Right Mix Mono and Stereo AUDIO TITLE PBC With some DVD discs pressing this key will display the title menu You can then us...

Страница 37: ...d into the player a navigation menu will be displayed automatically Use the UP and DOWN cursor buttons to select a file then press PLAY ENTER The slide show will commence Press PREVIOUS or NEXT to move between pictures Press pause to stop on the current picture Press PLAY ENTER to resume normal playing A JPEG disc contains JPEG jpg format picture information that can be decoded by a micro computer...

Страница 38: ...choice In PS mode widescreen material will fill the screen but at the expense of chopping off extreme left and right edges of the original film picture For this feature to work the disc must be specially coded Such discs are uncommon 4 3 LB LB Letter Box You may select this if you have a normal aspect ratio 4 3 TV Widescreen material will be shown in pure unaltered form allowing the entire picture...

Страница 39: ... Saver Off On Off TV Display LB This item allows you to set Angle Mark ON or OFF ANGLE MARK Users can select a particular camera angle when playing a DVD which offers multiple angles On Screen Display OSD Language Users can select on screen display language General Setup Page TV Display LB Angle Mark On OSD Lang ENG Captions On Screen Saver Off On Off General Setup Page TV Display LB Angle Mark On...

Страница 40: ... to all discs which are inserted and played Preference Page Preference Page Default SETUP PLAY ENTER SETUP PLAY ENTER DEFAULT Resets all settings except password and parental lock status for this DVD player back to the manufacturers original settings Press ENTER to perform the reset Note Some functions may not be available depending on the type of disc Resert ...

Страница 41: ...n the way the disc was burned In a few cases their performance may not be consistant or may not even operate at all This DVD Player is designed and manufactured according to the Region Management Information that is recorded on a DVD disc If the Region number described on the DVD disc does not correspond to the Region number of this DVD Player this DVD player will not play that disc This Region nu...

Страница 42: ...cm 12cm 8cm Disc diameter 30cm 20cm 12cm 12cm Horizontal resolution More than 500 line No more than 430 line No more than 350 line No more than 250 line Multiple kinds Picture proportion One kind One kind One kind Subtitle 32 kinds 16 kinds at most 4 kinds at most 4 kinds at most 4 kinds 2 kinds 2 kinds Language 8 kinds Sound quality 48KHz 96KHz 6 20 24bit 44 1KHz 16bit 44 1KHz 16bit 44 1KHz 16bit...

Страница 43: ...ure with snow Noise Color Spot Normal volume Scramble Normal or Weak Volume No color Normal volume No Picture No sound No sound Normal Normal Disturb Noise Double or Triple Image Note 1 If the fault can not be corrected using the above guide consult with your local authorized service center 2 The TV set must only be repaired by a qualified registered service person Never attempt to remove the back...

Страница 44: ...as those on the page showing playable discs contents are those of the license holders and the associated trademarks holders They are shown for informational purposes only and do not indicate content or capability in all software nor with all hardware 43 NTSC ATSC AC 120V 60Hz DC 12V 80W Picture tube Accessories Colour system Sound output power Power requirements Power consumption Dimension 2X2W 10...

Страница 45: ...01 0090500177I ...

Отзывы: