


7
2.2 To Use the Menus
1. Press the
MENU/EXIT
button to display
or close the main menu
2. Use the
Navigation Ring
to move around
to select, adjust or confirm an item in the
OSD (On Screen Display)
menu.
Press the
MENU/EXIT
button to enter the
main OSD. Adjust the items including
Picture,
Sound, TV, Features,
and
Parental.
However, some function items in the menus
may only be enabled in the particular source
modes.
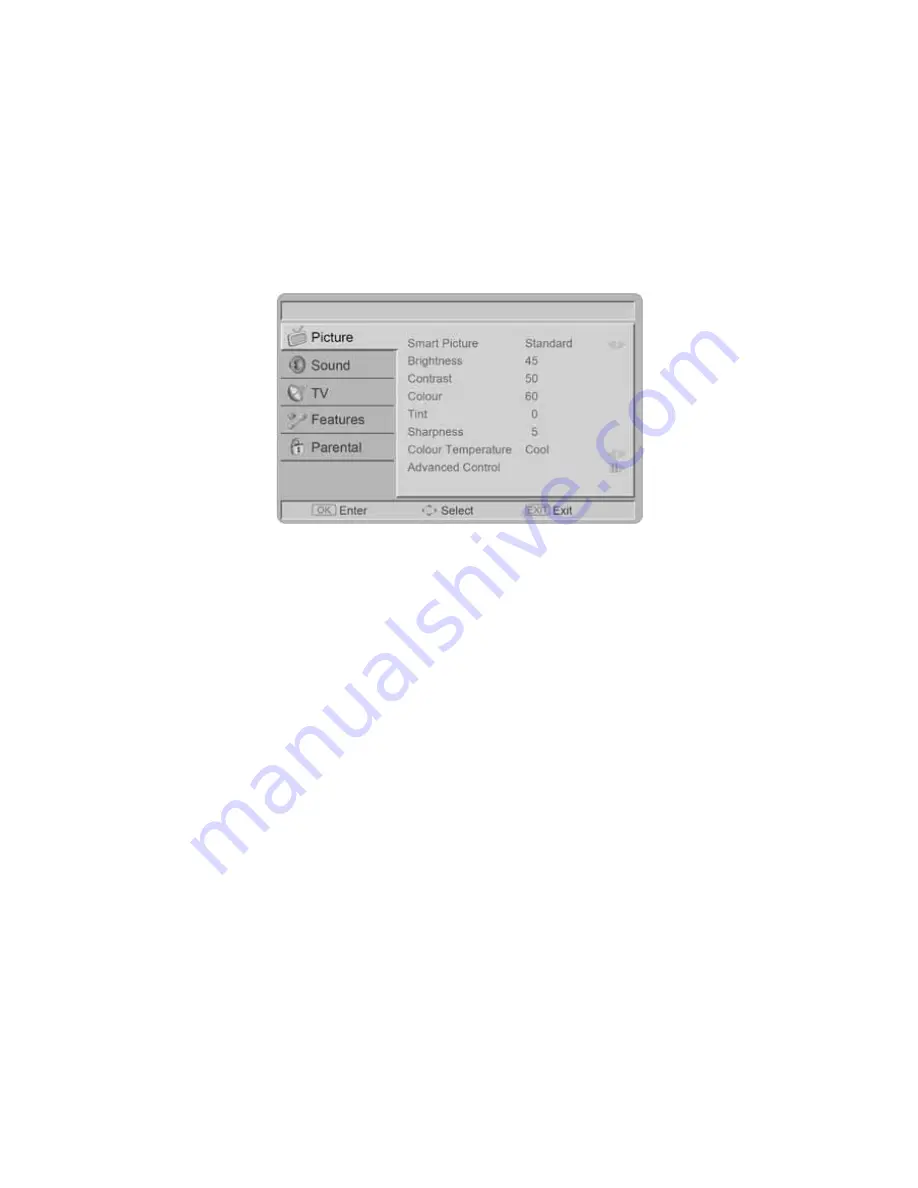
PICTURE MENU
The Picture menu in most source modes
shows as below. It provides several video
adjustment items for user fine
tuning the video
display.
1.
Smart Picture:
To set the best picture
appearance to a predefined picture
setting from Standard, Vivid, Movie,
Eco, or
Personal.
2.
Brightness:
To brighten the dark parts of
the picture.
3.
Contrast:
To sharpen the picture quality.
4.
Colour:
To add or reduce colour.
5.
Tint:
To adjust the picture tint.
6.
Sharpness:
To improve detail.
7.
Colour Temperature:
To choose
between Normal (neutral), Warm (redder),
and Cool (bluer).
8.
Advanced Control:
[Noise Reduction] -
To filter out and
reduces the image noise and improve
picture quality. Select the effect degrees
from Off, Low, Medium, High, or Auto.
[Flash Tone] -
To adjust the skin colour
to be more natural.
[Back Light] -
To make the background
colour brighter or darker.
[DCR] -
Dynamic Contrast Ratio (DCR)
auto adjusts the brightness of the screen
to show more depths in the darker
areas.
[HDMI Mode] -
(HDMI only) User
can select Auto/graphic/Video mode.
Description as following:
• Auto: Automatic to get device
information, device will indicate sending
timing is video timing or graphic timing
(PC
timing).
• Graphic: Force video timing shows
as graphic timing, for example: 720p
shows 1280x720@60Hz; 1080i shows
1920x1080@60Hz. This mode optimizes
for PC input.
• Video: Force graphic timing shows
as video timing, for example:
1280x720@60Hz shows 720p;
1920x1080@60Hz shows 1080i.
This mode optimises for DVD player,
camcorder, and other video appliances
inputs.
Содержание LT32A1
Страница 36: ...36 6 PCB Layout 6 1 Main Board LT26A1 715G3693M01000004K ...
Страница 37: ...37 ...
Страница 38: ...38 LT32A1 715G3693M01001004K ...
Страница 39: ...39 ...
Страница 40: ...40 6 2 Power Board LT26A1 715G3425P01000003S ...
Страница 41: ...41 ...
Страница 42: ...42 ...
Страница 43: ...43 LT32A1 E32AG2NB3WH72N 715G3234P01H30003M ...
Страница 44: ...44 ...
Страница 45: ...45 ...
Страница 46: ...46 LT32A1 E32AA2NB3WH72N 715G3332 1 ...
Страница 47: ...47 ...
Страница 48: ...48 ...
Страница 49: ...49 LT32A1 E32AA2NB3WH72N 715G3645P01W30003S ...
Страница 50: ...50 6 3 Key Board 715G3293K01001004S 6 4 IR Board LT26A1 715G3870R01000004M LT32A1 715G3478R01001004S ...
Страница 52: ...52 8 Block Diagram ...
Страница 81: ...81 11 Exploded View LT26A1 ...
Страница 82: ...82 LT32A1 ...
Страница 114: ...114 Q45G 99609 61 EPE COVER FOR MONITOR Q50G 500523 CABLE TIE Q52G 1285 12 BIG TAPE Q85T0152101CKD 19 32 SHIELD IO ...