background image

-14-

 TV OPERATION

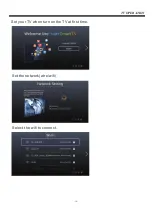
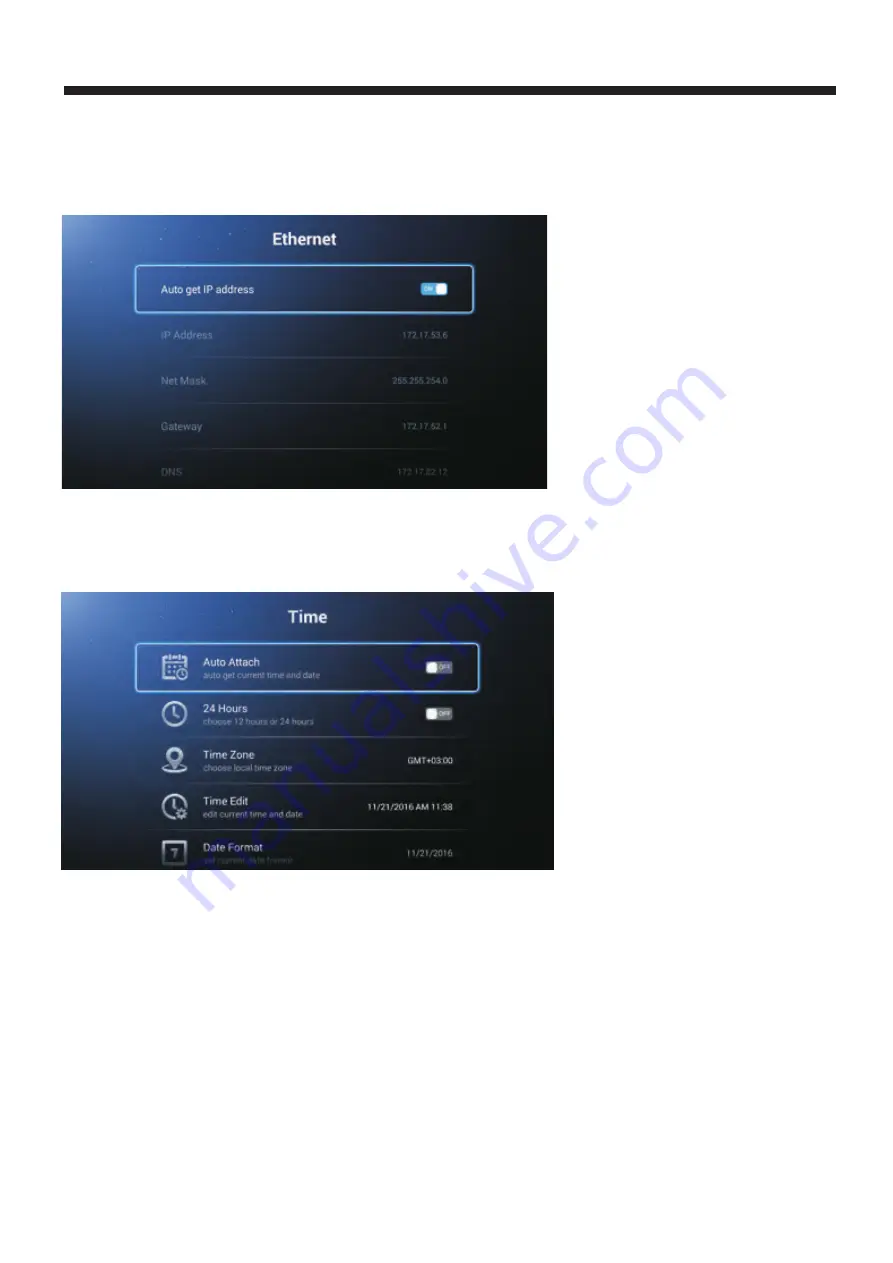
wired network

Insert the Ethernet cable ,and select Auto get IP

 address to connect the Ethernet

Time

Press the

Ż

 / 

ŹW

o select the Time to set.

Auto Attach

        Get the current time and date automatically

.

24 Hours

             Select the 12 hours or 24 hours.

Time Zone

           Select the local time zone.

Time Edit

             Edit the current time and date.

Date Format

        Set current date format.

Содержание LE75U9000SA

Страница 1: ...LE75U9000SA ...

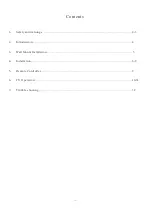
Страница 2: ...Contents 1 1ǃ Safety and warnings 2 3 2ǃ Introduction 4 3ǃ Wall Mount Installation 5 4ǃ Installation 6 8 5ǃ Remote Controller 9 6ǃ TV Operation 10 31 7ǃ Trouble shooting 32 ...

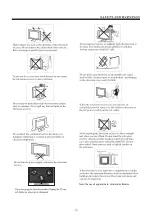
Страница 3: ...ower supply cord or plug is damaged liquid has been spilled or objects have fallen into the apparatus the apparatus has been exposed to rain or moisture does not operate normally or has been dropped 14 Mains plug is used as the disconnect device the disconnect device shall remain readily 15 The ventilation should not be impeded by covering the ventilation openings with items such as newspapers tab...

Страница 4: ...Note the use of apparatus in moderate climates ...

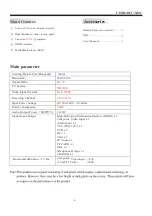
Страница 5: ...ct Ratio TV System Receiving Channel Power consumption Signal Input Output Horizon Video Signal System Input Power Voltage Audio Output Power 3840x2160 16 9 PAL B G NTSC PAL 1 99 ATV THD 7 High Definition Multimedia Interface HDMI x 3 Composite Video Input x 1 Audio Input x 1 YCb Pb Cr Pr x 1 tal definition TV line Composite Video input 350 Y Cb Pb Cr Pr 400 USB x 2 RF x 1 T VGA x 1 PC Audio x 1 F...

Страница 6: ...V appearance subject to material object x M8 20 x M8 20 x M8 20 x M8 20 x Place the TV with the display side down on a flat surface Use a cloth to protect the display Attach the stand base set to the bottom of the TV by firmly tightening the supplied 6 M6x18mm pcs screws Base Stand Assembly Instruction 5 ...

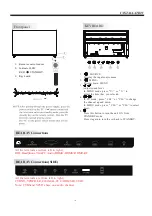
Страница 7: ...1 USB2 Front panel KEYBOARD 1 Remote control sensor 2 Indicator LED RED STANDBY 3 Key board 30 30 1 2 3 1 SOURCE Display the input source menu 2 MENU Display main MENU 3 Adjust sound level In MENU mode press V or V to adjust the item that you selected 4 In TV mode press CH or CH to change the channel up and down In MENU mode press CH or CH to select items 5 Press this button to turn the unit ON fr...

Страница 8: ...INSTALLATION 7 PRESET MODE HDMI ANTENNA Note Aerial connections IEC female Input impendance 75 unbalanced 480i 480P 60 1 50 2 3 4 Signal format 576i 576P 720P 50 60 1080i 1080P 50 60 5 2160i 2160P 30 ...

Страница 9: ...d to the following appliances VCR multi disc player DVD camcorder video game or stereo system etc YPbPr can support these video fomats 480i 576i 480p 576p 720p 1080i 1080p Note 1 share one audio channel 2 Sometimes it will not support in different device because the device supplys nonstandard signal VIDEO YPbPr 1 W A N 2 3 4 W R TO AUDIO OUTPUTS Y Audio Receiver G Green Y B Blue Pb Cb W White AUDI...

Страница 10: ... 9 REMOTE CONTROLLER ...

Страница 11: ... 10 TV OPERATION Set your TV when turn on the TV at first time Set the network wire wifi Select the wifi to connect ...

Страница 12: ... 11 TV OPERATION Select the contry LCN Antenna Type Search Type to start auto tuning Have a good time watching the TV ...

Страница 13: ... 12 TV OPERATION Main Menu The Main Menu UI are as follow ress P to select the menu ress P to select the APP List ...

Страница 14: ...TV OPERATION 13 System Setting elect the Setting in the Main Menu to enter the System Setting S Network Wireless Network Select the WIFI and press the passwork to connect ...

Страница 15: ...ress to connect the Ethernet Time Press the Ż Ź Wo select the Time to set Auto Attach Get the current time and date automatically 24 Hours Select the 12 hours or 24 hours Time Zone Select the local time zone Time Edit Edit the current time and date Date Format Set current date format ...

Страница 16: ...e General and set the general setting Ż Ź Language Setting Select current display language Input Method Select the Input method System Upgrade Upgrade to the newest system version System Recovery Recovery system to original state About Information about the TV ...

Страница 17: ...ideo and press OK button to enter Audio Track Change the audio track Select Subtitle Select On OFF the subtitle Region Language Select the language Encoding Standard Play Mode Select the play mode Aspect Ratio Select 16 9 4 3 Select the encoding standard ...

Страница 18: ...TV OPERATION TV OPERATION 17 Music Press the button to select the Music Ż Ź Photo Press the button to select the Photo Ż Ź Folder Press the button to select the Folder Ż Ź ...

Страница 19: ...TV OPERATION TV OPERATION 18 Input Source P 澬 澭 澬 澭b Press SOURCE button to enter input source Source TV TV AV YPBPR HDMI1 HDMI2 HDMI3 VGA ...

Страница 20: ...he picture Picture Mode Highlight the item and Press OK to enter the sub menu that shows the picture mode you can choose Standard Dynamic Soft User Vivid Brightness Adjust darkness of black sections in the picture Color Adjust the color intensity of the picture Sharpness Object edges are enhanced for picture detail 1 10 Dynamic Contrast Brightness Color Sharpness ...

Страница 21: ...n You can clear up the input signal by set the item Color Temp Select the color temperature that you feel comfortable Cool Gives white colors a blue tint Normal Gives white colors a neutral tint Warm Gives white colors a red tint Aspect Ratio Select the suitable aspect Ration DLC Select ON OFF ...

Страница 22: ...tandard Music Theater News User l t s de e l ass ca djusted Bass Adjus e ue c u ds Treble Adjus e ue c u ds Balance Adjus e e u e eake s AVC es e a cel e e l e e u s u e ea e udde a e lu ccu du e c a eak a e a es SPDIF Select t ON RAW PCM ta te ace Surround Select t ON OFF Su u d Ǐ ǐ Ǐ ǐ ...

Страница 23: ...hing the programs automatically Anolog Manual Scan Searching the ATV programs by input t the frequency Digital Manual Scan Searching the DTV programs by input the frequency Channel List List the programs Preferences Set your preference about audio 2 6 Air Antenna Type Analog Manual Scan Digital Manual Scan Channel List Preferences ...

Страница 24: ...want to stop searching press EXIT to stop searching Auto Scan will search for available channels and program receivable channels Channel Set the channel number Color system Select the color system DK BG I L M PAL SECAM NTSC Auto Sound System Select the sound system Frequency Input the frequency of the channel ...

Страница 25: ... rename state then select the word you want to change and V Ż Ź to select word Press to skip the select channel Your TV set will skip the channel automatically when using CH to view the channels Press the to select Channel List Ǐ ǐ Ǐ ǐ Ż Ź Press to Edit the Channel List ...

Страница 26: ...TV OPERATION TV OPERATION 25 Hearing Impaired AUDIO DESCRIPTION Set On Off Set On Off Audio Language Select the language of audio Subtitle Language Select the language of subtitle ...

Страница 27: ...TV OPERATION TV OPERATION Lock ress P Ǐ ǐ Ǐ ǐto select Lock Ż Ź Press OK button and input the password the default password is 0000 to enter the sub title and press Ż Ź Ǐ ǐ Ǐ ǐto adjust 26 ...

Страница 28: ...ATION TV OPERATION System Lock Select On Off Lock System Change Password Select change keep password Parental Control Select Parental Control to select the number of age which is suitable for your children 27 ...

Страница 29: ...OPERATION 28 Time ress P Ǐ ǐ Ǐ ǐto select Time Ż Ź Press Enter button to enter the sub title and press Ż Ź Ǐ ǐ Ǐ ǐto adjust OSD Timer Select OSD Timer to adjust Sleep Timer Select Sleep Timer to adjust and Ż Ź and Ż Ź ...

Страница 30: ... P Ǐ ǐ Ǐ ǐto select Setting Ż Ź Blue Screen Set the background color to blue or black when no input signal PVR Setting Set the PVR function Teletext Set the Teletext HDMI CEC Setup Set the CEC option Reset Recall the default setting Shop Mode ...

Страница 31: ...OPERATION 30 PVR Setting P PVR Setting ressᇻ ᇼ ᇻ ᇼto select PVR USB Selector Select the USB device to recode the program Record List List the programs have recorded H P HDMI CEC Setup DMI CEC Setup ressᇻ ᇼ ᇻ ᇼto select ...

Страница 32: ...TV OPERATION TV OPERATION 31 R HOTEL MODE eset 澬 澭 澬 澭t P Press MENU 1001 to enter the hotel mode ...

Страница 33: ... or not No picture Mute Power cord is not inserted Power switch is not opened Contrast and brightness volume setup Press standby key on the remote control for inspecting No color Normal audio color control Scramble Normal audio or weak retune channel No color Noise Audio system Special Explanation The accessories such as remote control is not belongs to the guaranteeDŽ Normal audio antenna position...

Страница 34: ......
Отзывы: