6
2.2 To Use the Menu
1. Pressing the menu button may display or exit the main menu.
2. In the main menu, you may use the / key to select the functional options to be adjusted by moving up or down,
∧ ∨
press the > to enter the sub-menu adjustment, and press the menu key to exit the main menu.
3. In the sub-menu, you may use the </> key to make adjustment, use the /
∧ ∨
key to select the previous/next
option, and press the menu key to go back to the previous level.
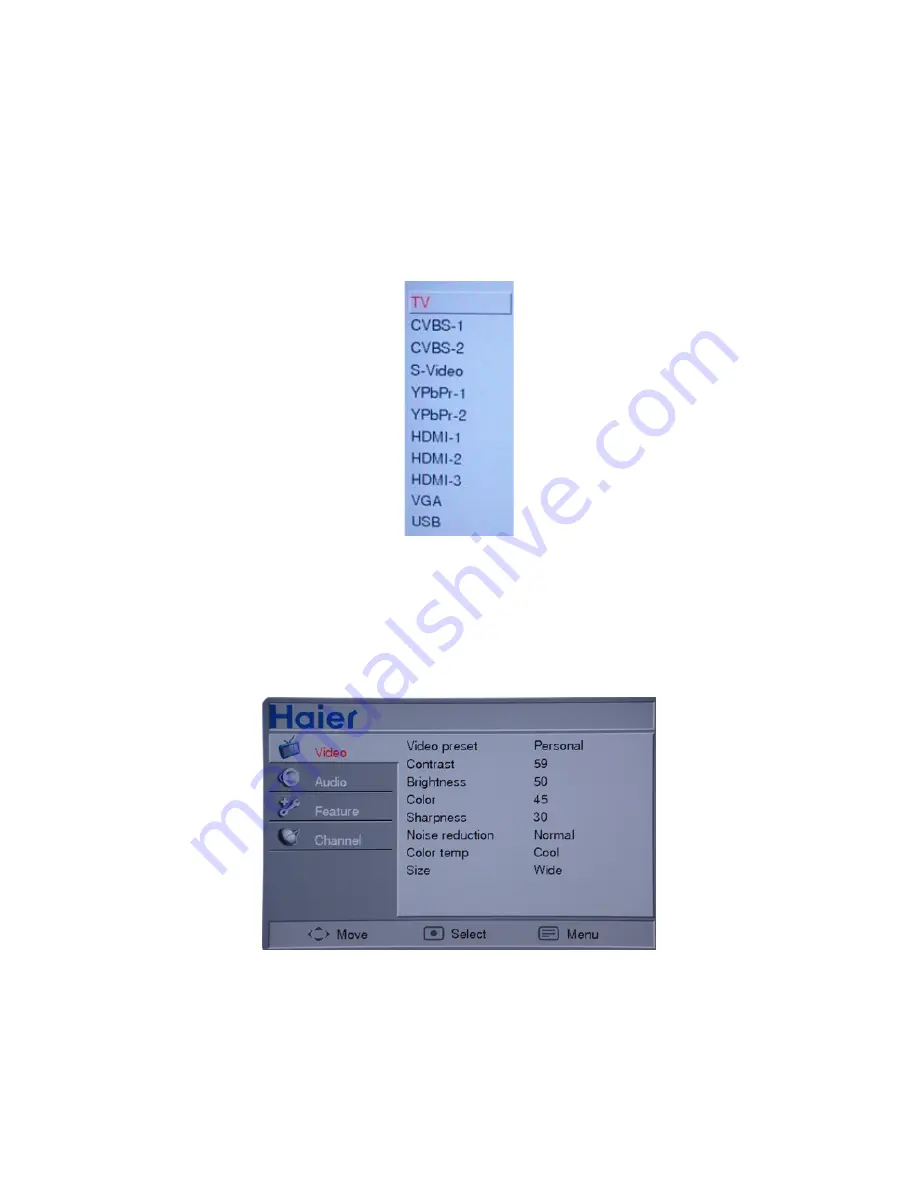
Signal source menu
Press "SOURCE" button to enter the SOURCE menu, including TV, CVBS-1, CVBS-2, S-Video, YPbPr1, YPbPr-2,
HDMI-1, HDMI-2, HDMI-3, VGA, USB. (with other signal sources, pressing number key or CH +/- key may switch to
the "TV" signal source.)
Pressing the Menu button to enter the main menu
While in TV mode, the adjustable options include picture, sound, function and channel.
While with CVBS-1, CVBS-2, S-Video, YPbPr1, YPbPr-2, HDMI-1, HDMI-2, HDMI-3, the adjustable options include
picture, sound and function.
While in PC mode, the adjustable options include picture, sound, function and PC.
Image setting
1. Video preset: Provide five image setting modes including Personal, Standard, Vivid, Movie, enco. You can adjust
the "Contrast, Brightness, Color and Sharpness" to your taste only in the Personal mode.
2. Contrast: Make the dark color in the black portion of the image enricher and make the white color brighter.
3. Brightness: Adjust the brightness of the image background; it is often used together with the Contrast, adjustable
from 0 to 100.
4. Color: Adjustable from 0 to 100. Adjustment of this option may change the color or streak of color of the picture
(not available in HDMI mode and PC mode).
5. Sharpness: Adjustable from 0 to 100. Adjustment to this option may change the degree of the clearness and
sharpness of the picture (not available in HDMI mode and PC mode).
Содержание L42A9
Страница 4: ...4 1 General Specification ...
Страница 19: ...19 4 Remove the AC socket ass y speakers and BKT ...
Страница 20: ...20 5 Remove the rest BKT and separate panel and bezel ...
Страница 25: ...25 6 PCB Layout 6 1 Main Board 715G3639M01000004K ...
Страница 26: ...26 ...
Страница 27: ...27 6 2 Power Board 715G3351P01W20003S ...
Страница 28: ...28 ...
Страница 29: ...29 ...
Страница 30: ...30 6 3 Inverter Board 715G3358 1 ...
Страница 31: ...31 6 4 IO Board 715G3481 1 ...
Страница 32: ...32 6 5 Key Board 715G3513K01000001S 6 6 IR Board 715G3666R01000004F ...
Страница 58: ...58 11 Exploded View ...


