Haier L26TA5A Скачать руководство пользователя страница 10

17

SLEEP TIMER
1.Press MENU button to make the main menu display.
2.Press      button to select TIMER menu, press 
        button to enter.
3.Press        button to select SLEEP TIMER item.
4.Press        button to select the sleep timer you
   need. You can select OFF, 15,30, ......, 240. After 
   setting, press MENU button to save and exit, the 
   TV will start counting.
Note: You can press SLEEP button on the remote 
controller to set the sleep timer you need.

CLOCK
1.Press MENU button to make the main menu display.
2.Press      button to select TIMER menu, press 
        button to enter.
3.Press       button to select CLOCK item, press 
          button to enter setting. Press      button
   to select hour or minute position, press       button
   to adjust the value. After setting, press MENU button
   to save and exit.

OFF TIME
1.Press MENU button to make the main menu display.
2.Press       button to select TIMER menu, press 
        button to enter.
3.Press       button to select OFF TIME item, press 
         button to enter setting. Press       button
   to select hour or minute position, press       button
   to adjust the value. After setting, press MENU button
   to save and exit. When the off time is coming, the TV
   set will enter standby status.

REMIND TIME
1.Press MENU button to make the main menu display.
2.Press      button to select TIMER menu, press 
         button to enter.
3.Press        button to select REMIND TIME  item, press 
         button to enter setting. Press       button
   to select hour or minute position, press        button
   to adjust the value. After setting, press MENU button
   to save and exit. 
Note: Functions only work when clock is set.

TIME SETTING 

TIME SETTING

18

REMIND PROGRAM
1.Press MENU button to make the main menu display.
2.Press       button to select TIMER menu, press 
         button to enter.
3.Press      button to select REMIND PROG. 
    item, press       button to set the on channel, if 
    the on channel is off, the on channel is the channel 
    before standby status.
Note: 1. Function only works when time is set.
           2. When the REMIND PROG. and the 
               PW.CHANNEL in the child lock menu are 
               set at the same time, the PW.CHANNEL is 
               prior.

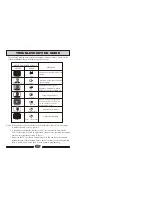
SIGNAL SOURCE SETTING

There is different signal source mode in this TV set, 
you can select according to your require: TV, AV,
S-VIDEO, YPbPr, VGA, 

ress TV/AV button on the remote  control to 


You can also press TV/AV button on the remote 

control to select the signal source directly. 

SCART1, SCART2, HDMI

or DTV. 

1.P

make 

   the signal source menu display
2.Press 

 button to select the signal source you

    need. Press     button to enter.

Note: 

TV
AV
S-VIDEO
YPbPr
VGA
SCART1
SCART2
HDMI
DTV

TIMER

SLEEP TIMER                  OFF
CLOCK                           - - : - - 
OFF TIME                      - - : - -
REMIND TIME             - - : - -
REMIND PROG.               OFF

TIMER

SLEEP TIMER                  OFF
CLOCK                           - - : - - 
OFF TIME                      - - : - -
REMIND TIME             - - : - -
REMIND PROG.               OFF

TIMER

SLEEP TIMER                  OFF
CLOCK                           - - : - - 
OFF TIME                      - - : - -
REMIND TIME             - - : - -
REMIND PROG.              OFF

TIMER

SLEEP TIMER                  OFF
CLOCK                           - - : - - 
OFF TIME                      - - : - -
REMIND TIME             - - : - -
REMIND PROG.               OFF

TIMER

SLEEP TIMER                  OFF
CLOCK                           - - : - - 
OFF TIME                      - - : - -
REMIND TIME             - - : - -
REMIND PROG.               OFF

Содержание L26TA5A

Страница 1: ...2TA5A L37TA5A L26TA6A L32TA6A L37TA6A L26TA5A L32TA5A L37TA5A L26TA6A L32TA6A L37TA6A LCD COLOUR TELEVISION OPERATING INSTRUCTIONS Wide view angle display high contrast Nicam Teletext HDMI Double scarts 01 009050 ...

Страница 2: ...R ANY PROBLEM REFER SERVICING TO QUALIFIED SERVICE PERSONNEL THERE IS A LIGHTNING ARROW SYMBOL IN THE TRIANGLE THIS SYMBOL INDICATES HIGH VOLTAGE IS PRESENT INSIDE IT IS DANGEROUS TO MAKE ANY KIND OF CONTACT WITH ANY INSIDE PART OF THIS PRODUCT THERE IS A EXCLAMATION MARK IN THE TRIANGLE THIS SYMBOL ALERTS YOU THAT IMPORTANT LITERATURE CONCERNING OPERATION AND MAINTENANCE HAS BEEN INCLUDED WITH TH...

Страница 3: ......

Страница 4: ...ol of battery must match with the marks on the remote 3 Close the cover of battery apartment Cautions for using remote control Confirm there is no object between the remote control and the remote sensor of TV set Sunshine or other strong light will interfere the signal sent by the remote control In this situation turn the TV set to avoid the direct light source Do not put the remote control in dir...

Страница 5: ...t the volume RECALL Pressing RECALL button can switch the channel to the last channel you watched MUTE FUNCTION 1 Press MUTE button to shut off the TV sound the screen displays mute mark 2 Press MUTE button again or VOL button to turn on the TV sound OSD LANGUAGE SELECTION Select the LANGUAGE item in the menu 1 Press MENU button to make the main menu display 2 Press button to select FUNCTION menu ...

Страница 6: ...n to stop auto search during searching Note The order of the auto scan is due to the frequency of the program generally speaking it is used only at the first time you search the program and once the order of the program has been confirmed you don t have to use this function otherwise the order of the program will be changed MANUAL SEARCH Manual search can search and order the program freely 1 Pres...

Страница 7: ...SITION CHAR 001 002 003 004 005 006 007 008 009 010 COPY OK CANCEL OK RETURN SELECT S MODE PAGEUP P MODE PAGEDOWN 12 TV PROGRAM SETTING INSERT 1 Press button to select the channel you need insert press button to drag the channel you need move 2 Press button to select the position you need insert press button to insert the selected channel in this position during operating press green button to can...

Страница 8: ...button to enter 3 Press button to select BALANCE item 4 Press button to adjust the value AUTOMATIC VOLUME CONTROL 1 Press MENU button to make the main menu display 2 Press button to select AUDIO menu press button to enter 3 Press button to select AUTO VOLUME item 4 Press button to select ON or OFF EQUALIZER 1 Press MENU button to make the main menu display 2 Press button to select AUDIO menu press...

Страница 9: ...ENU button to make the main menu display 2 Press button to select FUNCTION menu press button to enter 3 Press button to select ADVANCE item press button to enter the sub menu DURATION 15S HALF TONE 50 FUNCTION LANGUAGE ENGLISH BLUE SCREEN OFF OSD SETTING IMAGE POSITION ADVANCE TXT LANGUAGE WEST FUNCTION LANGUAGE ENGLISH BLUE SCREEN OFF OSD SETTING IMAGE POSITION ADVANCE TXT LANGUAGE WEST H POSITIO...

Страница 10: ...em press button to enter setting Press button to select hour or minute position press button to adjust the value After setting press MENU button to save and exit Note Functions only work when clock is set TIME SETTING TIME SETTING 18 REMIND PROGRAM 1 Press MENU button to make the main menu display 2 Press button to select TIMER menu press button to enter 3 Press button to select REMIND PROG item p...

Страница 11: ...rrent status 20 19 O TV UNLOCK CHANNEL 000 UNLOCK OTV SEARCH UNLOCK OKEYPAD UNLOCK OREMOTE UNLOCK OCLEAR ALL OCHANGE PASSWORD OVOLUME LIM 100 OPW CHANNEL OFF OBUS ON INPUT NEW PASSWORD INPUT NEW PASSWORD INPUT NEW PASSWORD AGAIN 20 DTV MENU Main Menu Press DTV MENU button to make the Main Menu display Main Menu Channel List Favourites Gudies Settings Common Interface Channel List 1024 Colour Bar 1...

Страница 12: ...nnel 40 BBC NEWS 24 51 BBCi 800 Barnkanalen 801 SVT Extra 802 SVT1 803 SVT2 ABC List 1 1 BBC ONE Select List Select Channel Select i More Add Remove Edit Favourite Lists List 2 List 3 List 4 List 5 1 2 1 Settings 1 Press button to select Settings item press OK button to enter 2 Press button to select Configuration item press OK button to enter 3 Press button to select the item you need press to ad...

Страница 13: ...untry again to search First Time Installation Welcome Choose your country Continue installation Select Belgium Are you sure you want to delete all channels and settings for first time installation Yes No Common Interface This function is not available First Time Installation Press button to select First Time Installation item press OK button to enter Are you sure you want to delete all channels an...

Страница 14: ...s found Press button to hide the teletext information Either press the button or the Text button to exit the cancel display mode Language change Pressing the button will change the Teletext characters between Eastern and Western Hold Pressing the button will stop the teletext page automa tically updating This feature is very useful where there are several teletext pages or data on the same page nu...

Страница 15: ...Cr Pr INPUT OUTPUT AUDIO L MONO AUDIO R S VIDEO VIDEO SCART1 SCART2 You can connect outside signal source VCR VCD DVD PC equipment to the TV set Antenna Input 1 Connect the VCR radio frequency input to the back radio frequency input of the LCD 2 Connect the antenna to VCR antenna input 3 Press TV AV button to select TV mode 4 Press PLAY button in VCR to start watching S VIDEO input If you use S te...

Страница 16: ... 60Hz Mode Resolution Horizontal Frequency Vertical Frequency RESOLUTION Note The above parameters are VESA standard 30 SPECIFICATIONS L26TA5A L32TA5A L37TA5A L26TA6A L32TA6A L37TA6A 68 1 24 6 52 5 including base L26TA5A L26TA6A 81 3 24 6 61 9 including base L32TA5A L26TA6A 94 9 31 0 70 3 including base L37TA5A L26TA6A Model Screen Type Viewable angle Sound system Video input Colour system TV VIDE...

Страница 17: ...otor Vehicle Fluorescence lamp etc Volume Sound mute The power plug isn t plugged in AC outlet The main power isn t turned on The setting up of contrast brightness and volume Adjust Colour control Adjust channel again The following problems are not always caused by hardware failure Please use the follow troubleshooting guide before you call for service Picture with Snow No Colour No Picture Normal...

Отзывы: