background image

Содержание HWR12XC3

Страница 1: ...77 337 3639 or questions on parts and services Life les instructions avant de proc_ der_ Pins_allatian Pour _vtes qveshbnsconcernant les pi_ceset I en_retlen camposez te t 877 337 3639 Lealas tnstrucd...

Страница 2: ...f comfort Please read instructions carefully before using the producL Also do not forget to fiHout and mail the Product Registration Card Record Your ModeUand SeHaUNumber For all your service calls du...

Страница 3: ...r 4 DO NOT USEAN ADAPTEROR AN EXTENSIONCORD 5 When installing your air conditioner in a window make sure the window is strong enough to hold the weight of the air conditioner Youalso want to secureand...

Страница 4: ...tricaJ Safely 4 Tips 5 Energy Saving Guide 5 FeQtures 6 7 Operating Gulde 8 14 Normal Operating Sounds 8 Operating instructions 8_ J4 JnstaJJations 15_24 Parts 16 Tools 17 Installing Unit into A Windo...

Страница 5: ...urrent The power cord has a grounding wire with a grounding pJug PJugif into an outlet that is properly installed and grounded WARNHNG mmproperuseof the grounding pJugcan resuJtin a risk of electric s...

Страница 6: ...nstallation _ _ Usecorrect electric voJfageand proper ampere for the unit to run effectively _ Only let a certified eledrician do any modifications fo your eledricol outlet o When installing your air...

Страница 7: ...re is reached the fan will run at the LQ Setting 3 Function Your air conditioner has 3 Functions a A C Here the air conditioner will operate the compressor and the desired fan speed set to give you ch...

Страница 8: ...nstall the unit in a window or the wall Window nsl aJ Kit Enables you to install the air conditioner in a double hung window Extra brackets or sug ort may be needed depending on your window JOoRemote...

Страница 9: ...ow instalafion High pitch compressor sound may be heard pe ethsg Ins tru lieHs Folowing are the operating instructions of your electronic air conditioner After instaling your air conditioner pJug it i...

Страница 10: ...ers the status of Fan OnJy with Jaw setting You wiJJhave to press the or o key on the TempiTime to set the temperature at your desired comfort You can choose behueen 61 F and 86 F Once the temperature...

Страница 11: ...mnthe Auto speed the fan wiHIstart at High Med or Lo as the temperature varies in the room Tr temperature inside the room Ts the set temperature When Tr Ts 2 F the Hi is to be automatically When TroTs...

Страница 12: ...When Ts l F Tr Ts 3 F the compressor wilJ cycle for 10 minutes on and 6 minutesoff 3 When Tr Tsol F the compressor wilJ shut off The dehumidification process takes pJace be_veen the set temperature _1...

Страница 13: ...r each hour Hfyou passed the desired time use the H pad key to lower the selection _Timer Stop See Fig 7 Unit must be running to set the timer off Use this to preset the time you would like the unit t...

Страница 14: ...eat in the night and as nights generally become cooler this feature Jetsyou deep comfortably throughout the night without having to wake up to change the temperature settings See Fig 8 Fig 8 ontroU Pa...

Страница 15: ...lay wi show room temperature Pressthe key to get settemperature When unit is in Timer Stop funco tion LEDdisplay wi show the time eft for the unit to shut off Tocancd Timer Stop press the main Off key...

Страница 16: ...o hold the weight of the air conditionen 4 The wail is strong enough to hold the unit Extra brackets or supports may be needed depending on the wail 5 There is adequate and proper power supply near th...

Страница 17: ...curtain sash screws Casemenl to screws 13 32 securance screw I drain elbow Remote control Model ItWR OXC3 left and right side curtains Pads Supplied seal cudain curtain sash screws Casement to _ _ at...

Страница 18: ...ed to have the fallowing tods to help yau in the installation of your air condifianen Sdssars _PhiHipsScrewdriver oStandard Screwdriver oPliers eWrench DriJJand DriH Bits oTape Measure eGJaves Level o...

Страница 19: ...lation kits Measure your window opening width and compare it to the chart below to ensure that it meetsthe minimum and maximum window width requirements HWRO8XC3 I l HWR10XC3 HWR 2XC3 HWRO8XC3 HWR10XC...

Страница 20: ...ill with a n n n um of three countersunk wood screws no1 supplied wilh kil 1his provides a smooth surface for nounling air condifionen Mu_ be a rr ir_ mul i nod des gned or wind dfi I_i _ _ F bc lr 2n...

Страница 21: ...or sash This wiJJ stop air leakage which reduces efficiency ModeJs HWRIOXC3 HWR12X 3 I REPAREUNIT FOR INSTALLATION Unpack unit on floor next to instaJJatlonJocatlon Remove F_ontattachment screw Separa...

Страница 22: ...s no_ supplied wth kit mold ngs to ensure Inslant Moun This pray des a smooth surface for will fit window frame Instant Moun_ mounting air conditionen models are designed or windows wide the detal see...

Страница 23: ...f the windowframe Install wo 3 32 screws One in each upper right and left corner of the cudains Inslall three 31 32 top mounling rail screws NOTE To make screws easier to drve dill a plot hole nlo sas...

Страница 24: ...direction of the drain _ube drain elbow to make it be in line with the hole in the rear of unit Insert the drain tube drain elbow into the hole and twist 90 RETURN CHASSIS TO OUTERCASE Find someone t...

Страница 25: ...ch you have purchased 2 Measure the outside width and the height of the frame to determine the cutout dimensions necessary for the opening in the wall The depth of the frame will depend on the depth o...

Страница 26: ...rame 6 Usingthe screw hobs on the sidesof the unit which are for the window mountingkit and the screw hobs in the top mountingkit rain attach the casing to the wood frame 7 With the hdp of another per...

Страница 27: ...on the top and bottom tabs Jocatedon the right side of the front mask See flgo 22 The filter may be washed or vacuumed Removethe excesswater from the filter by gently shaking the fiJtenThis wiJJremove...

Страница 28: ...ware store Before puffing away your unit make sure any wa_er Jeffin the pan is removed and drained away Water left in the pan could Jeadto Rusting or damage to the dectricaJ connections Hfa_r ondltlon...

Страница 29: ...a On extreme hot humid days air conditioners may take a Jiffle longer to cooJ Air orldltJc_ner is r_clklng noise wBen cooUing Youmay hear sounds of air movement water compressor clicking on and off or...

Страница 30: ...thorized Service Depot For the name of the Service Depot nearest you contact Haier at 877 337_3639 2 All service must be performed by an authorized Haier Service Depot HHSWARE_J_NTY COVERS UN TS W THU...

Страница 31: ...ppareik De plus n oubliez pas de rempJir et de renvoyer Ja carte d enregJstrement de rappareiJ 3O Notez Je num_ro du module et son nu_ro de s_rie Vous aurez besoin des informations suivantes pour rout...

Страница 32: ...installez votre climatiseur sur une fen6tre v6rifiez que cette derniBre est suffisamment robuste afin de soutenir le poids de I appareik Vous devrez 6galement fixer I appareil afin qu il ne puisse to...

Страница 33: ...ide d Econo_ies d Energle 34 _ract_risttlques 35 36 Gulde d U_iilsatlon 37 43 Bruils de Foncfionnemenf Lot sd Une Exp oitafion Normde 37 Insfrucfions d Exploifafion 37 43 nsfaUJal ions 44 54 Pi_ces Fo...

Страница 34: ...chappe Le cordon 6lectrique comporte unfil de masse avec une broche de masse Branchez la fiche dans une prise ad6quate ayant 6t6 raise 6 la masse AVERTISSEMENT Tout utilisation incorrecfe de la broche...

Страница 35: ...6tre branch6 sur une prise murale ad6quafecorrespondant6latension et I intensit6decedernierafin qu il puisse fonctionner 6 plein rendement _ Toute modification au niveau de votre prise 6lectrique doit...

Страница 36: ...ure de positionnement et JatempSrature J it_rieur de JasaJJe Lorsque Jatemperature r6gJBeest ayreint JeventiJateur fonctionne sur LO Bas R6gJage 3 Fonction Le cJimatiseur poss_de 3 fonctions a A C Sur...

Страница 37: ...JespossibiJit s du CJimatiseun Vous pouvez instaJJerJ appareiJ soit B une fen6tre soit sur un tour 9_ Kit d nstalJation pour Fen_tre Permet d hTstaJJer JecJimatiseur sur une fen6tre doubJe 6 guiJJoti...

Страница 38: ...ion au tour ou 6 une fen re Le compresseur 6met par_ois des bruits tr s aigus Jnstructiens d e p eitatien Vous trouverez ci dessous Jes directives de fonctionnement du dimatiseur d air Jectronique Apr...

Страница 39: ...nly avec une basse configuratiom Appuyer sur la touche ou o situ6e sur Temp Time Temp Heure afin de r6gJer la temp6rature en fonction de vos pr6f ences Vous pouvez s61ectionner une temp6rature compris...

Страница 40: ...ode Auto speed Vifesse outomafique En mode de vitesse eutomafique le venfilofeur d6marre sur High Rapide puis se r_gle sur Lo Bas en fonction des fluctuations de la femp6rafure de la pi6ce Une lois qu...

Страница 41: ...eur foncl ionne sur la vil esse Lo Basse Si la temp6rature descend auodessous du r6glage le compresseur s 6l einl el le ventilal eur continue de foncl ionner 6 basse vil esse Le processus de d humidif...

Страница 42: ...s d6passez J heure souhait6e servez vous de Ja touche o pour revenir en arri6re Arr_t de la Minuterie Voir fig 7 Pour arr6ter la minuterie I appareil doit 6tre allure6 Se servir de cette fonction pour...

Страница 43: ...endant Ja nuit et que les nuits sont g6nBrdement plus fratches celle foncfion permef de dormir confodalolemenf durant toute la nuit sons avoir a se r6veiller pour changer le r6glage de tempBrature Voi...

Страница 44: ...touche _ pour r6gler la ternp6rature Lorsque I appareil foncfionne en mode Timer Stop Arr6t Minuterie I affichage 6 cristaux liquides indique e temps restant avant que I appareil s 6teigne Pour annule...

Страница 45: ...ffisamment robuste afin de supporter Je poids du dimatiseur 4 V6rifiez que le tour est suffisamment robuste afin d accueillir Je dimatiseur Vous devrez peut 6ire instaJJer des supports et fixations su...

Страница 46: ...n mousse de Jafen re 6 guiJJotind 1 1 1 4 Supporl de bJocage de fenStre 2 2 2 5 Vis de 31 32 po 9 9 9 6 Vis de 13 32 po 6 9 9 7 Rail de montage sup ieur mont 1 1 8 Raccord coud6 pour sortie d eau 1 9...

Страница 47: ...aurez besoin des outils suivants pour I insfallation du dimafiseur Ciseaux Tournevis cruciforme Tournevis ordinaire Pinces CI6 6 molette Perceuseet forets M tre ruban graduB Gants Niveau o CI6 6 douil...

Страница 48: ...il avec ou sans kit d installation Mesurez la largeur de I ouverture de la fen tre el comparezola au tableau ci dessous afin de vous assurer qu elle correspond aux critares minimum et maximum HWRO8XC3...

Страница 49: ...ant une bande de bois d au moins 1 po 3 81 cm de large le long du rebord Fixer la bande de bois au rebord 6 I ade d au mons trois vis 6 bois 6 t te ira s e non comprises dans le n cessare Ceci procure...

Страница 50: ...installS Reirer la vis de la parlie avant S parer le boitier ext rieur de I avant 6 I aide d un couteau mastic aux endro ts d sign6s par les fl ches Refirer une vis re enant le suppor _ de fixation de...

Страница 51: ...vis 6 bois _ t te avec au moins trois vis _ bois _ 116_e frais6e non fournies avec le kit Vnus obfiendrez ansi une surface lisse afin de placer le climatiseu_ 1 2cr_ de placer le climaliseur D_g_g_ n...

Страница 52: ...inf6rieur Approx 5 degr6s Efirer les rideaux de far on ce quills entrent en contact avec le cadre de la ten6tre Poser cina de 25 mm _ 1ravers les ddeaux el la cr maill_re sup6rieure REMARQUE Atin de...

Страница 53: ...sser I extr6mit6 du coude dans le lrou jusqu _ ce qu il soil verrouill6 REMETTRE LE CHASSIS DANS LE BOJTIER EXTI_RIEUR Faire appel 6 quelqu un pour remet re le ch6ssis dans le boitier ext rieur Poser...

Страница 54: ...ensions de J ouvedure 8 pratiquer dans le tour La profondeur du cadre d6pendra de la profondeur du mun Apr s avoir terrain6 de construire le cadre placez le dans le mun Le cadre doit 6ire cart6 et niv...

Страница 55: ...de drain sur le ch6ssis pas dans tousles mod les Ajustez Ja direction du tube de drain coude de drain pour Jeloire re en conformit_ avec le frou dans I arri_re de Funit6 Ins6rez Jetube de drain coude...

Страница 56: ...aspirafeun Refirez I eau du fillre en le secouanf 16g6remenf Ceci vous permeffra de refirer la poussi6re et les parficuJes 6 J infSrieur du fiJfre Apr s avoir netfoy6 le filfre replacez_le N_ PA utlJl...

Страница 57: ...eau dans Je bac et que route I eau a 6t6 purg6e Toute eau demeur6e dans Je bac risque d entrai ner Ja formation de rouiJJe et d endommager Jes raccordements 6Jectriques SJ le llmattJseur ne fonctJerin...

Страница 58: ...uffisante afin de refroidir Ja pi ce JJfaut toujours un peu plus de temps pour refroidir une pi ce Jors d une chdeur extr6me et d une forte humidit6 Be cJJmatiseur tait du bruit Jorsqu iJ foncti nne V...

Страница 59: ...roche Pour conna_ tre Jenora du centre agr 6 Haler Je plus proche cornposez Je 877 337 3639 2 Toute r6parafion doit 6fre effectu6e par un centre de r6paraflon agr6 Hden LA GA_NTHE COUVr_E BEg APPARE L...

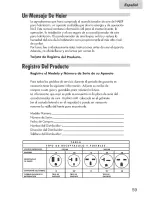
Страница 60: ...aparafo Adem6s no oJvide Henar y enviarnos por correo Ja Yarieta de Reg_s_ro demProduc_oo Registre el Modemo y N_ero de Serie de su Aparato Para todos Jospedidos de servicio durante el perlodo de gar...

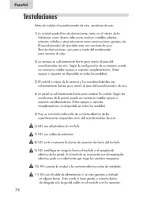
Страница 61: ...le de alimentaci6n que se encuentre gastado o en malas condidones Evite usarlo si mue4ra grietas o da_os por desgaste en el cable mismo o en d enchufe o conedor NO USE ADAPTADORES O CABLES DE EXTENSIO...

Страница 62: ...do de na unidad que pueden cortarJe y causarJe nesiones graves 8 Tenga cuidado cuando Jevanta el acondicionador de aire para instalarlo o remover Ja unidad_ Siempre realice esta operaci6n con dos pers...

Страница 63: ...ias 64 Guia de Aherro de Energla 64 aracter_sticas 65 66 Guia De Opera i6n 67 73 Sonidos De Operaci6n Normal 67 JnstruccionesDe Operaci6n 67 73 Ur_staJacJor_es 74 84 Piezas Que Se Suministran 75 Herra...

Страница 64: ...entaci6n de corriente cuenta con un cable de conexi6n a fierra y con un enchufe que permite es_aconexi6n Conecte el enchufe en un recept6culo o tomacorrien_e apropi o adamente insfalado y con conexi6n...

Страница 65: ...ario que un profesiond redice Ja instaJad6n Use corriente en_ctrica de los vdtajes y amperaies requeridos para que la unidad fundone en forma efidente _ Llame Onicamente a dectridstas certificados par...

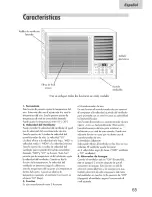
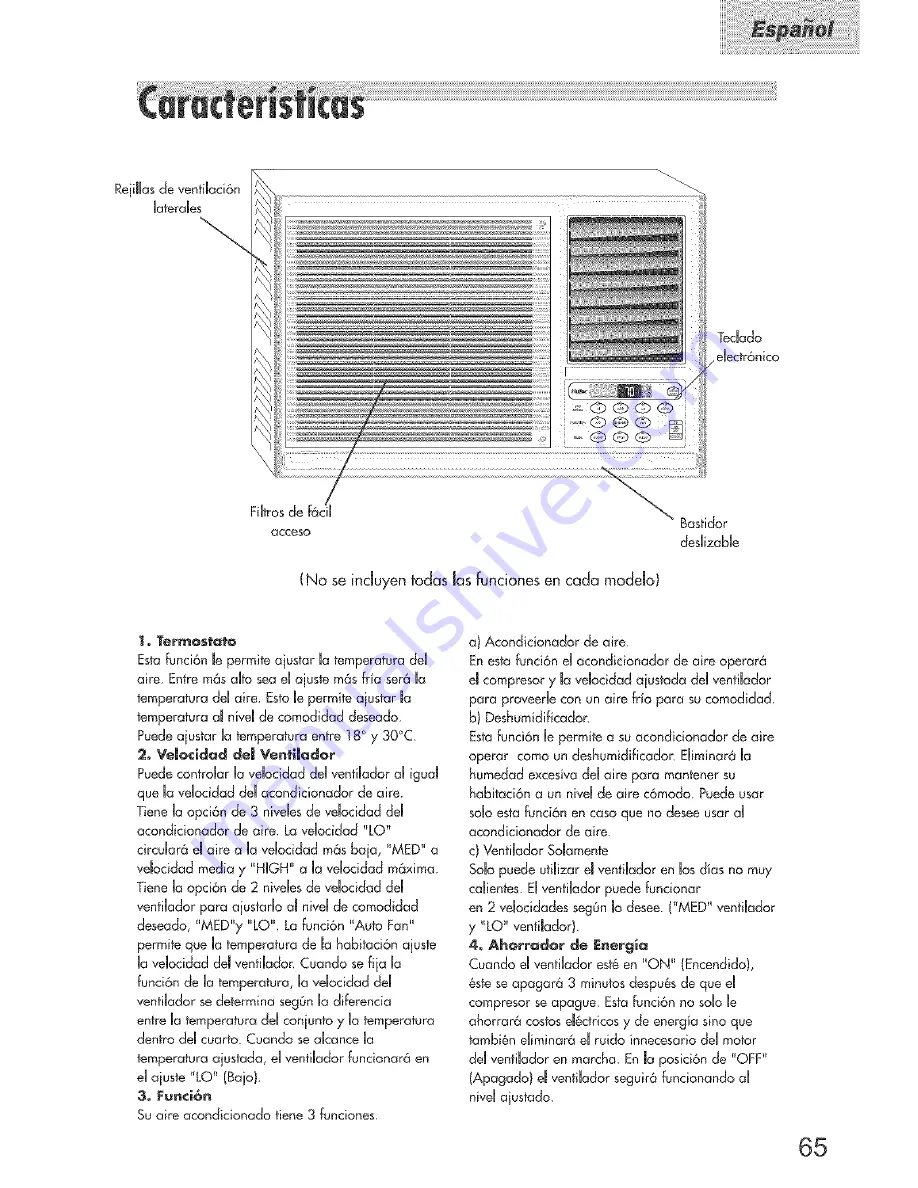
Страница 66: ...del coniunto y Hafemperatura dentro dell cuarto Cuando se aHcance Ha temperatura ajustada eHvenfiHador fundonar6 en eHajuste _LO Bajo 3 I unci6n Su tire acondiclonado tiene 3 funciones a Acondicionado...

Страница 67: ...dlcionador de alre es mucho m6s vers6tiH con esta fund6n Usted fiene Haopci6n de instaHar maunidad en una ventana o en Hapared 9 Equipo de nstamac_6n en e Pared Le permite instaHar em acondacionador d...

Страница 68: ...o en la ventana o Un sonido de aJtafrecuenda puede oirse como producto dd fundonamiento de compreson llllr stlllrucdelllr e sde llll e d A continuaci6n se induyen las instrucciones de funcionamiento...

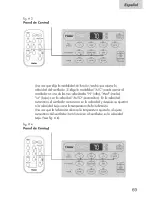
Страница 69: ...urad6n baja Tendr6 que presionar la teda o end ajuste Temp Time TemperaturaiHora para aiustar la temperatura seg0n Io desee Usted puede escoger entre temperaturas de 61 F 16 C y 86 F 30 C Una vez que...

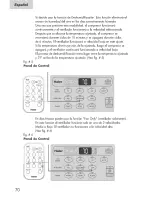
Страница 70: ...docidades HF_ dta Med media Lo_ baia o en Javdocidad AUTO autom6fica En JaveJocidad autom6fica eJ venfiJador comenzar6 en Javdocidad y despu6s se aiustar6 ana vdoddad baia como Ja temperatura de Ja ha...

Страница 71: ...te cidos de 6 minutos EJvenfilador funcionar6 a vdocidad baja en este ajuste Si Jatemperatura disminuye m6s de Jo aiustado Juego eJcompresor se apagar6 y eJvenfinador confinuar6 funcionando a vdocidad...

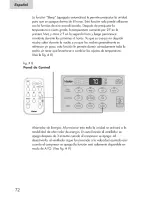
Страница 72: ...en los botones _Temp Time temperatura horario uno pot cada hora Si se pas6 dd fiempo deseado use Jatda _ para disminuir Uasdecci6n Jnterruptor deJTemporizador Vea fig 7 La unidad debe estar encendida...

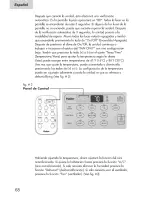
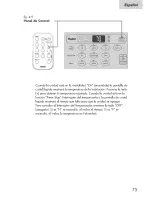
Страница 73: ...e mucho cdor durante la nochey ya que las nochesgenerdmente se refrescan un poco esta fund6n Jepermitedormir c6modamentetoda Ja noche sin tener que bvantarse a cambiar los aiustesde temperatura_ Yeala...

Страница 74: ...ra obtener natemperatura aiustada Cuando Ja unidad est6 en Ja funci6n Timer Stop interruptor deJtemporizador Ja pantdJa de cristd Jlquido mostrar6 eJtiempo que faJta para que Ja unidad se apague Para...

Страница 75: ...ndicionador de ake 4 La pared es suficientemente fuer_e para sostener Jaunidad Seg0n Jas condiciones de Ja pared puede ser necesario instaJar apoyos o soportes compJementarios Estos apoyos o soportes...

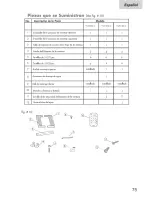
Страница 76: ...ucho de la hola de la ventana 1 1 1 4 Ayuda del bloqueo de la ventana 2 2 2 5 Tornillos de 31 32 po 9 9 9 6 TornilUosde 13 32 po 6 9 9 7 Rid de montaje superior instdlado 1 1 8 Accesorio de drenaje de...

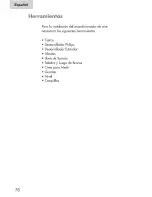
Страница 77: ...6n dd acondicionador de aire nece ar6 las siguientes herramienfas Tiieras DestorniJJador PhiJips DestorniJJador Est6ndar AJicates LJavede Tuercas Tdadro y Juego de Brocas Cinta para Medir Guantes o Ni...

Страница 78: ...de instalaci6n Mida Ja amplitud de su ventana y compare con JosvaJores dd cuadro para asegurarse de estar entre Ja m6xima y m_nirna amplitud de ventana requerida iiiii i i i I ii iil HWRO8XC3 HWR10XC3...

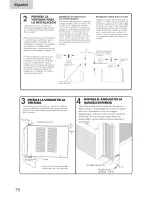
Страница 79: ...c I n rio INSTALE LA UNIDAD EN LA VENTANA d_ la ventana a de Javenrana Gula No se incluye el ensamble tie la cortina para dar m6s claridad Aprox_ 5 o INSTALE EL ANGULO DE LA BANDEJA INFERIOR floe vari...

Страница 80: ...eJos HWRIOX 3 HWRI2X 3 I REPARE LA UNIDAD PARA LA INSTALACION Desemoaque la unidad en el piso cerca de donde se instalar Quite el torn Iio de sujeci6n Separe la par_e exterior de la caja del frel_te c...

Страница 81: ...e la unidad Mida el ancho entre las molduras de nst_l ac_6n en e_tructura_ _on n_r_vent_N_ largo de todo el acho del umbral nsta acJ6r_ r_6bim par_ su CC_sc_ coincidir con la al_ura del bo_e del tren_...

Страница 82: ...Instale cinco omillos de 25 mm a lrav6s de las cortinas y del rel superor eJ m_rco Utilice dos de los tomillos sujeta_ la caia a la hoja de la ventana JNSTALE Ek ANGULO DE BANDEJA UNFERUOR Instale do...

Страница 83: ...n su posici6n COLOQUE DE NUEVO EL BASTIDOR EN LA CAJA EXTERIOR Pda a una persona que le ayude a calocar de nuevo el bastidor en la caia ex erion Ins ale el sujetador de la bandeia i_ ferion Coloque el...

Страница 84: ...teriores deJancho y dtura deJmarco para determinor hasdimensiones necesarias para Ja abertura en Ja pared La profundidad deJ marco depender6 dd grueso de la pared El marco terminado deber6 ahora coJoc...

Страница 85: ...bastidar no en tadas bs madebs Aiuste Jadirecci6n dd _bo dd dren coda dd dren para hacer que est6 en linea can d agujera en la porte _sferiar de la unidad Inserte e tuba dd dren coda de dren en e aguj...

Страница 86: ...piarse con una aspiradora de aire Remueva despu_s de JavarJo eJacceso de agua que quede en eJ fiJtro sacudi6ndob suavemente En esta forma se podr6n remover Jas parfidas y eJpoJvo que hayan quedado atr...

Страница 87: ...andeja_EJagua que pueda quedar en Ra6andeja puede producir oxidad6n o dai_osen Jasconexiones d6ctricas SieUacondiclonader de aire no funciona Verifique que Jaunidad est6enchufada EJenchufe puede estar...

Страница 88: ...dad en BTUpuede ser muy baja pare Jascondio ciones de Jahabi_aci6n e Endies ex_remnadamente c6Jidosy hOmedos los acondicionadores de aire pueden demorar un poco pare principiar a enfriar_ EUacondlclon...

Страница 89: ...ioAutorizado de Haien Para obtener eJnombre dd Centro de 8ervido m6s cercano JJame a Haier d 877 337 3639 2 Todoservicio debe ser redizado par un Centro de Servicio de Haler debidamenteautorizado ESTA...

Страница 90: ...PEC F ELECT_ CAL _J_T HG _EFE_ TO ELECY_ CAL RAYJHG HAMEPLAYE O_ YOUR UH Y REPORYEZ VOUS A LA PLAQUE G_ALET QUE DE L APPA_E _ _L EEG ME_ ELECTRJ O ESPEC F _O DEL APARATO SE E_CUE_T_ E_ LA P_ A DE _EG...

Отзывы: