background image

drain the rest water in the hot tank then tighten the cap. Open the cold
water faucet to drain the rest water in the cold tank.

If you do not plan to use the water heating function for more than three
days, we strongly recommend that you turn off the hot water function.

TAKING

TAKING

TAKING

TAKING DISPENSER

DISPENSER

DISPENSER

DISPENSER OUT

OUT

OUT

OUT OR

OR

OR

OR SERVICE

SERVICE

SERVICE

SERVICE

If the water dispenser will not be used for a long period of time, unplug the
power supply cord.

Turn off the hot water.

Drain the water through the faucets.

Drain the water from tanks by drainage hole from the back of the
dispenser.

ATTENTIONS

ATTENTIONS

ATTENTIONS

ATTENTIONS

Do not use the bottle with any crack, leakage or holes.

Do not set “heating” function until water comes out of hot water faucet to
prevent any damage on the heating tube.

Never set “heating” function when there is no water.

In the process of using, check the water tray frequently. If the water tray is
full, please pour the water out in time.

Do not change the set of “cooling” between “ON” and “OFF” in three
minutes and protect the compressor and extend the compressor usage
life.

This water dispenser is not recommended for outdoor use. Locate the
dispenser vertically and on the flat floor. Please keep the back side of the
dispenser more than 20 cm to the wall or other appliance, to make a better
heating emanating for the condenser of the dispenser.

Locate the dispenser away from direct sunlight and sources of heat (stove,
heater, radiator, etc.).

Keep the body of the dispenser clean, avoid the body of dispenser to be
scratched by the hard and sharp things.

Please do not incline the dispenser more than 45 degrees when move it.
And also when move the dispenser, to avoid dropping and crash.

Please do not locate the dispenser near the costly appliance or facility, like
the TV, DVD.

PREPA

PREPA

PREPA

PREPARATION

RATION

RATION

RATION BEFORE

BEFORE

BEFORE

BEFORE FIRST

FIRST

FIRST

FIRST OPERATION

OPERATION

OPERATION

OPERATION

Before connecting the appliance to the power source. Let it stand upright
for approximately 2 hours. This will reduce the possibility of a malfunction
in the cooling system from handling during transportation.

The water dispenser is pre-cleaned at the factory but the reservoir and water

lines must be flushed with fresh water before use as follows:

1. Keep the unit unplugged.
2. Check and make sure the backside hot water drainage hole cap is not

leaked or broken.

3. Fill water tank with tap water full to capacity, wait for 5 minutes until

water settles.

4. Press the hot water faucet button until water comes out, then stop.

Содержание HLM-116B

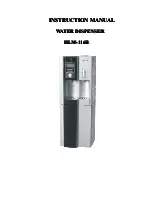
Страница 1: ...INSTRUCTION INSTRUCTION INSTRUCTION INSTRUCTION MANUAL MANUAL MANUAL MANUAL WATER WATER WATER WATER DISPENSER DISPENSER DISPENSER DISPENSER H H H HLM LM LM LM 116B 116B 116B 116B ...

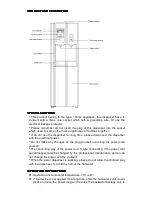
Страница 2: ...e disconnect the dispenser with the electrical power Do not make any changes on the plug yourself or prolong the power cord yourself The connecting way of the power cord X type connecting if the power cord get damaged must be changed by the professional maintenance person do not change the power cord by yourself When the water dispenser is working please do not allow the children play with the dis...

Страница 3: ...cate the dispenser vertically and on the flat floor Please keep the back side of the dispenser more than 20 cm to the wall or other appliance to make a better heating emanating for the condenser of the dispenser Locate the dispenser away from direct sunlight and sources of heat stove heater radiator etc Keep the body of the dispenser clean avoid the body of dispenser to be scratched by the hard an...

Страница 4: ...locates on the back side of the dispenser until the left water drains completely Please do remember to close the drain cap stopper after the drainage 8 Then you could place a 5 gallon 3 gallon bottle of water onto the water intake of the dispenser allow water to stand for approximate one minute Or place a water purifier onto the water intake of the dispenser then pour tap water into the water puri...

Страница 5: ...mperature protection indicator flash the low temperature protection indicator is cooling indicator and flash together please reset the power then the water dispenser can work normally 8 Troubleshooting Troubleshooting Troubleshooting Troubleshooting display display display display when the screen display Er Er Er Er if the heating indicator does not display it shows heating sensor meet problem tur...

Страница 6: ...r for for for sterilization sterilization sterilization sterilization cabinet cabinet cabinet cabinet only only only only Firstly put the items or goods into cabinet close the cabinet door then press STERILIZTING NIGHT LAMP over 2 seconds to start sterilization when need sterilization progress stop at the midway press the button over 2 seconds and quit the sterilization progress Sterilization sett...

Страница 7: ...he hot water tank 1 Press the left faucet button till water come out 2 Shake the dispenser gently 4 Press the right water faucet button no water come out There are some air left in the cold water tank 1 Press the right faucet button till water come out 2 Shake the dispenser gently 5 water leakage from the head of top cover The cap of the water bottle is damaged Contacting your bottle water supplie...

Страница 8: ...use electrical appliances inside the food storage compartments of appliance unless they are of the type recommended by the manufacturer WARNING To avoid a hazard due to instability of the appliance it must be fixed in accordance with the instructions In order to ensure the water dispenser with enough stability users should follow below instructions to fix the unit 1 Children should be supervised t...

Отзывы: