Haier HLC19SL2 Скачать руководство пользователя страница 24

Operation

EN-23

Haier LED HDTV/DVD

DVD System Setup

General Setup Process

Press 

A

SETUP

 button, the general set up page will be 

displayed, press twice the preference page will be 
displayed.

Press 

B

/

to select, the item, then press

to 

enter the submenu.

Press

C

/

to select then press 

ENTER

 to confirm.

Press 

D

SETUP

 repeatedly to exit the set-up menus.

 Note

Preference page will be displayed when there is no 

R

disc in the unit. To access this page, press 

SETUP 

button twice.

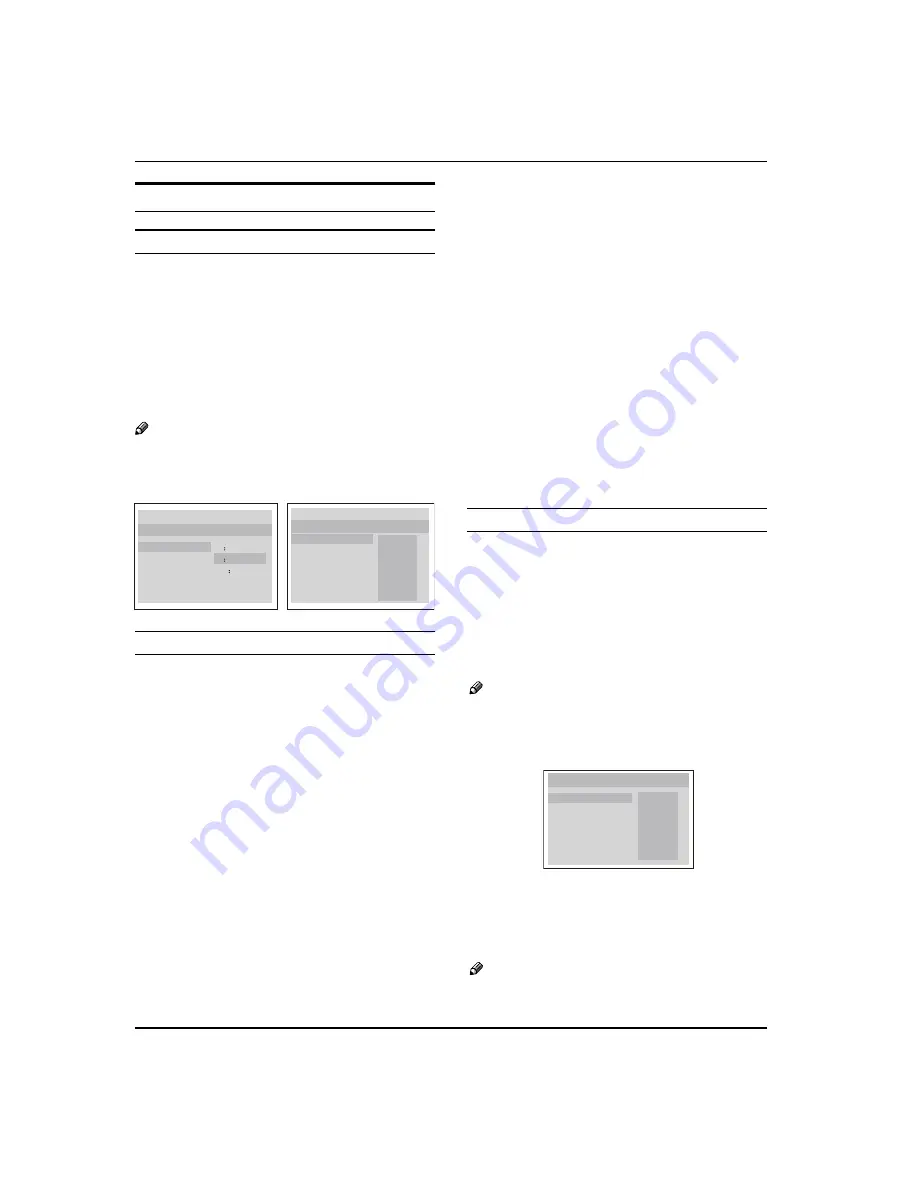
..General Setup Page..

Tv Display       LB
Angle Mark      On
Osd Lang        ENG
Caption           On
Screen Saver  Off

4

3/Ps

4

3/Lb

16

9

 Parental

 Password

 Default

..Preference Page..

1 Kid Saf
2 G
3 Pg
4 Pg 13
5 Pgr
6 R
7 Nc17
8 Adult

 General Setup Page 

ASPECT RATIO DESCRIPTION

Y

When using the DVD with the internal TV, select 4:3/LB.
The following information applies only when the DVD
output is connected to an external TV.

4:3/PS (PS = Pan and Scan)

q

You may select if you have a normal aspect ratio (4:3) 
TV, although the NORMAL/LB (letter box) is a more 
common choice. In PS mode, wide screen material 
will fill the screen, but at the expense of chopping 
off extreme left and right edges of the original film 
picture. For this feature to work, the disc must be 
specially coded. Such discs are uncommon.

4:3/LB (LB = Letter Box)

q

You may select this if you have a normal aspect ratio 
(4:3) TV. Wide screen material will be shown in pure 
unaltered form, allowing the entire picture area of the 
original film to be viewed without any side cropping. 
Black bars will appear above and below the picture.

16:9

q

You may select this if you have a wide screen (16:9) 
TV. Back bars may still appear above and below 

the picture even if using a wide screen TV. This is 
because some film directors prefer to use ultra wide 
screen aspect ratios e.g. 2.35:1. This will normally be 
indicated on the DVD packaging.

ANGLE MARK: 

Y

Users can select a particular camera angle when 
playing a DVD which offers multiple angles.
This item allows you to set Angle Mark ON or OFF.

On Screen Display (OSD) Language:

Y

Users can select on-screen display language.

CAPTION:

Y

This function allows you to display or hide the 
caption.

SCREEN SAVER:

Y

If the screen saver is on, then there will be an 
animated picture of DVD on the screen whenever the 
DVD player is idle for more than 3 minutes.

Preference Page

The Preference Page is only available when there is 

q

no disc in the player.

PARENTAL:

Y

The parental  control function works in conjunction with the 
different censorship classes assigned to DVDs. These classes 
help to control the types of DVDs that the family watches. 
There are up to 8 censorship classes for DVDs.

 Note

To change this setting you must enter your password. 

R

(Initial password is 1234)

When set to OFF, all discs may be viewed.

R

..Preference Page..

Parental

Password

Default

1 Kid Saf
2 G
3 Pg
4 Pg 13
5 Pgr
6 R
7 Nc17
8 Adult

PASSWORD CHANGE:

Y

You can change your password by entering 4 digits. 
You must confirm the 4 digits before the new 
password can be accepted.

 Note

If you forget your password or a password is 

R

Содержание HLC19SL2

Страница 1: ... READ this manual carefully before operating yourTV and retain it for future reference Veuillez lire ce guide attentivement et entièrement avant d utiliser votre téléviseur conservez ce guide pour vous y reporter ultérieurement Se recomienda leer con atención este manual antes de poner en funcionamiento su televisor y conservarlo para consultas futuras HLC24XSL2 HLC24XSLW2 ...

Страница 2: ...ese instructions Keep these instructions 2 Heed all warnings 3 Follow all instructions 4 Do not use this apparatus near water 5 Clean only with dry cloth 6 Do not block any ventilation openings Install in accordance with the manufacturer s instructions 7 Do not install near any heat sources such as radiators heat registers stoves or other apparatus including 8 amplifiers that produce heat Protect ...

Страница 3: ...r or attempt to service this device due to possible eye injury CAUTION USE OF CONTROLS OR ADJUSTMENTS OR PERFORMANCE OF PROCEDURES OTHER THAN THOSE SPECIFIED HEREIN MAY RESULT IN HAZARDOUS RADIATION EXPOSURE CAUTION VISIBLE AND INVISIBLE LASER RADIATION WHEN OPEN AND INTERLOCK DEFEATED DO NOT STARE INTO BEAM LOCATION INSIDE NEAR THE DECK MECHANISM SAVE THESE INSTRUCTIONS Thank you for purchasing t...

Страница 4: ...ty 27 Warning 1 Safety Instructions 2 Introduction 4 Controls 4 Connection Options 5 Remote control 5 Installation 7 External Equipment Connections 7 Accessories 7 Antenna Connection 7 Choose Your Connection 8 Connecting a VCR 8 External A V Source Setup 8 Conmponent Setup 8 Connecting a computer 9 Cable TV Setup 9 HDMI input 10 Operation 10 Switching On Off the TV set 10 Choose the Menu Language ...

Страница 5: ...ugh channels To scan quickly through channels press and hold down either In the MENU screen these buttons serve as up down buttons 6 Power indicator 7 Remote Sensor Receivers IR signals from the remote control Do not put anything near the sensor which may block the remote control signal 1 POWER Press to turn on and off theTV 2 MENU Menu display Press to access the on screen menu display 3 INPUT Pr...

Страница 6: ...s jack 7 Component Input Connect a component video device to these jacks 8 AUDIO In Connect the audio L R cables from the video signal source to these jacks 9 AUDIO In Connect the audio L R cables from the video signal source to these jacks 0 PC Audio In Connect the audio L R cables from a computer to this jack A AUDIO OUT Connect the audio L R cables to your audio equipment B PCVideo In Connect a...

Страница 7: ...t the system settings to your preference B SLEEP button Press to display the sleep timer option C DVD USB PLAY PAUSE D DVD Open close E DVD USB FAST FORWARD F DVD USB FAST REVERSE G DVD CALL H DVD MENU I DVD SEARCH J DVD ANGLE K DVD Mode L CH LIST Open the channel list inTV M MTS SAP Select MONO STEREO SAP in NTSC system N FAVORITE Open the favourite channel list inTV O ARC Selecttheaspectratio P ...

Страница 8: ... wall antenna socket Wall Antenna Socket RF Coaxial Wire 75 ohm Single family Dwellings Houses Connect to wall jack for outdoor antenna Outdoor Antenna To improve the picture quality in a poor signal area please purchase a signal amplifier and install properly If the antenna needs to be split for two TV s install a 2 Way Signal Splitter in the connections To install the antenna properly please con...

Страница 9: ...ape into the VCR and press B PLAY on the VCR Refer to the VCR owner s manual Select the input source with using the C INPUT button on the remote control and then press button to select the source press ENTER button to confirm External A V Source Setup How to connect Connect the audio and video cables from the A external equipment s output jacks to the TV input jacks as shown in the figure When con...

Страница 10: ... PC mode to another resolution change the refresh rate to another rate or adjust the brightness and contrast on the menu until the picture is clear If the refresh rate of the PC graphic card can not be changed change the PC graphic card or consult the manufacturer of the PC graphic card Note Use a DVI cable R Avoid keeping a fixed image on the TV s screen R for a long period of time The fixed imag...

Страница 11: ...orrectly A Select the viewing source by using B INPUT button on the remote control When finished using the TV press C POWER button on the remote control The TV reverts to standby mode If you intend to be away on vacation disconnect the D power plug from the wall power outlet Note If the TV in power on the screen show information R according the type of input signal the information will disappear I...

Страница 12: ... to confirm then press button to adjust the contrast of the picture Color Y Press button and ENTER button to confirm then press button to adjust the color saturation Tint Y Adjust the tone of the picture Sharpness Adjust the amount of the detail enhancement the image sharpness rises as the number increases By increasesing the level it will show cleaner and clearer images and by descreasing the lev...

Страница 13: ...ll appear on the screen Press to select OK then press OK to confirm The TV screen will be black and no picture but the sound is still normal Press POWER button to exit Audio Only mode OK Cancel You can press POWER button to reveal the picture on the screen SAP Broadcasts Setup This TV can receive MTS stereo programs and SAP Secondary Audio Program that accompanies the stereo program if the station...

Страница 14: ...hows the playback status Play button to go up and down to select the desired option Press C ENTER button to confirm and button increase and decrease the level to adjust the selected option to your preference Repeat step 2 and step 3 until desired audio quality D has been achieved Function Tuner Mode Y Press ENTER button to select Antenna or Cable Channel Scan Y Press ENTER button to start to scan ...

Страница 15: ...ature is available when using your ATSC tuner and QAM cable tuner Function Menu Options Press A MENU button and button until the following menu appears on the screen Function Language English OSD Timeout Short OSD Transparency Middle DCR On Blue Screen On Time Setup Closed Caption Default Select Back EXIT Video Audio Channel Lock Function DPMS On Screen Mode Normal Press B ENTER button to enter th...

Страница 16: ...en when this option is selected CC1 When CC1is displayed on TV means CC mode is turned on CC2 to CC4 For other modes of video related broadcast information Text1 For program guide and other information displayed by broadcasters This blocks a large portion of the picture on your screen Text2 to Text4 For other modes of information displayed by broadcasters This blocks a large portion of the picture...

Страница 17: ...ENTER Press button to select the channel you want to lock then press ENTER button to confirm The channel is locked and a lock mark appears in the pane If you want to unlock the channel repeat the operation above again Then press EXIT to exit step by step Program Block Y ENTER button to enter the submenu as follows Program Block Parental Lock Parental Guide MPAA Rating CA Eng Rating CA Fren Rating ...

Страница 18: ...llowing list U S Movie Rating Chart G General Audience this type of movie rating means all ages admitted to see the movie PG Parental guidance suggested Some material may not be suitable for children PG 13 Parents Strongly Cautioned this type of movie rating means some material may not be appropriate for children under13 R Restricted This type of movie rating means children under 17 of age require...

Страница 19: ... on you can press OK to resume it Press OK to display password menu and input your password PC menu Press A MENU button and button to select Video menu in PC mode Press B ENTER button to enter the Video menu and button to go up and down to select the desired option Press C ENTER button to confirm and button to increase and decrease the level to adjust the selected option to your preference Repeat ...

Страница 20: ... a nonstandard device is used then an identification problem may occur USB Media Menu operation Plug in an external storage device into USB port A Press B USB button on the remote to display multimedia Press C ENTER button on the remote to display the sub page Press D EXIT button on the remote to return to the previous menu To play pictures Press A USB button on the remote to enter USB media syste...

Страница 21: ... button to display the option list 1 Play Pause 4 Show Info 2 Repeat 5 Show Spectrum 3 Shuffle On or Off 6 Audio Only Press the button on the remote control to select the E adjusted item press ENTER button to confirm PLAY PAUSE REV STOP PREV REPEAT NEXT 1 2 3 4 5 6 7 1 Play or pause 2 Stop 3 Repeat 4 Fast reverse 5 Fast forward 6 Play previous music 7 Play next music Press F EXIT button to return ...

Страница 22: ... mode OPEN will display on the screen all the times Do not place a disc that is unplayable in this DVD q player Some discs do not start automatically Press PLAY PAUSE to start playback Some discs may start playback with a menu Use the B cursor buttons on the remote control to select menu options and press PLAY PAUSE to start You may also press the digit buttons to select a menu option directly Man...

Страница 23: ...ttons to select the program number that you want When finished move the cursor to select START Press ENTER to confirm This will start the program playback SEARCH Y Press SEARCH once to display the search menu Press the button again to select Press the program number buttons to input the item you require Press ENTER to confirm D AUDIO Y Press this key can change the mode of audio such as Audio 1 2 ...

Страница 24: ...a of the original film to be viewed without any side cropping Black bars will appear above and below the picture 16 9 q You may select this if you have a wide screen 16 9 TV Back bars may still appear above and below the picture even if using a wide screen TV This is because some film directors prefer to use ultra wide screen aspect ratios e g 2 35 1 This will normally be indicated on the DVD pack...

Страница 25: ...r performance may not be consistant or may not even operate at all This DVD Player is designed and manufactured according to the Region Management Information that is recorded on a DVD disc If the Region number described on the DVD disc does not correspond to the Region number of this DVD Player this DVD player will not play that disc This Region number of this DVD Player is 1 Discs Protection and...

Страница 26: ...cking or placing object on discs outside of their case may cause warping STRUCTURE OF DISC CONTENTS Normally DVD discs are divided into titles and the titles are sub divided into chapters Audio CD are divided into tracks DVD DISC AUDIO CD TITLE1 TITLE2 CHAPTER1 CHAPTER2 CHAPTER3 CHAPTER4 CHAPTER5 TRACK1 TRACK2 TRACK3 TRACK4 TRACK5 Each title chapter or track is assigned a number which is called ti...

Страница 27: ...y if electricity is available Blank screen Verify if correct signals are input Press INPUT button to change signal input to TV input Restart the television of power supply is interrupted No sound Press Mute button and verify if Mute mode is set Switch to other channel and verify if the same problem happens Press VOL button to see if the problem can be solved Poor sound Verify if sound system is co...

Страница 28: ...s authorized to make any warranties other than those described herein or to extend the duration of any warranties beyond the time period described herein on behalf of Haier The warranties described herein shall be the sole and exclusive warranties granted by Haier and shall be the sole and exclusive remedy available to the purchaser Correction of defects in the manner and for the period of time de...

Отзывы: