


Installation
EN-9
Haier LCD HDTV
Choose Your Connection
There are several ways to connect your television,
depending on the components you want to connect
and the quality of the signal you want to achieve. The
following are examples of some different ways to
connect your TV with different input sources.
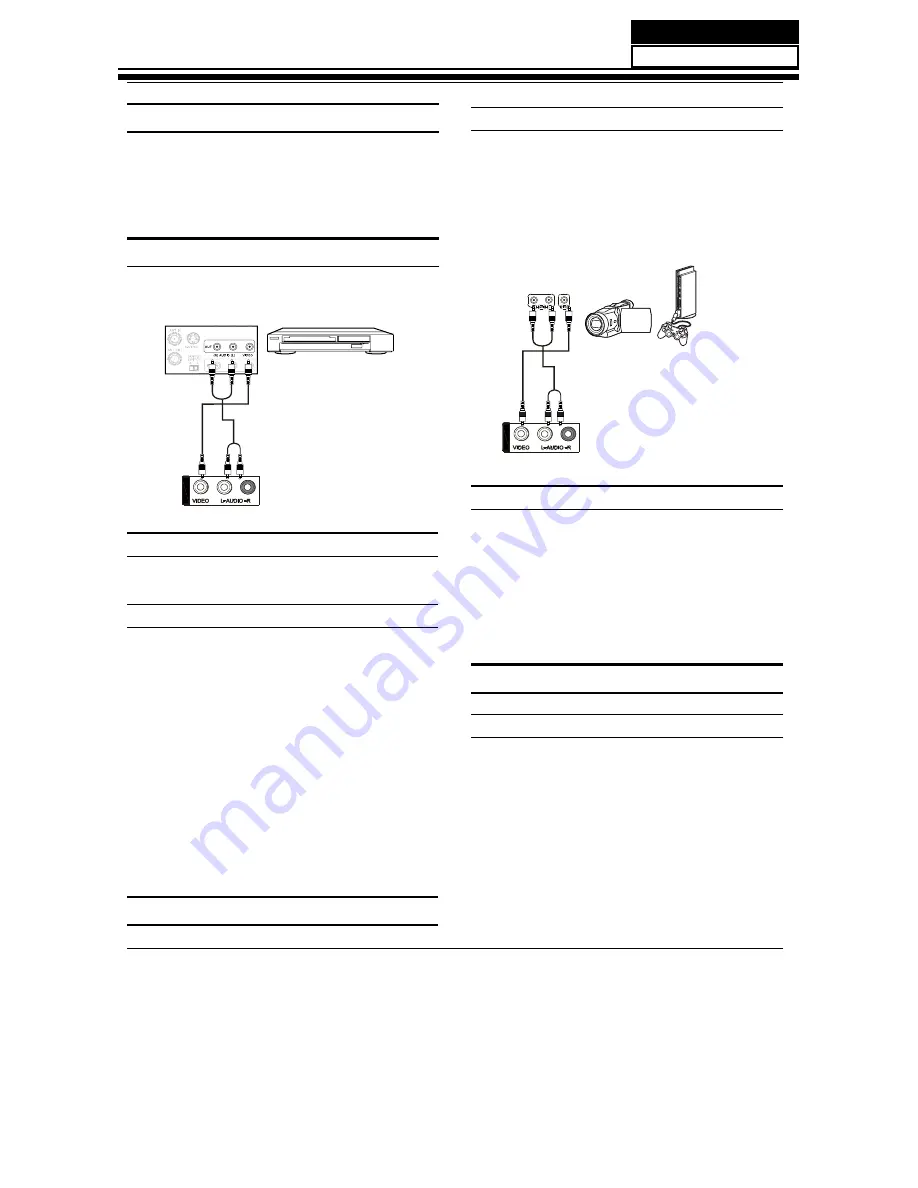
Connecting a VCR
To avoid picture noise (interference), leave an adequate
distance between the VCR and TV.
How to connect
Connect the audio and video cables from the
•
external equipment’s output jacks to the TV input
jacks, as shown in the figure.
When connecting the TV to external equipment,
•
match the jack colors (Video = yellow, Audio Left =
white, and Audio Right = red).
Camcorder or video
game set
Video= yellow
Audio left= white
Audio right= red
Back of TV
AV
2 IN
How to use
Select the input source with using the
A
INPUT button
on the remote control.
Press
B
/
button to select the desired source.
Press
C
ENTER button to confirm.
Operate the corresponding external equipment.
D
Component Setup
How to connect
Connect the DVD video outputs (COMPONENT) to the
Y Pb Pr jacks on the TV and connect the DVD audio
outputs to the YPbPr Audio IN jacks on the TV, as shown
in the figure.
Back of VCR
Back of TV
Video= yellow
Audio left= white
Audio right= red
AV
2 IN
Connection Option 1
Set VCR output switch to channel 3 or 4 and then turn
the TV to the same channel number.
Connection Option 2
Connect the audio and video cables from the VCR’s
A
output jacks to the TV input jacks, as shown in the
figure. When connecting the TV to VCR, match the
jack colors (Video = yellow, Audio Left = white, and
Audio Right = red). If you connect a S-VIDEO output
from VCR to the S-VIDEO input, the picture quality is
improved; compared to connecting a regular VCR to
the Video input.
Insert a video tape into the VCR and press
B
PLAY on
the VCR. (Refer to the VCR owner’s manual.)
Select the input source with using the
C
INPUT button
on the remote control, and then press
/
button
to select the source, press ENTER button to confirm.
External A V Source Setup
Service Manual
Model No.: HLC32K2
19
Содержание HL32K2
Страница 10: ...Service Manual Model No HLC32K2 9 2 2 External pictures four faces Front Side Left Side ...
Страница 11: ...Service Manual Model No HLC32K2 10 Right Side Back Side ...
Страница 47: ...8 2 2 Video Service Manual Model No HLC32K2 46 ...
Страница 48: ...8 2 3 Audio 8 2 4 Picture Mode Service Manual Model No HLC32K2 47 ...
Страница 50: ...8 2 7 Back Light 8 2 8 Mod_Param Service Manual Model No HLC32K2 49 ...
Страница 51: ...8 2 9 Function 8 2 10 Reste to default Service Manual Model No HLC32K2 50 ...
Страница 52: ...Service Manual Model No HLC32K2 51 ...
Страница 54: ...9 2 Power Supply Board Failure Check Service Manual Model No HLC32K2 53 ...