


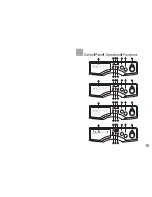


HG1600TXVEME
HG1400TXVEME
4
HG1600TXVE
HG1400TXVE
4
four
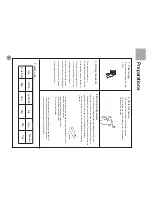
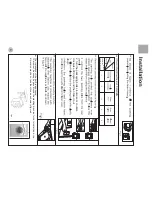
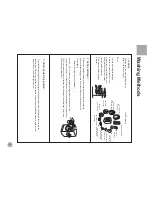
1.
2.
turn
the
packaging
bolts
clockwise
or
counter-
clockwise
90
degree,
and
then
take
it
out.
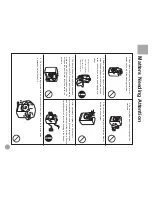
The
installation
of
the
built-in
appliance
There
must
be
enough
space
around
the
washing
machine
for
us
to
install,
and
the
dimension
may
be
no
less
than
those
as
shown
in
figure
4.
10cm
10cm
5cm
Fig.4


