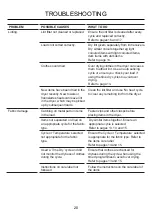
background image

TROUBLESHOOTING

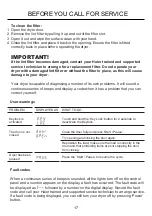
The following is a list of problems you may encounter when using this appliance and 

some suggestions that may help to correct the problem. If you still have problems, 

please contact your Haier Repairer.


PROBLEM

POSSIBLE CAUSES

WHAT TO DO

Pressing ‘Power’

does not turn

on the dryer.  

Fault with household power 

supply. 

Try plugging in and turning on another 

electrical appliance. 

Pressing 

‘Start / Pause’ 

does not start the 

drying cycle.   

Dryer could be displaying a user 

warning or fault code.  

Refer to page 17.

‘Delay’ function is set. 

Refer to page 15 for more information. 

Dryer keeps

stopping and

starting.   

The ‘Anti-crease’ option has

been selected.  

Dryer stops 

working mid-cycle.  

Power failure. 

Press ‘Power’ and restart the desired 

cycle.

Dryer has been paused. 

Press the ‘Start / Pause’ button to restart 

the cycle. 

Dryer door is open. 

Ensure the door is firmly shut. 

Dryer is taking too 

long/results were 

not satisfactory.    

Drying cycle selected not 

appropriate for the load.  

Select an appropriate cycle for the load. 

Refer to pages 13, 14 and 15.

Selected drying temp, not 

appropriate for the load.  

Select a higher drying temp. Refer to 

page 15. 

Dryer overloaded for the cycle. 

Some cycles have a lower max. load size. 

Refer to page 13.

Try dividing the load in half and dry

half at a time.  

Lint filter is blocked. 

Clean the lint filter. 

Load overly wet at the start of 

cycle.  

Remove more water from the load before 

placing it in the dryer, eg select a faster 

spin on your washer, a speed appropriate 

for your load.  

Clothes getting too 

hot or damaged.  

Cycle selected not appropriate 

for the load. 

Ensure the cycle selected is appropriate 

for items in the load. 

Refer to pages 13 and 15.  

Items removed from dryer before 

the end of cycle cool down had 

finished.  

Removing items before cool down may 

damage clothing if it is not spread out and 

exposed to cooler air once removed from 

the dryer.    

Refer to page 15 for more information. 

18

Содержание HDV70E1

Страница 1: ...Vented clothes dryer INSTALLATION INSTRUCTIONS USER GUIDE Model HDV70E1 HDV70E1 7kg ...

Страница 2: ...ORE YOU CALL FOR SERVICE TROUBLESHOOTING IMPORTANT SAVE THESE INSTRUCTIONS Please read these instructions carefully before using your tumble dryer The instructions contain important information which will help you get the best out of the device and ensure safe and proper installation use and maintenance 12 13 2 5 14 16 17 18 ...

Страница 3: ...s should not be placed in the dryer Damage to the dryer can result if the metal reinforcements come loose during drying If you wish to dry these items use a drying rack or place in a garment bag Check and remove all objects from pockets eg lighters and matches Never dry rubber articles or any plastic items or film eg plastic lined tablecloths and baby bibs Clothes should go through the cool down a...

Страница 4: ...ilter No other parts are designed to be removed by anyone other than a Haier Repairer For problems that cannot be solved from information in this User Guide turn off and unplug your dryer and contact a Haier Repairer When disposing of the dryer it is recommended that the door is removed to avoid children getting trapped inside and that the electrical cable is cut off close to the dryer IMPORTANT W...

Страница 5: ...y should not be removed from the tumble dryer and piled or stacked while hot Items that have previously been cleaned in washed in soaked in or spotted with flammable liquids or solids eg petrol gasoline kerosene dry cleaning solvents vegetable or cooking oil acetone denatured alcohol some brands of spot removers turpentine waxes and wax removers or other flammable or explosive substances should no...

Страница 6: ...sories inside the drum Location IMPORTANT The dryer must be installed in a well ventilated dust free environment The dryer must not be installed on any textured floor coverings eg carpet rugs Do not install the dryer behind a lockable door sliding door or behind a door where the hinge is on the opposite side to that of the dryer in such a way that the full opening of the door is inhibited Ensure t...

Страница 7: ...ecirculation of moist air Eliminates condensation on walls and ceilings Reduces the chance of lint being sucked into the dryer Prevents lint and other fine particles being blown into the room The external venting system should be Made from 100mm diameter flexible plastic pipe where the vent system goes through the wall Exhausted outside and not into another confined space eg the roof cavity of a h...

Страница 8: ...nd level floor IMPORTANT Do not put the heavy loads on the top of your dryer eg the wet clothes that were taken out of the washing machine Inverted wall mounting Your dryer has been designed to be inverted and mounted on the wall above a washer or tub A wall mounting kit must be used Inverting allows access to the dryer control panel Tools and parts required Drill and 3mm bit Phillips head screwdr...

Страница 9: ...racket is 555mm A 3 To install the hooks onto the dryer remove one screw from each side B reuse these screws with two more each side from the kit to fasten the hooks in place 4 Remove plastic plugs from the back of the dryer and screw the spacers provided in place C 5 With assistance mount the dryer on the wall brackets 6 The inverted control panel is supplied in the accessories with your dryer Fi...

Страница 10: ...ad washing machine Drill two holes on both sides of top panel of washing machine with 2 9mm diameter drill Detailed drill position as shown on the stacking bracket Only use the screws supplied in the stacking bracket Fix the stacking bracket on the top panel of washing machine The models of Haier front load washing machine that can be stacked installation are followed HW70 BP12636S HW80 BP12636S H...

Страница 11: ...g The dryer can be vented directly through the wall with a flexible hose in combination with the hose connector supplied with the dryer Toolsandpartsrequired Slottedscrewdriver kit part includes 1 x Hose connector 1 x Flexible hose 1 x Flexible hose clip Hose connector Flexible hose Flexible hose clip Connect the narrow end of the connector to the dryer duct pipe mouth at the back of the dryer The...

Страница 12: ...with wet hands or with bare feet A damaged power cord must be replaced by a Haier trained and supported service technician The appliance must not be operated until it is repaired as there is risk of electric shock Do not operate this dryer if it has been damaged during transport Contact your Haier trained and supported service technician Product specifications HDV70E1 Capacity kg 7 DIMENSIONS mm W...

Страница 13: ...Anti crease Option automatically defaults for all cycles This means a series of beeps will sound to alert at the end of a cycle and the drum will rotate periodically and cool air will be circulated through the load to minimise wrinkling and creasing F The Delay option enables you to delay the start of the drying cycle If you have programmed a Delay time the delay light is on G The screen displays ...

Страница 14: ...ct 30 60 90 120 150 and 180 minute drying times Customising dryer cycles After using your dryer a few times you may discover there are some drying options you prefer for some cycles You can programme your dryer to remember the drying options you prefer for each drying cycle For instance you may want to set the Normal Dry cycle to a lower drying temperature To customise a cycle 1 Turn on your dryer...

Страница 15: ...n the laundry labels Loading the dryer Garments need to be loaded correctly to minimise creasing and wrinkling and to ensure the load is dried evenly Make sure there is plenty of room for the garments to tumble freely while drying To reduce tangling and creasing Load items individually Ensure duvet doona covers are fastened before placing in the dryer Shake clothes out and load individually to hel...

Страница 16: ... cycle to alert you that the dryer has finished Anti crease operates up to 1 hour after your drying cycle has ended with cool air to minimise wrinkling and creasing Selecting delay start time The Delay option enables you to delay the start of the drying cycle from between 5 minutes and 12 hours Times you can select are 5 min 15 min 30 min 1 hour then hourly up to 12 hours This can be useful to tim...

Страница 17: ...e dryer Use a soft damp cloth to wipe all surfaces then wipe dry Avoid using chemical or scouring cleaners as these will damage the paint and plastic surfaces of your dryer Cleaning the inside of your dryer It is important that you occasionally clean the inside of your dryer If the drum has any residual dirt or lint stuck to it remove this and wipe it clean with a damp cloth Do not leave any metal...

Страница 18: ...en it has a problem that you can correct yourself User warnings PROBLEM DISPLAYED AS WHAT TO DO The door is not closed Close the door fully and press Start Pause Try opening and closing the door again Reposition the load make sure the load is correctly in the drum and that protruding items are not stopping the door from closing Dryer has been paused Press the Start Pause to resume the cycle Fault ...

Страница 19: ...mly shut Dryer is taking too long results were not satisfactory Drying cycle selected not appropriate for the load Select an appropriate cycle for the load Refer to pages 13 14 and 15 Selected drying temp not appropriate for the load Select a higher drying temp Refer to page 15 Dryer overloaded for the cycle Some cycles have a lower max load size Refer to page 13 Try dividing the load in half and ...

Страница 20: ... page 15 Dye transfer White light and coloured items not separated before drying Remember to separate white light and coloured items before placing them in the dryer Wet items left sitting in the dryer for long periods of time before drying Do not leave wet items sitting in the dryer for long periods of time before drying if they are prone to colour run If you do intend to leave them for long peri...

Страница 21: ... together eg light coloured items with light coloured items dark items with dark items Refer to page 14 Over drying clothes in the dryer can cause them to attract lint Use an auto sensing cycle or ensure you check your load if using the time dry cycles to avoid over drying Refer to page 14 New items have been dried in the dryer recently New towels or flannelette sheets can leave lint in the dryer ...

Страница 22: ...0180500 2017 09 A ...

Страница 23: ...ค ำแนะน ำในการติดตั ง คู มือการใช งาน เครื องอบผ าระบบ Vented รุ น HDV70E1 ...

Страница 24: ...อบผ าของท าน 16 ก อนติดต อขอรับบริการ 17 การแก ไขปัญหา 18 ข อส ำคัญ โปรดเก บรักษาคู มือการใช งานเล มนี โปรดอ านคู มือการใช งานเล มนี อย างละเอียดก อนเริ มต นการใช งานเครื องอบผ าของท าน คู มือเล มนี ประกอบไปด วยข อมูลส ำคัญที จะช วยให ท านได รับประโยชน สูงสุดจากการใช งานผลิตภัณฑ และมั นใจ ได ถึงการติดตั ง การใช งาน และการดูแลรักษาเครื องได อย างถูกต องและปลอดภัย ...

Страница 25: ...งออกมาให หมดทันที ไม ควรปล อยไว ในเครื องอบผ า จากนั นให น ำผ ามาตากโดยเร วเพื อระบายความร อนออกจากผ า ห ามเก บผ าไว กองรวมกัน เช น เก บไว ในตะกร า ผ า เครื องอบผ าเครื องนี ได รับการออกแบบมาส ำหรับการใช งานในครัวเรือนเท านั น ไม ควรน ำไปใช งานในเชิงพาณิชย เช น ในคลินิกสปา ความงาม ที อาจมีการสะสมของฝุ นจากขุยผ าค อนข างมาก หรือมีวัตถุที สามารถติดไฟอยู ใน บริเวณโดยรอบหรือในผ าที น ำมาอบ ความหมายของ...

Страница 26: ...วนอื นๆ นอกเหนือจากนี ไม ได รับการออกแบบมา ให ผู ใช สามารถถอดได ยกเว นช างซ อมจากศูนย บริการของ Haier หากเกิดปัญหาเกี ยวกับการใช งานที ไม สามารถแก ไขได โดยอ างอิงจากข อมูลในคู มือนี ให ปิดสวิตช และถอดปลั กไฟ ของตัวเครื อง จากนั นติดต อไปทางศูนย บริการของ Haier เมื อต องการน ำเครื องอบผ าไปก ำจัดทิ ง ขอแนะน ำให ถอดประตูออกเพื อป องกันไม ให เด กเข าไปติดอยู ด านใน พร อมกับตัดสายไฟออกโดยให ตัดตั งแต ...

Страница 27: ... ลุกไหม และควรใช ขั นตอนการระบายความร อนของเครื องอบผ า เพื อลดอุณหภูมิของวัตถุเหล านี หลังจากที น ำ ผ าออกจากเครื อง ไม ควรน ำผ าไปพับหรือวางซ อนกันในขณะที ผ ายังร อนอยู ไม ควรใส ผ าที ผ านการท ำความสะอาด ซัก แช หรือเปื อนคราบของของเหลวหรือสารเคมีที สามารถติดไฟได เช น น ำมันปิโตรเลียม น ำมันเบนซิน น ำมันก าด น ำยาซักผ าแห ง น ำมันพืช หรือน ำมันส ำหรับการท ำอาหาร อะซิโตน แอลกอฮอล น ำยาขจัดคราบสกปร...

Страница 28: ... อย างครบถ วนหรือไม รุ น HDV70E1 ค ำแนะน ำการติดตั งและคู มือการใช งาน 1 เล ม ชุดอุปกรณ ติดตั งที ผนัง 1 ชุด แผงยึดส ำหรับการติดตั งแบบซ อนชั น 2 ชิ น ข อต อท อ 1 ชิ น ท อแบบยืดหยุ น 1 ชิ น เข มขัดรัดท อแบบยืดหยุ น 1 ชิ น แผงควบคุมส ำหรับการติดตั งแบบกลับด าน 1 ชิ น ใบรับประกันสินค า 1 ใบ ต ำแหน งในการติดตั ง ข อส ำคัญ ต องติดตั งเครื องอบผ าในสภาพแวดล อมที มีการระบายอากาศที ดี ปราศจากฝุ นละออง ต ...

Страница 29: ...มีความชื นไหลกลับเข ามา ก ำจัดปัญหาการก อตัวของไอน ำที ผนังและเพดานห อง ช วยลดโอกาสที ฝุ นจากขุยผ าจะถูกดูดกลับเข าไปในเครื อง ป องกันไม ให ฝุ นจากขุยผ าและสสารที มีอนุภาคขนาดเล กมากถูกเป าเข าไปภายในห อง ระบบระบายลมร อนออกภายนอกอาคาร ควรมีคุณสมบัติดังนี ติดตั งระบบโดยใช ท อพลาสติกแบบยืดหยุ นขนาดเส นผ าศูนย กลาง 100 มม ตรงจุดที ต องการระบายลมร อน ออกผ านผนังห อง ต องระบายลมร อนออกไปนอกอาคาร และห า...

Страница 30: ... อส ำคัญ ห ามวางของหนักไว บนเครื องอบผ า เช น ผ าเปียกที ท านเพิ งน ำออกมา จากเครื องซักผ า การติดตั งเครื องที ผนังแบบกลับด าน เครื องอบผ าของท านได รับการออกแบบมาให สามารถติดตั งแบบกลับด าน และยึดไว กับผนังเหนือเครื องซักผ า ซึ งจะต องใช ชุดอุปกรณ ส ำหรับติดตั งที ผนัง การติดตั งแบบกลับด านจะท ำให สามารถเข าถึงแผงควบคุมของ เครื องอบผ าจากในต ำแหน งนี เครื องมือและอุปกรณ ที จ ำเป น สว านไฟฟ า และ...

Страница 31: ... กลางของแผงยึดทั งสองตัว คือ 555 มม A 3 ในการติดตั งตะขอบนเครื องอบผ า ให ถอดสกรูหนึ งอันออกจากแต ละด าน B เพื อน ำสกรูเหล านี มาใช กับสกรู อีกสองตัว แต ละด าน ที มาจากชุดอุปกรณ ในการยึดตะขอให อยู กับที 4 ถอดจุกพลาสติกออกจากทางด านหลังของเครื องอบผ า และขันสกรูที กั นระยะที จัดมาให เข าไปแทนที C 5 ช วยกันยกเครื องอบผ าขึ นไปแขวนไว บนแผงยึดที ผนัง 6 แผงควบคุมแบบกลับด านเป นอุปกรณ ที จัดมาให พร อมกั...

Страница 32: ... งแบบซ อนชั นไว แล ว เข ากับทางด านบนของเครื องซักผ า ฝาหน า เจาะสว านสองรู ทั งสองด านของแผงด านบนของเครื องซักผ า โดยใช ดอกสว านขนาดเส นผ าศูนย กลาง 2 9 มม ต าแหน งของการเจาะสว านอย างละเอียดจะแสดงไว บนแผงยึดส าหรับการติดตั งแบบซ อนชั น โปรดใช สกรูที จัดมา ให พร อมกับแผงยึดส าหรับการติดตั งแบบซ อนชั น ติดแผงยึดส าหรับการติดตั งแบบซ อนชั นเข ากับแผงด านบนของ เครื องซักผ า เครื องซักผ าฝาหน าของ H...

Страница 33: ...ายลมร อนออกสู ภายนอกอาคาร เครื องอบผ าสามารถระบายลมร อนออกสู ภายนอกอาคารผ านทางผนังโดยการเชื อมต อท อแบบยืดหยุ น และติดตั งท อ โดยใช ข อต อท อที จัดมาให พร อมกับเครื องอบผ า เครื องมือและอุปกรณ ที จ ำเป น ไขควงปากแบน ชุดอุปกรณ ประกอบด วย ข อต อท อ 1 ชิ น ท อแบบยืดหยุ นได 1 ชิ น เข มขัดรัดท อแบบยืดหยุ นได 1 ชิ น เชื อมต อปลายด านแคบของข อต อเข ากับปากช องระบายลมร อนของเครื องอบผ าที อยู ทางด านหลัง...

Страница 34: ... กโดยกระชากสายไฟ ข อส ำคัญ ห ามสัมผัสหรือใช งานเครื องอบผ าขณะมือเปียก หรือขณะที ไม ได สวมรองเท า หากสายไฟช ำรุดจะต องเปลี ยนสายไฟใหม โดยช างเทคนิคที ผ านการอบรมและสนับสนุนโดย Haier และห าม ใช งานเครื องจนกว าจะได รับการซ อมแซมเป นที เรียบร อย เพราะอาจเกิดไฟฟ าช อตได ห ามใช งานเครื องอบผ าหากเกิดความเสียหายระหว างการขนส ง ในกรณีนี โปรดติดต อศูนย บริการของ Haier ข อมูลผลิตภัณฑ ความจุ หมายถึง น ำหนั...

Страница 35: ...ว างขึ น E ตัวเลือก Alarm การเตือน และ Anti crease ลดรอยยับ เป นการท างานมาตรฐานส าหรับทุกโปรแกรม การอบผ า หมายความว า เครื องจะส งเสียงบี บหนึ งชุดเพื อเตือนให ท านทราบเมื อสิ นสุดโปรแกรมการอบผ า และจากนั นถังอบจะหมุนเป นจังหวะระยะเวลาหนึ ง และจะมีการเป าลมเย นหมุนเวียนอยู ภายในถังอบ เพื อ ลดรอยยับย นบนเนื อผ า F ตัวเลือก Delay การหน วงเวลา จะท าให ท านสามารถหน วงเวลาการเริ มต นการท างานของโปรแกร...

Страница 36: ...ำลง การก ำหนดโปรแกรมการอบผ าด วยตัวเอง 1 เปิดสวิตช เครื องอบผ า 2 เลือกโปรแกรมการอบผ าที ท านต องการก ำหนดการตั งค าเอง 3 กดปุ มตัวเลือกการอบผ าที ต องการค างไว 3 วินาที ไฟสัญญาณจะกะพริบ และหน าจอจะแสดง เพื อ ระบุว าเครื องอบผ าอยู ในโหมดการปรับโปรแกรมการท ำงาน 4 เลือกตัวเลือกของ Temperature อุณหภูมิ และ Option ตัวเลือก ที ท านต องการ โดยการกดปุ มตัวเลือก ที เกี ยวข อง 5 กดปุ ม Key Lock ล อคปุ มกด...

Страница 37: ...มเติม บางอย างได จากฉลากที ติดไว บนเสื อผ าของท าน การใส ผ าลงในเครื องอบผ า ควรใส ผ าเข าไปในเครื องให ถูกวิธีเพื อลดการเกิดรอยยับย น และเพื อให ผ าถูกอบให แห งอย างทั วถึง ต องแน ใจว ามี พื นที เพียงพอให ผ าสามารถปั นไปทั วถังอบได อย างอิสระขณะอบผ า การลดปัญหาผ าพันกันและรอยยับย น ใส ผ าเข าไปในเครื องทีละตัว ตรวจสอบให แน ใจว ามีการรัดสายผ าห มนวมอย างเรียบร อยก อนที จะน ำไปใส เข าไปในเครื องอบผ...

Страница 38: ...แล ว ฟังก ชั น Anti crease ลดรอยยับ ท างานได นานสูงสุด 1 ชั วโมงหลังจากที สิ นสุด รอบการอบผ า โดยใช การเป าลมเย น เพื อลดรอยยับบนผ า กำรเลือกเวลำเริ มต นกำรท ำงำน ตัวเลือก Delay หน วงเวลา ท าให ท านสามารถหน วงเวลาเริ มต นโปรแกรมการอบผ า โดยตั งค าได ตั งแต 5 นาที ไปจนถึง 12 ชั วโมง ระยะเวลาที ท านสามารถเลือกได ได แก 5 นาที 15 นาที 30 นาที 1 ชั วโมง และเพิ มได ทีละ 1 ชั วโมง จนถึง 12 ชั วโมง ท าให ...

Страница 39: ...องเครื องอบผ า ใช ผ าเนื อนุ มชุบน ำบิดพอหมาดๆ เช ดบนพื นผิวของตัวเครื อง จากนั นใช ผ าแห งเช ดซ ำอีกรอบ หลีกเลี ยงการใช น ำยา ที เป นสารเคมี หรือน ำยาขัดผิว เพราะจะท ำให เกิดความเสียหายกับสีเคลือบผิว และพื นผิวพลาสติกของเครื อง อบผ า การท ำความสะอาดภายในเครื องอบผ าของท าน ควรท ำความสะอาดบริเวณภายในเครื องอบผ าอย างสม ำเสมอ หากถังอบมีคราบสกปรก หรือเศษฝุ นติดอยู ให ก ำจัด ออกก อน จากนั นให เช ดท ำ...

Страница 40: ...แก ไขได ด วยตัวเอง การเตือนผู ใช งาน รหัสแสดงความผิดพลาด เมื อมีเสียงบี บดังขึ นแบบต อเนื อง ไฟทุกดวงบนแผงควบคุมดับ และมีหมายเลขปรากฏขึ นบนหน าจอ แสดงว ามี ความผิดพลาดบางอย างเกิดขึ น รหัสแสดงความผิดพลาดจะแสดงขึ นด วยตัวอักษร Err และตามด วยหมายเลขบน หน าจอแสดงผล ให ท านจดบันทึกรหัสแสดงความผิดพลาด และติดต อไปที ศูนย บริการของ Haier เพื อขอรับบริการ หากรหัสแสดงความผิดพลาดยังคงแสดงอยู ท านสามารถปิดเค...

Страница 41: ...ิ มเติม โปรดดูหน า 15 กดปุ ม Power เปิด ปิดเครื อง และรีสตาร ท โปรแกรมการอบผ าที ต องการ ตรวจสอบให แน ใจว าโปรแกรมที เลือกเหมาะ ส ำหรับผ าที น ำมาอบ โปรดดูหน า 13 และ 15 การน ำผ าออกมาก อนที จะสิ นสุดขั นตอนการระบาย ความร อนออกจากผ า อาจท ำให ผ าเสียหายได หากท านไม ได น ำผ ามาตากทันทีที น ำผ าออกมา จากเครื อง กดปุ ม Start Pause เริ ม หยุด เพื อรีสตาร ท โปรแกรมการอบผ า ตรวจสอบให แน ใจว าท านได ปิดป...

Страница 42: ...บผ าชิ นเล ก ใส ผ าแบบแยกประเภทลงในเครื องอบผ า ห ามใส ผ าที พับไว เข าไปในเครื องอบผ า ลองอบผ าที มีขนาดเล กลง โปรแกรมการอบผ าบาง โปรแกรมรองรับปริมาณผ าสูงสุดน อยลง โปรดดูหน า 13 และ 14 อบผ าปูที นอน และผ านวมคลุมเตียงแบบแยกออกจาก ผ าชนิดอื นๆ ตรวจสอบให แน ใจว ามีการติดกระดุม หรือรัดสายของผ านวมคลุมเตียงก อนที จะน ำไปใส เข าไปในเครื องอบผ า ห ามใส ผ าเปียกไว ในเครื องอบผ าก อนถึงเวลาอบผ าจริง นาน...

Страница 43: ...7 รูดปิดซิป และติดตะขอเสื อผ าให เรียบร อยก อนที จะน ำไปใส ในเครื องอบผ า ควรอบผ าประเภทเดียวกันพร อมกัน ตรวจสอบให แน ใจว าท านได เลือกโปรแกรมการอบผ าที เหมาะสม โปรดดูหน า 13 14 และ 15 ตรวจสอบให แน ใจว าโปรแกรมการอบผ า หรือ Temperature ที เลือกเหมาะกับประเภทของผ า โปรดดูฉลากแนะน ำการดูแลรักษาที ติดไว บน เสื อผ า โปรดดูหน า 14 และ 15 ต องแน ใจว าได ตรวจดูระดับความแห งของเสื อผ า ระหว างรอบการอบผ า ...

Страница 44: ......

Отзывы: