


Manuale di Installazione Uso e Manutenzione - Installation, Use and
Maintenance Manual
pag. 24
B.
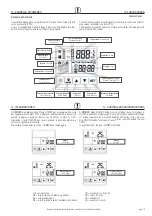
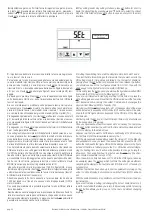
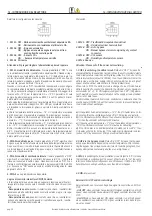
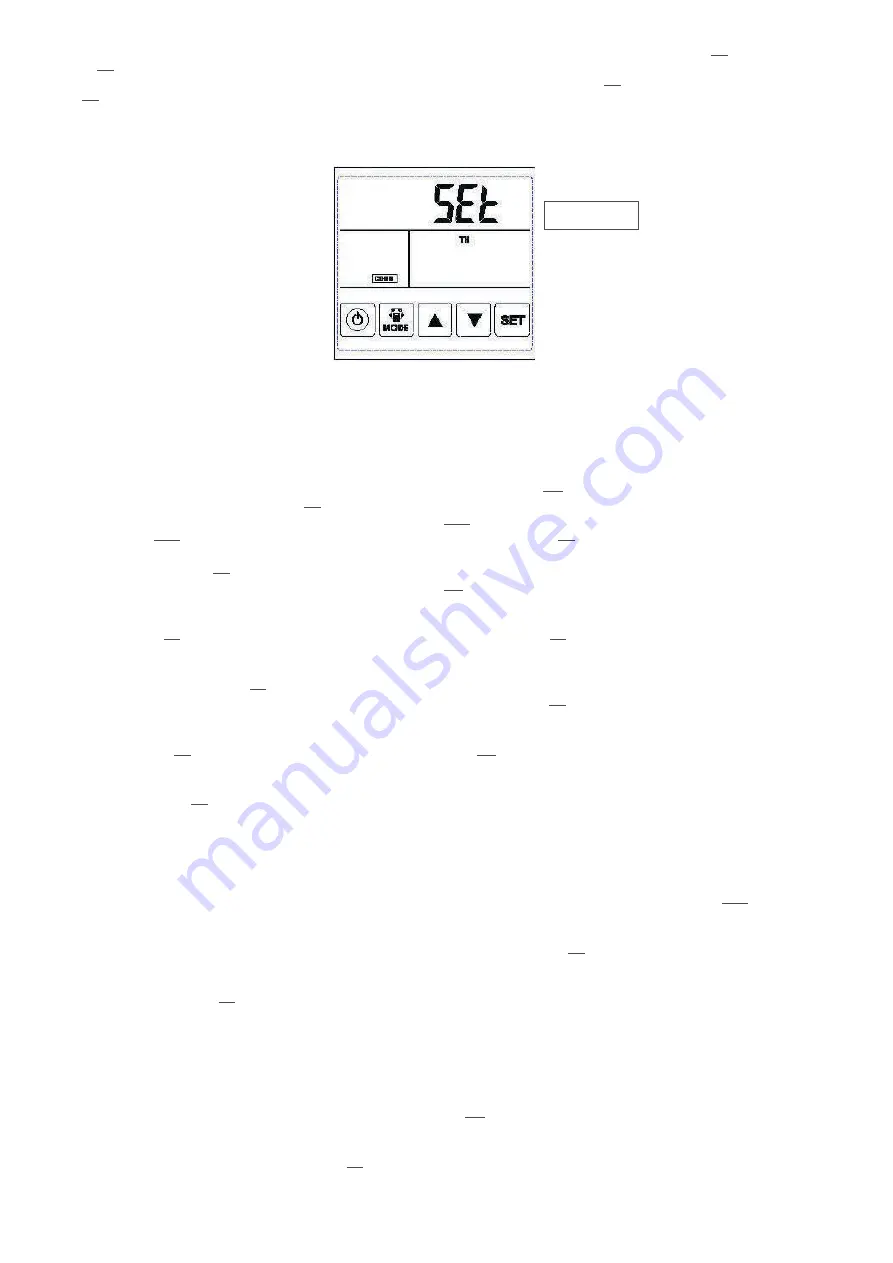
Impostazione giorno: sotto l'interfaccia di impostazione giorno, preme-
re il tasto
SET
brevemente per iniziare l'impostazione giorno, premendo i
pulsanti
▲
e
▼
per selezionare il giorno corretto, dopo questo, premere
il tasto
SET
per salvare e tornare all'interfaccia principale.
B.
Day setting: under day setting interface, press
SET
button for short to
begin the day setting, by pressing
▲
and
▼
buttons to select the correct
day, after this finished, press
SET
button to save and return to the main
interface.
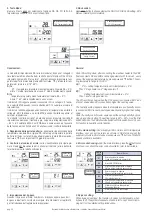
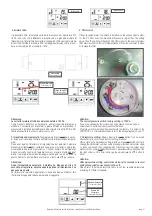
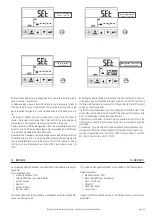
C.
Impostazione dell’orario di accensione di tutte le fasce orarie giornalie-
re, sia fascia 1 che fascia 2.
Per selezionare l’orario di accensione delle fasce orarie desiderate entra-
re nella modalità impostazione ON per fasce orarie come descritto nella
prima parte del capitolo 8, ossia: premere il tasto
SET
per 6 secondi e poi
rilasciare il tasto, si dovrebbe vedere una delle quattro figure indicate da A
a D, poi con il tasto
MODE
portarsi alla figura C dove il simbolo ON lam-
peggia.
A questo punto premere il tasto
SET
e si ha la visualizzazione della figura
sotto denominata ON1 da cui parte l’impostazione dell’orario di ON della
fascia 1 del lunedì.
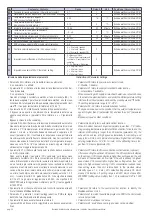
Se non si è interessati a modificare nulla per questa fascia oraria preme-
re nuovamente il tasto
SET
e si vedrà che diventa attiva la schermata con
orario di ON della fascia 1 del martedì, ossia il numero 1 rimane acceso,
ma cambia la visualizzazione del giorno da lunedì (MO) a martedì (TU).
Proseguendo ripetutamente con il tasto
SET
si attiveranno in sequenza tutti
gli 1 dei sette giorni della settimana fino alla domenica (SU) ed al succes-
sivo si passerà alla figura ON2 che corrisponde all’orario di ON della fascia
2 del lunedì.
Proseguendo con il tasto
SET
si visualizzano tutti gli orari di ON della fascia
2 per i sette giorni della settimana.
Una volta giunti alla schermata di ON della fascia 2 della domenica, a suc-
cessiva pressione del tasto
SET
permetterà l’uscita dal modo di imposta-
zione delle fasce orarie e riporterà il display alla schermata principale.
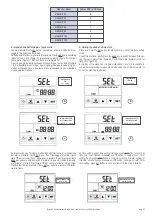
Supponiamo ora di voler impostare come orario di accensione le ore 12.00
del lunedì utilizzando la prima fascia delle due disponibili, ossia la 1.
Con il procedimento sopra descritto selezionare la fascia 1 del lunedì e a
differenza di prima, una volta giunti alla fascia desiderata, premere il tasto
On/Off che porterà alla figura ON3 con visualizzato al posto dell’orario le
lineette come in figura, una ulteriore pressione del tasto di On/Off inizierà
a visualizzare l’orario lampeggiante e sarà a questo punto possibile modi-
ficarlo con i tasti freccia, per passare dall’ora ai minuti utilizzare il tasto
MODE (la variazione dei minuti è possibile a step di 10).
Una volta impostato l’orario di accensione (12.00 in figura ON4, preso a
titolo di esempio) premere il tasto
SET
che conferma l’impostazione e porta
automaticamente la visualizzazione alla fascia oraria successiva (fascia 1
di ON del martedì nel nostro esempio).
Attenzione quanto fatto finora equivale a far accendere l’unità alle ore
12.00 del lunedì, ma fino ad ora nessun orario di spegnimento (OFF) è
stato impostato.
Con analogo procedimento è possibile impostare l’orario di ON per tutte le
fasce desiderate.
Se si desidera una volta eseguita una impostazione modificare soltanto l’o-
rario di alcune fasce vale la pena sottolineare che quando si ritorna su una
fascia precedentemente impostata, la pressione del tasto
SET
permette di
passare alla successiva senza nulla modificare.
C.
Setting the switching time of all the daily time slots, both slot 1 and 2.
To select the time for switching on the time slots that you want, enter to the
ON setting mode for time slots as detailed in the first part of chapter 8,
namely: press the
SET
button for 6 seconds and then release the button,
you should see one of the four figures shown from A to D, then with the
MODE
key go to the figure C where the symbol ON flashes.
At this point press the
SET
key and you will see the figure below called ON1
from which the ON time slot of the Monday slot 1 starts.
If you are not interested in modifying anything for this time slot, press the
SET
button again and you will see that the ON time window of the Tuesday
slot 1 becomes active, namely the number 1 remains on, but changes the
day view from Monday (MO) to Tuesday (TU).
Carrying on with the
SET
key repeatedly, all 1 of the seven days of the week
will be activated in sequence until Sunday (SU) and the next will be swit-
ched to the ON2 figure which corresponds to the ON time of the Monday
2nd time slot.
Continuing with the
SET
key, all the ON times of time slot 2 are displayed
for the seven days of the week.
Once you have reached the ON screen of slot 2 on Sunday, the next press
of the
SET
button will allow the exit from the time slot setting mode and will
return the display to the main screen.
Suppose now that you want to set the hours on Monday at 12.00 am using
the first time slot of the two available, namely the 1.
With the procedure described above select the time slot 1 of the Monday
and unlike before, once you reach the desired time slot, press the On / Off
button that will lead to the figure ON3 with the dashes shown in the figure
instead of the time, a further pressure the On / Off button will start displa-
ying the flashing time and it will now be possible to change it using the
arrow keys. To change from hour to minutes use the
MODE
key (the chan-
ge in minutes is possible in steps of 10).
Once the switch-on time has been set (12.00 in the ON4 figure, taken as
an example) press the
SET
key which confirms the setting and automati-
cally brings the display to the next time slot (ON time slot 1 of Tuesday in
our example).
Attention to what has been done up to now is equivalent to turning on the
unit at 12.00 on Monday, but until now no switch-off time (OFF) has been
set.
With the same procedure it is possible to set the ON time for all the desi-
red time slots.
If you want to make a setting just changing the time of some time slots, it
is worth to underline that when you return to a previously set slot, pressing
the
SET
button allows you to move on to the next one without changing
anything.
Impostazione Giorno
Day Setting
Содержание HACI-RP Series
Страница 36: ...2019 05 ...


