Page 3
CONFIGURATION
The network settings of the HTX2 can be configured by navigating
to the built-in web server from any web browser. The HTX2 is
shipped from the factory with DHCP enabled. The HTX2 will
accept an IP address and other network parameters from a DHCP
server on the network. DHCP facilitate easy first-time setup;
however, we recommend that you assign the device a static IP
address outside your router’s DHCP range to ensure that the HTX2
will always be available at the same IP address.
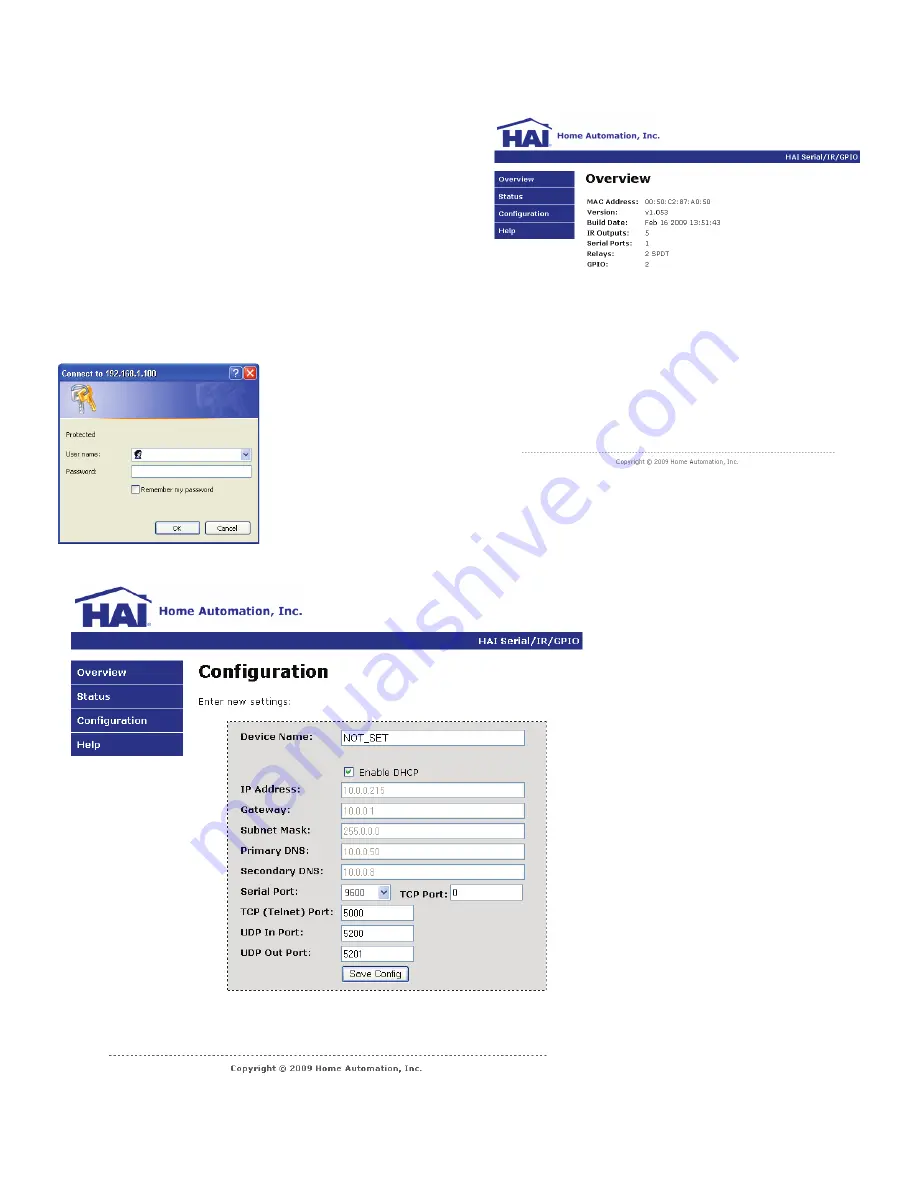
Open a new browser window and type in the IP address of the HTX2
to be configured. The HTX2 Overview page will appear. This page
contains information such as the device’s MAC address, current
firmware revision, and the number of inputs, outputs, and relays.
Select the Configuration button
on the menu bar to configure the
network settings and serial port
settings. The configuration
page is protected with the
following credentials:
User name: admin
Password: homeauto
1.
You can give a custom name to the
HTX2 so that it can be easily
identified.
2.
To configure a static IP address,
disable DHCP by removing the check
from the “Enable DHCP” checkbox.
3.
Enter the static IP address.
4.
Enter the Gateway.
5.
Enter the Primary DNS.
6.
Enter the Secondary DNS.
7.
If used, enter the baud rate for the
Serial Port.
8.
When all of the settings have been
entered, click the “Save Config”
button.
Note:
An HTX2 can be discovered on the network by using HAI Automation Studio and HAI HTX2 Mobile Designer software.
Содержание 86A00-2
Страница 5: ...Page 5...


