Connect to the controller
Attach the supplied SUB-D connector to a two-wire, shielded data cable (signal or bus cable). Refer
to the applicable documentation for the data cable connection.
Connect to external devices (optional)
N O T I C E
Network and access point security is the responsibility of the customer that uses the wireless instrument. The
manufacturer will not be liable for any damages, inclusive however not limited to indirect, special, consequential
or incidental damages, that have been caused by a gap in, or breach of network security.
Startup
User interface and navigation
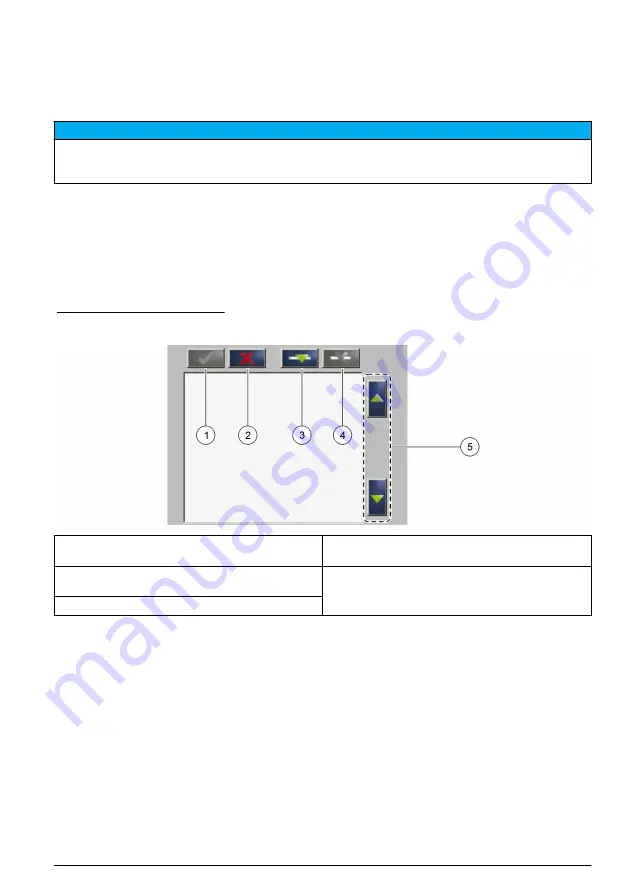
Keypad description
for the keypad description and navigation information.
Figure 2 Keypad description
1
Enter: Saves the setting and exits the current
screen to the CONFIGURE menu
4
Delete: Removes a sensor from the selection
2
Cancel: Exits the current screen to the
CONFIGURE menu without saving the setting
5
UP and DOWN arrows: Moves the sensors up or
down the list
3
Add: Adds a new sensor to the selection
Add a sensor
Note: Make sure that an RTC communication card is installed in the sc1000 sensor module.
1.
Connect the controller. Refer to the controller documentation.
2.
Select MAIN MENU>RTC MODULES/PROGNOSYS>RTC
MODULES>RTC>CONFIGURE>SELECT SENSOR.
3.
Push
Add
. Refer to
A list with all network connections shows.
4.
Select the applicable sensor for the RTC module and push
Enter
. The sensor is shown in the
sensor list.
Note: The sensor names in black are available for an RTC module. The sensor names in red are not available
for an RTC module. A sensor name identified with a "(p)" is available for PROGNOSYS.
Note: The mA input cards and the PROFIBUS card (item no. YAB103) can supply RTC input signals.
5.
Push
Add
to add more sensors or input cards from the list.
English
7
Содержание RTC
Страница 335: ......


