Page 50
5.2 Unpacking and Installation
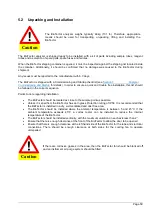
The BioTector analyzer weighs typically 46kg (101 lb). Therefore, appropriate
means should be used for transporting, un-packing, lifting and installing the
BioTector.
The BioTector analyzer is shipped ready to be installed, with a kit of parts including sample tubes, reagent
tubes and a selection of spare parts, spare fuses and ferrules.
When the BioTector shipping container is opened, it must be inspected against the shipping list located inside
the container. Additionally, it should be confirmed that no damage was caused to the BioTector during
shipment.
Any issues must be reported to the manufacturer within 3 days.
The BioTector is shipped with a Commissioning and Startup checklist (see
for details). In order to ensure a quick and trouble free installation, this list should
be followed in the correct sequence.
Points to note regarding installation:
The BioTector should be located as close to the sample point as possible.
Unless it is specified, the BioTector has an Ingress Protection rating of IP54. It is recommended that
the BioTector is installed in a dry, well ventilated and dust free area.
The BioTector should be installed where the ambient temperature is between 5 and 45°C. If the
ambient temperature exceeds 45°C, a vortex cooler can be installed to reduce the internal
temperature of the BioTector.
The BioTector should be installed vertically, with the maximum variation on each axis less than 2°.
Ensure that there is enough clearance at the front of the BioTector to allow the door to be opened.
Ensure that there is enough clearance at the left hand side of the BioTector for the tube and electrical
connections. There should be enough clearance at both sides for the cooling fan to operate
unimpeded.
If there are corrosive gasses in the area, then the BioTector fan should be blanked off,
and an instrument air purge system should be fitted.
Caution
Caution
Содержание BioTector B3500C
Страница 17: ...Page 17 Software Menu Diagram...
Страница 44: ...Page 44 Figure 4 BioTector analysis layout typical TIC TOC system...
Страница 46: ...Page 46 Figure 6 BioTector oxygen concentrator layout...
Страница 63: ...Page 63...
Страница 78: ...Page 78 Section 8 Maintenance Menu Maintenance Menu Diagram...
Страница 155: ...Page 155 Section 11 System Replacement and Spare Parts...
Страница 163: ...Page 163 ZK Zero check ZM Manually input zero adjust ZS Zero and Span...


