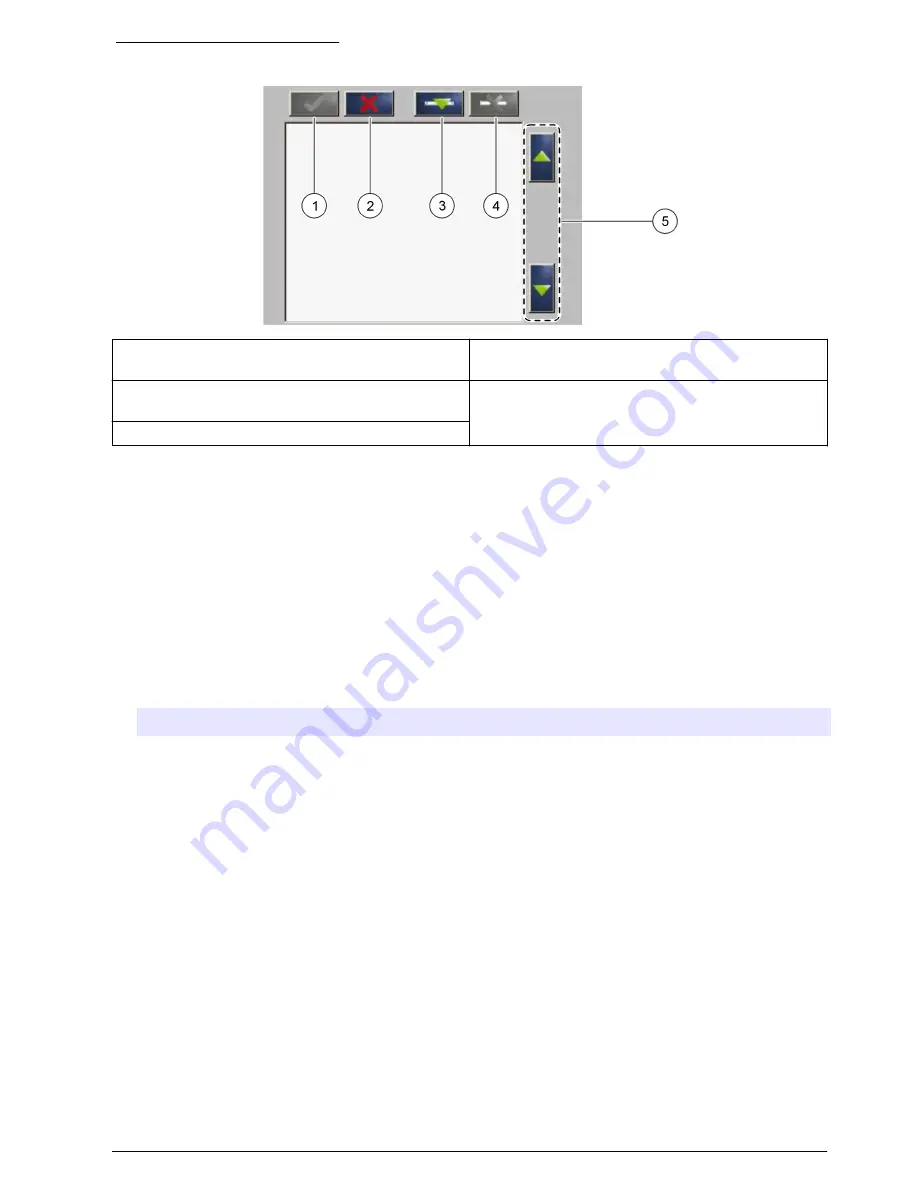
Figure 1 Keypad description
1
Enter: Saves the setting and exits the current
screen to the CONFIGURE menu
4
Delete: Removes a sensor from the selection
2
Cancel: Exits the current screen to the
CONFIGURE menu without saving the setting
5
UP and DOWN arrows: Moves the sensors up or
down the list
3
Add: Adds a new sensor to the selection
Startup
Add a sensor
Note: PROGNOSYS is not available for all sensors. Only newer sensor models can use the PROGNOSYS
function.
Note: Make sure that an RTC or a PROGNOSYS communication card is installed in the sc1000 sensor module.
When an RTC or PROGNOSYS communication card is installed, PROGNOSYS files are available
for different sc sensors. Do the steps that follow to add a sensor. Refer to
Figure 2
.
1.
Connect the controller. Refer to the controller documentation.
2.
Select an option.
Option
Description
For
RTC/PROGNOSYS
card
Select MAIN MENU>RTC MODULES/PROGNOSYS>RTC
MODULES>RTC>CONFIGURE>SELECT SENSOR
For PROGNOSYS
card
Select MAIN MENU>RTC
MODULES/PROGNOSYS>PROGNOSYS>CONFIGURATION>PROGNOSYS>SELECT
SENSOR
3.
Push
Add
. A list with all network connections opens.
4.
Select the applicable sensor for the RTC or PROGNOSYS module and push
Enter
. The sensor is
shown in the sensor list.
Note: Sensor names with black font are available for an RTC module. Sensor names with red font are not
available for an RTC module. A sensor name identified with a "(p)" is available for PROGNOSYS.
5.
Push
Add
to add more sensors from the list.
Sensors that are selected before are shown in gray. Refer to
Figure 3
on page 7 or
Figure 4
on page 7 to put in order or delete a sensor.
6.
Push
Enter
to accept the list.
English
5
Содержание PROGNOSYS
Страница 1: ...DOC023 52 90351 PROGNOSYS 05 2014 Edition 7 User Manual ...
Страница 2: ......
Страница 4: ...Table of Contents 2 ...
Страница 22: ...20 English ...
Страница 24: ......
Страница 25: ......


