background image

© Haag-Streit AG, CH-3098 Koeniz, Switzerland

1500.7200631.04040

10

2 Sicherheit

Umweltbedingungen

• Transport  Temperatur 

-40 °C  bis  +70 °C


Luftdruck 

500 hPa  bis  1060 hPa

 Relative 

Feuchte 

10% 

bis 

95%

• Lagerung  Temperatur 

-10 °C  bis  +55 °C


Luftdruck 

700 hPa  bis  1060 hPa

 Relative 

Feuchte 

10% 

bis 

95%

• Gebrauch  Temperatur 

+10 °C  bis  +35 °C


Luftdruck 

800 hPa  bis  1060 hPa

 Relative 

Feuchte 

30% 

bis 

75%

Montage

• Instrument vor dem Auspacken einige Stunden in der Ver-
packung belassen (Kondensation).
• Spaltlampe und Kopfhalter müssen auf einer elektrisch iso-
lierten und feuerfesten Tischplatte montiert sein.
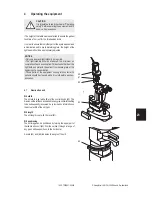
• Die Schienendeckel (30) verhindern ein Kippen der Spalt-
lampe.
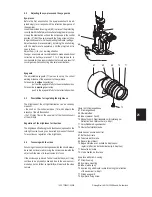
• Prüfen: sitzen die Verbindungsteile des Zubehörs (Schraub-
verbindungen, Bajonettverschluss)?

Bedienung, Umgebung

• Bedienung nur durch qualifiziertes und geschultes Personal, 
dessen Ausbildung ist Aufgabe des Betreibers.
• Nur Haag-Streit Zubehör verwenden.
• Nach jedem Betrieb Instrument ausschalten. Bei Verwendung 
der Staubschutzhülle: Gefahr durch Überhitzung.
• Mit Okularen niemals in die Sonne blicken.
• Instrument nicht in explosionsgefährdeten Bereichen benut-
zen, keine flüchtigen Lösungsmittel (Alkohol, Benzin usw.) und 
brennbare Narkosemittel in der Nähe.
• Feuchtigkeit vermeiden.

Lampenwechsel

• Netzschalter ausschalten - Netzstecker ziehen.
• Lampe abkühlen lassen!
• Die Spaltlampe darf nur zum Wechseln der Lampe geöff-
net werden.

Elektrisches

• Nur ein typengeprüftes 3-poliges Netzkabel verwenden.

Für USA und Kanada Netzkabelset, nach UL-Liste, Typ SJE, 
SJT oder SJO, 3-polig, nicht kleiner als 18 AWG.

• Stecker, Kabel und Schutzleiteranschluss der Steckdose 
müssen einwandfrei funktionieren

Reinigung

• Spaltlampengehäuse nur mit leicht angefeuchtetem Tuch 
reinigen.
• Keine Flüssigkeiten, keine ätzenden Mittel.
• Nur die Aussenflächen der Optikteile säubern.

Lichttoxizität

• Eine lange und intensive Beleuchtung kann die Retina schä-
digen. Die Helligkeitseinstellung sollte daher den Wert nicht 
überschreiten, welcher für eine klare Darstellung der Zielstruk-
turen benötigt wird. Eine Untersuchung mit diesem Instrument 
darf nicht unnötig ausgedehnt werden.

2 Sécurité

Conditions de l'environnement

• Transport  Température 

-40 °C 

à  +70 °C


Pression atmosph.  500 hPa  à  1060 hPa

 Humidité 

relative 

10% 

à 

95%

• Stockage  Température 

-10 °C 

à  +55 °C


Pression atmosph.  700 hPa  à  1060 hPa

 Humidité 

relative 

10% 

à 

95%

• Travail 

Température 

+10  °C  à  +35  °C


Pression atmosph.  800 hPa  à  1060 hPa

 Humidité 

relative 

30% 

à 

75%

Installation

• Afin d'éviter toute condensation, veillez à laisser l'instrument 
dans l'emballage pendant plusieurs heures.
• Montez toujours la lampe à fente et l’appui-tête sur un plateau 
de table électriquement isolé et résistant au feu.
• Les cache-rails (30) évitent une inclinaison de la lampe à fente.
• Rassurez-vous: les raccords pour les accessoires sont-ils serrés 
(par ex. les assemblages par vis et le joint à baïonnette)?

Opération et environnement

• Seul un personnel qualifié et formé a le droit d'utiliser cet instru-
ment, la formation des opérateurs incombe au propriétaire.
• Utilisez seulement les accessoires Haag-Streit.
• Eteindre après chaque utilisation. Avec l'utilisation de la housse 
en plastique: risque de surchauffe.
• Ne jamais regarder avec l'oculaire dans le plein soleil.
• N’utilisez jamais l’instrument dans des zones où il y a des 
gaz explosifs, des vapeurs combustibles (alcool, benzol) ou 
des agents anesthésiques inflammables.
• Evitez toute source d'humidité.

Remplacer l'ampoule

• Couper l’interrupteur principal.
• Permettez l’ampoule de refroidir.
• N’ouvrez pas la lampe à fente pour aucune autre raison que 
pour remplacer l’ampoule.

Installation électrique

• N'utilisez qu'un câble d'alimentation secteur à trois conduc-
teurs homologué. 

Pour USA et Canada: Câble d'alimentation 

électrique, selon UL, type SJE, SJT ou SJO, tripolaire,  plus 
grand que 18 AWG.

• Toutes les fiches, les câbles et le conducteur de protection 
de la prise doivent être en état parfait.

Nettoyage

• Nettoyez le boîtier de la lampe à fente seulement avec un 
linge légèrement humide.
• N’utilisez aucun liquide ni de produits abrasifs.
• Nettoyez uniquement l’extérieur des pièces de l’optique.

Toxicité de lumière

• Un éclairage long et intensif peut endommager la rétine. Le 
réglage de la luminosité ne devrait pas dépasser la valeur 
qui est nécessaire à une bonne représentation des structu-
res ciblées. Un examen avec cet instrument ne doit pas être 
inutilement prolongé.

Содержание Slit lamp BD 900

Страница 1: ...1 Haag Streit AG CH 3098 Koeniz Switzerland 1500 7200631 04040 BD 900 Spaltlampe Lampe à fente Slit lamp Gebrauchsanweisung Mode d emploi Instruction manual ...

Страница 2: ...s les cabinets de médecin dans les hôpitaux et dans les universités sous des conditions normales Elle est utilisée par des ophtalmologues des optométristes et des opticiens Vorwort Wir danken Ihnen dass Sie sich für ein Haag Streit Gerät entschieden haben BeisorgfältigerEinhaltungderVorschriftenindieserGebrauchs anweisungkönnenwirIhneneinezuverlässigeundproblemlose Anwendung unseres Produktes gewä...

Страница 3: ... Slit Lamp BD 900 We will be forced to disclaim any warranty and liability if the instrumentisalteredinanywayorifroutinemaintenanceisne glected or not carried out according to factory specifications Only original Haag Streit spare parts are to be used to ensure continued reliability of the instrument Purpose of use The Slit Lamp BD 900 is used at room temperature in the examination diagnosis and d...

Страница 4: ...lachse reinigen 38 B 6 Staubhülle 38 Anhang C Technische Daten 40 Table des matières Généralités page 6 1 Nomenclature 1 1 Appui tête 8 1 2 Lampe à fente BD 900 8 2 Sécurité 10 3 Description de l appareil 3 1 Dispositif d éclairage 14 3 2 Microscope stéréoscopique 14 3 3 Accessoires 16 3 4 Alimentation secteur 18 3 5 Point de fixation réglable 20 3 6 Equipement vidéo option 20 4 Utilisation de l a...

Страница 5: ...A 1 Attaching the headrest and the power supply to the instrument table HSM 801 or 901 27 A 2 Attaching the headrest and the power supply to tables and units of other manufacturers 27 A 3 Installation of background illumination 29 A 4 Installation of camera cables 33 A 5 Installation of video camera with C mount interface 33 A 6 Handling the slit lamp when fitted with video equipment 33 A 7 Instal...

Страница 6: ...okumentation kann der Videoausgang 14 benutzt werden 12 Zur Fluobilddarstellung lässt sich das Gelbfilter 22 ein schwenken Généralités 1 Ajustez la mentonnière 6 à l aide de la vis 7 de manière à ce que les yeux du patient se trouvent au niveau de la marque noire 4 située à côté de l appui tête 2 Tirez la vis de réglage de l oculaire 25 Ajustez le foyer des oculaires en tournant les anneaux à vril...

Страница 7: ...tting is achieved with the naked eye Fine adjustments are obtained by rotating and tilting the lever while observing the image through the microscope 24 7 The slit width is adjusted to the left or right by means of the knob 17 whichalsoadjuststheanglebetweenthemicroscope and the illumination unit 8 The slit image can be shown in the vertical horizontal or slanted positions as required by turning t...

Страница 8: ... lampe 13 Diffuseur 14 Raccordement vidéo monture C 15 Couvercle de protection 16 Graduation angulaire entre la lampe et le microscope 17 Bouton rotatif pour régler la largeur de la fente 18 Réglage de la luminosité 19 Raccord alimentation secteur 20 Marque déposée BD 900 21 Echelle pour la longueur de la fente et filtre bleu 22 Filtre jaune 23 Câche protecteur 24 Microscope stéréoscopique avec oc...

Страница 9: ...Streit AG CH 3098 Koeniz Switzerland 1500 7200631 04040 1 2 3 4 5 6 7 20 21 22 23 24 25 26 27 28 29 30 31 32 Kopfhalter Appui tête Headrest Spaltlampe Lampe à fente Slit Lamp 8 9 10 11 12 13 14 15 16 17 18 19 ...

Страница 10: ...sgedehnt werden 2 Sécurité Conditions de l environnement Transport Température 40 C à 70 C Pression atmosph 500 hPa à 1060 hPa Humidité relative 10 à 95 Stockage Température 10 C à 55 C Pression atmosph 700 hPa à 1060 hPa Humidité relative 10 à 95 Travail Température 10 C à 35 C Pression atmosph 800 hPa à 1060 hPa Humidité relative 30 à 75 Installation Afin d éviter toute condensation veillez à la...

Страница 11: ...ging the light bulbs Switch off the main switch disconnect the mains connector Allow the bulb to cool down Do not open the slit lamp for any other reason than to change the light bulb Electrical Only a hospital grade 3 conductor electrical power supply cable must be used For USAand Canada Detachable Power Supply Cord Set ULListed type SJE SJT or SJO 3 conduc tor not smaller than 18 AWG Plug cable ...

Страница 12: ...lnummer h Produkteklassifikation Typ B i Herstellungsdatum La dose photochimique à risque pour la rétine se compose de l intensitéderayonnementetdutempsdel examen sil intensitéde rayonnementestréduitedemoitié letempsestmultipliépardeux jusqu à obtention de la valeur limite du temps d exposition Jusqu àprésent iln apuêtreconstatéaucunrisqued irradiation imminent avec les lampes à fente Nous recomma...

Страница 13: ...d 89 336 EEC and the confor mity module A Acopyofthedeclarationofconformityandinformationconcer ningEMC Electromagneticcompatibility ofthepresentinstru ment can be requested at any time at Haag Streit company All statutory accident prevention regulations are to be ob served Classification IEC EN Standard 60 601 1 Slit Lamp BD 900 equipment safety class I Application part Type B Operation mode cont...

Страница 14: ...1 6x Okular 10x 10x 25x 25x Gesamtvergrösserung 10x 16x 25x 40x Objektfeld ø mm 18 11 3 8 5 3 Description de l appareil 3 1 Dispositif d éclairage Lampe halogène La lampe halogène est centrée en usine pour assurer un éclairage optimal La lumière émise par l ampoule centrée traverse le condensa teur le diaphragme et la lentille de l objectif Ensuite elle est déviée par un miroir oblique dans l oeil...

Страница 15: ...operating by lever 34 36 Open aperture 37 Redfree filter 38 Grey filter 10 Due to standard ISO 10939 the heat absorption filter and UV filter are permanently mounted Apertures at window 33 operating by lever 35 39 Aperture producing area of 14 mm ø 40 Wedge shaped diaphragm for continuous slit length adjustment 41 Blue filter 3 2 Stereomicroscope 42 Two objective lenses 43 Lever for yellow filter ...

Страница 16: ...e 25x 1200987 Halogenlampe mit Flansch Ampoule halogène avec bride Halogen bulb with flange 1200559 Spiegel Miroir Mirror 1200602 Streuscheibe Diffuseur Diffusor 1004744 Negatives Vorsatzglas Hruby Lentille intercalaire négative Minus preset lens 1400223 Vorsatzglaswagen mit Schiene Chariot pour lentilles intercalaires Carriage for preset lenses with rail 1400100 Adapter für Lipstick auf C mount A...

Страница 17: ...801 Instrument table HSM 801 für weitere Informationen wenden Sie sich bitte an Ihren Haag Streit Händler pour de plus amples informations adressez vous à votre distributeur Haag Streit for further information ask your Haag Streit distributor Papierservietten für Kinnstütze Serviettes papier pour mentonnière Chinrest papers 1001309 Stiftschlüssel Clé à 6 pans Allen key 5 mm 1001602 Steckstift zu K...

Страница 18: ...te Unemyopieouunehypermétropiedupatientpeutêtrecorrigée 57 entre 10 D et 15 D 56 Ainsi une fixation efficace de l oeil est garantie car l accommodation et la convergence sont éliminées dans une très large mesure 3 4 Gerätenetzteil Typenbezeichnung LC SLT ACHTUNG Das Gerätenetzteil ist mit einem Spannungs wahlschalter 50 115V 230V ausgerüstet Der Bereich ist vor der ersten Inbetriebnah me dem örtli...

Страница 19: ... secondary voltage fuse Turntheslitofthefuseholder 51 totheleftwithascrewdriver Change the fuse cartridge Fuse F 3 15 A HS Part Number 1001331 The degree of brightness can be regulated with the brightness control 18 The illumination intensity as per Appendix C Technical specifications 3 5 Adjustable focusing target If the lamp cable 54 is connected the fixation lamp burns as soonasthepowersupplysw...

Страница 20: ...züglich folgender Komponenten eingehalten werden Netzteil Monitor Videorecorder und Videoprinter 3 6 Equipement vidéo option Dimensions champ visuel Grossissement Taille du capteur caméra vidéo microscope 1 3 1 2 1x 16 x 12 21 3 x 16 1 6x 10 x 7 5 13 3 x 10 L équipement vidéo se compose des pièces suivantes Soit caméra vidéo avec monture C Taille maximale de la caméra hauteur 110 mm largeur 50 mm ...

Страница 21: ...ight 50 mm width 55 mm Or Lipstick video camera needs an adapter from the relevant video camera manufac turer so that it can be mounted to the C mount interface of the BD 900 Cable lead guides consisting of Cable junction box for camera cable Cable guide for optical light lead Rail cover cable lead guide Moreover Haag Streit recommends Background illumination with light source consisting of Cold l...

Страница 22: ...über eine beliebig schräge Lage hori zontal gestellt werden An der Skala 62 und 64 kann der Winkel des Spaltes abgelesen werden 4 Utilisation de l appareil ATTENTION Avantlamiseenservicedel appareilconsultez le chapitre Sécurité de l appareil Pour obtenir un bon appui du front et du menton il faut choisir la hauteur de la table de manière à ce que le patient soit assis incliné en avant Vousdevezré...

Страница 23: ...ch examination This extends the life of the light bulb and protects the patient from severe glare at the beginning of an examination Those parts of the equipment coming into contact with patients should be cleaned with a dry cloth before each ex amination 4 1 Illumination unit Slit width The slit width is set with either of the control knobs 63 The divisiononthelefthandknobenablesanygivenslitwidth...

Страница 24: ...n kann die gleiche Objektebene durch Akkommodation zwar weiter beobachtet werden es besteht jedoch kein Zusammenhang mehr mit der Bildebene der Videokamera 4 2 Réglage des oculaires et des bonnettes Oculaires Avant le premier examen les oculaires doivent être réglés de façon individualisée conformément à la réfraction de l exami nateur Enfoncer la tige d ajustage 65 à la place du couvercle de prot...

Страница 25: ...e knurled ring with the diopter scale separately until the projected slit is seen in focus Adjust from to at low magnification Younger examiners are recommended to make an additional correction on both eye pieces of 1 to 2 diopters each to compensate for the accommodation that occurs as a result of convergence when conducting binocular examinations Eyeguard The adjustable eyeguard 71 serves to set...

Страница 26: ...Es darf kein Kabel eingeklemmt werden da möglicherweise ein Kurzschluss entstehen kann Annexe A Montage de l appareil A 1 Raccordement d appui tête et de l alimentation secteur à la table HSM 801 ou HSM 901 Il faut observer le mode d emploi de la table d instruments concernant A 2 Raccordement de l appui tête et de l alimentation secteur à des tables et unités de source étrangère 1 Fixer l aliment...

Страница 27: ...plugconnector 77 between the headrest and the power supply 5 Install the headrest in the required position on the adapter piece of the table top by means of both Allan screws 82 6 The cable plate 74 should be installed in such a manner that the plug connection and cable are affixed 7 Mount the handles 83 and connect the main lamp lead 81 to the lamp housing 8 Screw the angled plug 80 up tight to t...

Страница 28: ...d ambiance a Il est possible de produire des images de photo et de vidéo uniquement à l aide de la lampe à fente b Diffuseur De meilleurs résultats résultent si l on emploie un diffuseur option maisceciexclutl utilisationsimultanéedel illumination de la fente Montage Enficher le diffuseur par le bas dans les trous prévus 82 à cet effet en le passant par l arrondi Pour un bon éclairage de la partie...

Страница 29: ...optimal solution for video images Installation The cold light source should be positioned according to the instrument table Slacken the set screw 86 until the light lead adapter 87 can be removed downwards Insert the light lead 90 for the background illumination into the female receiver piece boring of the light lead adapter 87 and secure slightly by means of the set screw 89 The light lead adapte...

Страница 30: ...ärts des Schalters 98 Schwenkbar Filter abnehmbar Netzadapter 97 mit Kabel für Europa USA Japan GB EcoLite EL 02 d Eclairage d ambiance EcoLite EL 02 A l aide de l eclairage d ambiance EcoLite EL 02 la partie illuminée peut être modifiée simplement en la faisant pivoter Montage Enlevez le cache de protection 95 Installez EcoLite EL01 94 Insérez la fiche coudée 96 dans EcoLite EL 02 Branchez l alim...

Страница 31: ... greater flexibility simply by pivoting it Installation Remove protection cover 95 Install the EcoLite EL 02 94 Insert the angled plug 96 into EcoLite EL 02 Connect the power supply 97 Turn ON OFF the light by moving up and down the switch 98 Pivoting Filter can be removed Power supply 97 with cable for Europe USA Japan UK EcoLite EL 02 94 95 96 97 98 ...

Страница 32: ...aktion um 1 bis 2 dpt am Okular nötig A 4 Montage des câbles de la caméra Introduisezlecâbledelacamérasurlatêtedelacaméra 100 passez le guide câble à travers la table 102 et raccordez le à l unité de commande vidéo Le câble est fixé à la lampe à fente au bras de microscope 99 puis il se fixe au cache rail à l aide de la conduite de câble 101 A 5 Montage de la caméra vidéo avec raccord monture C En...

Страница 33: ...pearmandmustbemountedintheway that the picture is correctly displayed on the screen In the case of misaligned images on the screen the camera should be rotated until the correct position image is dis played Image focus on the monitor Needs not to be adjusted the interface has been designed so that optimal image focus is set automatically Breath shield Depending on camera model a distance screw mus...

Страница 34: ...8 Montage von Kopfhalter und Gerätenetzteil Die entsprechenden Haag Streit Gebrauchsanweisungen sind zu beachten A 7 Montage de la caméra vidéo avec raccord mini caméra Montage de la tête de la caméra vidéo Vissez l adaptateur pour raccordement de la mini caméra sur la monture C Vissez la tête de la caméra de manière à juste pouvoir tourner l adaptateur vidéo pendant que les 3 vis sans tête sont e...

Страница 35: ...re to the left and right is shown out of focus 108 The 3 set screws are still slightly loose and the camera height can be adjusted vertically by turning the camera adapter but not the camera which can be held with one hand so that it cannot turn When the image on the video monitor screen appears sharply in focus the lock nut of the camera can be firmly tightened Thepositionoftheimageonthemonitoras...

Страница 36: ...ufstecken bis er einrastet und das Lampenkabel anschliessen Annexe B Entretien de l appareil B 1 Remplacement de la lampe halogène ATTENTION 1 Avant de remplacer la lampe ou l optique coupez l interrupteur et retirez la prise de courant ATTENTION Sur la partie supérieure du boîtier de la lampe les températures peuvent être très élevées Laissez la lampe se refroidir ou mettez des gants de protectio...

Страница 37: ...cool down before removing it or use protective gloves to remove Use only original HS halogen bulbs 2 Hold the lamp bulb cover at the sides and pull upwards 3 Unplug the contact base 112 4 Unhook the retaining spring 110 on the left side and swing out sideways CAUTION The lamp bulb should not be touched with the fingers 5 Replace the halogen lamp bulb 111 The groove on the lamp holder 109 should po...

Страница 38: ...hützen Staubhülle klein für Spaltlampe HS Part number 1001395 Staubhülle gross für mehrere Instrumente HS Part number 1001434 B 2 Remplacement du miroir Vous n avez pas besoin de démonter le miroir pour le nettoyer Son remplacement ne s impose que s il a subit un dommage mécanique ATTENTION Nepastoucherlafaceréfléchissantedumiroir avec les doigts Démontage Poussez le miroir dans le sens de la flèc...

Страница 39: ...movetheslitlamparoundonthegliding plate the plate should be cleaned with a slightly oily rag After removing the rail covers 30 the rails should be cleaned with a stiff brush B 4 Cleaning of the optical parts A dust brush is to be employed for dusting the exposed glass surfaces Surfaceswhichhavebecomereallydirtyshouldfirstbedusted then wiped carefully with a soft dry clean cloth washed linen chamoi...

Страница 40: ...te Augenpupille voll ausfüllen als hoch angesehen In Übereinstimmung mit ISO 10939 Annexe C Caractéristiques techniques Eclairage de la fente Largeur de l image de la fente 0 14 mm continu Hauteur de l image de la fente 1 14 mm continu Diamètre du champ d éclairage 14 mm Rotation de l image de la fente 0 90 Mouvement de l éclairage de la fente par rapport au microscope Horizontal 90 Filtres Bleu g...

Страница 41: ...5 V 300 000 Lux at position 1 Irradiance depending on light wave length see diagram at right hand side Irradiance at max intensity 11 5 V lamp and max aperture 0 01 mW cm2 305 nm 400 nm 90 mW cm2 380 nm 700 nm 5 mW cm2 700 nm 1100 nm Spectrally weighted photochemical aphakic output source radiance LA at maximum intensity 11 5 V lamp and maximum aperture 270 mW cm2 sr Spectrally weighted photochemi...

Страница 42: ...tzklasse II IPX0 Dauerbetrieb für Betrieb in der Nähe von feuerge fährlichen Betäubungsmitteln nicht geeignet Microscope stéréoscopique Angle stéréoscopique 13 Changeur de grossissement 1x et 1 6x Grossissement avec oculaire 10x standard 10x et 16x avec oculaire 25x 25x et 40x Réglage dioptrique pour oculaires 6 à 6 dioptries Distance interpupillaire 54 94 mm Raccordement vidéo monture C Base des ...

Страница 43: ...rument base Operation Single handed 3 dimensional opera tion of the guide lever Adjustment of the instrument base 80 mm length 30 mm height 100 mm side Electric supply Class II type B 230 V 0 13 0 21 A or 115 V 0 25 0 42 A 50 60 Hz Miscellaneous Weight 8 1 kg without power supply headrest and options Classification Against electric shock Class I type B Against water IPX0 Sterilisation and disinfec...

Страница 44: ...Koeniz Switzerland 1500 7200631 04040 44 Haag Streit AG Gartenstadtstrasse 10 CH 3098 Koeniz Switzerland Phone 41 31 978 01 11 Fax 41 31 978 02 82 eMail info haag streit ch internet www haag streit com 01 09 5 1500720063104040 ...

Отзывы: