73
Installing the rear 4LFF drive cage
1.
Power off the server. For more information, see "
2.
Remove the server from the rack. For more information, see "
Removing the server from a rack
."
3.
Remove the access panel. For more information, see "
."
4.
Remove the chassis air baffle. For more information, see "
5.
Remove the fan cage. For more information, see "
."
6.
Remove all drive blanks from the 4LFF drive cage, if any. For more information, see "
."
7.
Remove the blanks for PCIe riser connectors 1 and 2, as shown in
and
.
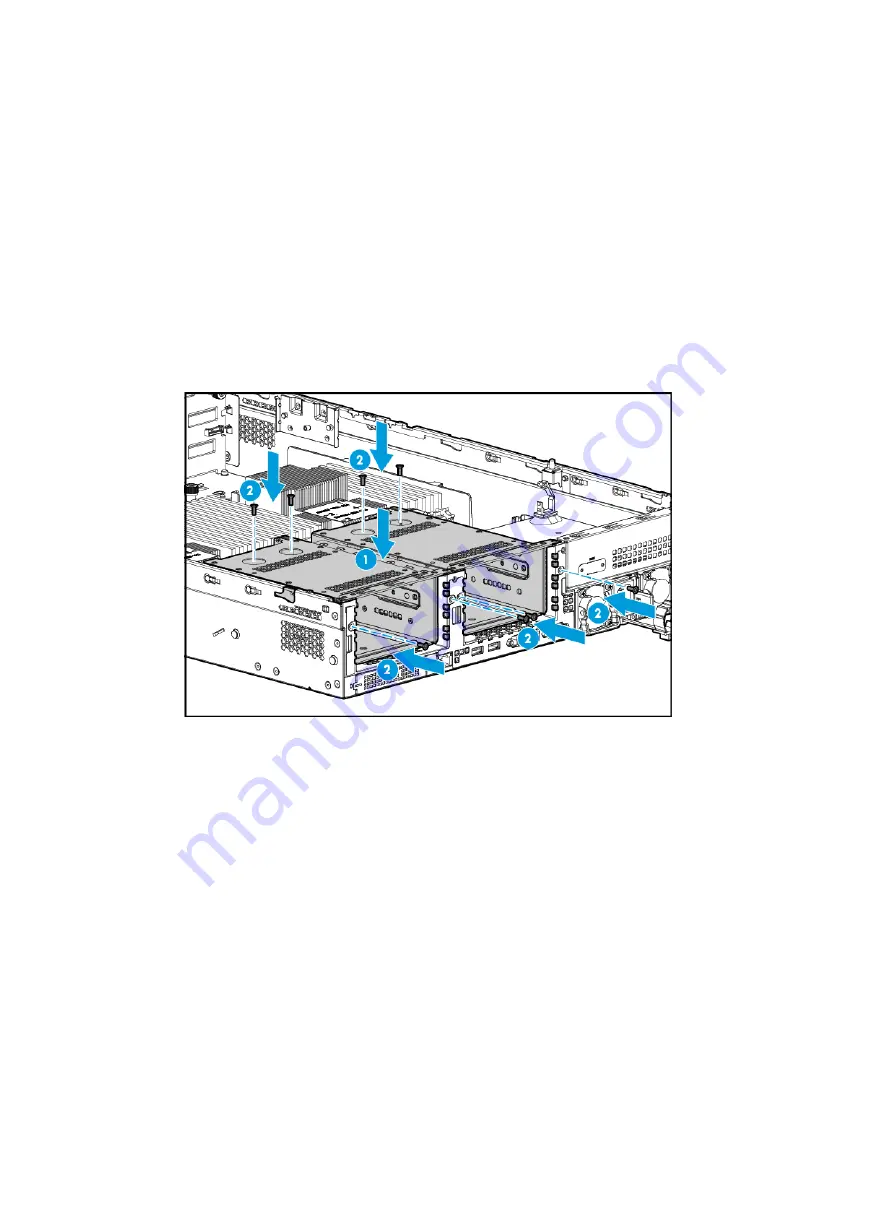
8.
Place the rear 4LFF drive cage into the chassis and use screws to secure it into place, as
shown in
.
Figure 89 Installing the rear 4LFF drive cage
9.
Connect AUX signal cable, data cable, and power cord to the rear 4LFF drive backplane. For
more information, see "
10.
Install drives in the rear 4LFF drive cage. For more information, see "
11.
Install the removed fan cage. For more information, see "
."
12.
Install the removed chassis air baffle. For more information, see "
."
13.
Install the access panel. For more information, see "
14.
Rack-mount the server. For more information, see "
15.
Connect the power cord. For more information, see "
16.
Power on the server. For more information, see "
Installing a front 8SFF drive cage
Preparing for the installation
Use
to determine the location of the front 8SFF drive cage you are installing depending on
the type of the drive cage. For more information about the locations of drive cage bays, see "Front
panel view."


